How Many Miles Is Too Much for a Motorcycle?

When buying a used motorcycle or evaluating the longevity of your current bike, the question of mileage often arises. Understanding how many miles are too many involves examining various factors, such as the type of motorcycle, maintenance history, riding conditions, and intended use. How many miles is high for a motorcycle? This comprehensive guide explores these factors and provides insights to help you determine whether a motorcycle’s mileage is too high or within a reasonable range.

How Many Miles Is Too Much for a Motorcycle:

What Should You Consider?

How Does the Type of Motorcycle Affect Mileage Considerations?

Different types of motorcycles are designed for varying purposes and riding conditions, which significantly influence their longevity and acceptable mileage.

Sport Bikes:

High Performance and Stress:

Engine Stress: Sport bikes are designed for high performance and agility, often ridden at high speeds and subjected to greater stress on the engine and components. This intensive use may result in shorter lifespans compared to other types of motorcycles.

Acceptable Mileage: For sport bikes, a mileage range of 20,000 to 30,000 miles may be considered high, depending on maintenance and usage. Regular servicing and proper care can extend their lifespan, but higher mileage on sport bikes typically signals more wear and potential issues.

Cruisers and Touring Bikes:

Built for Longevity:

Engine Durability: Cruisers and touring bikes are built for long-distance travel and comfortable cruising. They often have larger, more durable engines designed to handle extended usage and higher mileages.

Acceptable Mileage: It is common for these types of bikes to reach 50,000 to 100,000 miles or more with proper maintenance. Cruiser and touring bike riders often report high mileage without significant issues, making these bikes suitable for long-term ownership.

Dual-Sport and Adventure Bikes:

Versatile Usage:

Mixed Terrain: Dual-sport and adventure bikes are used on both paved roads and off-road terrains. Their engines and components are designed to handle diverse riding conditions, making them relatively durable.

Acceptable Mileage: How many miles is too much for a motorcycle? Due to their rugged design, these bikes can accumulate high mileage, often exceeding 40,000 to 60,000 miles. However, off-road usage can subject the bike to additional wear and tear, so condition and upkeep are crucial.

Decoding How Many Miles Are Too Much for a Motorcycle.

Maintenance History:

Why Is Maintenance History Crucial When Evaluating Motorcycle Mileage?

How many miles is too many on a motorcycle? A well-maintained motorcycle can outperform one that hasn’t received proper care, regardless of the mileage.

Regular Servicing:

Impact on Longevity:

Scheduled Maintenance: Adherence to regular maintenance schedules, such as oil changes, valve adjustments, and tire replacements, significantly extends the lifespan of a motorcycle. A bike with high mileage but a thorough maintenance record may be more reliable than a low-mileage bike with poor upkeep.

Service Records: When buying a motorcycle, request detailed service records. Consistent maintenance and timely repairs indicate that the previous owner took good care of the bike, reducing the risk of hidden issues.

Component Replacements:

Signs of Wear and Renewal:

Engine Rebuilds: Motorcycles with very high mileage may have undergone significant component replacements or rebuilds, such as engine overhauls or transmission repairs. These replacements can restore the bike’s functionality and extend its life.

Common Replacements: Look for records of common wear and tear items being replaced, such as brake pads, chains, sprockets, and clutch assemblies. Replacing these components at appropriate intervals ensures the bike remains reliable.

Decoding How Many Miles Are Too Much for a Motorcycle.

Riding Conditions:

How Do Different Riding Conditions Affect Motorcycle Mileage?

How much is a lot of miles for a motorcycle? The conditions in which a motorcycle is ridden play a significant role in determining its lifespan and acceptable mileage.

Urban vs. Highway Riding:

Impact on Wear:

Stop-and-Go Traffic: Motorcycles used primarily in urban environments with frequent stop-and-go traffic may experience more wear on the clutch, brakes, and engine compared to those used for highway riding. This kind of riding can result in higher maintenance needs and potentially shorter lifespans.

Highway Mileage: Highway riding tends to be less stressful on a motorcycle, as sustained speeds and lower frequencies of stops contribute to reduced wear. Bikes with high highway mileage may still be in excellent condition if they have been well-maintained.

Climate and Terrain:

Environmental Factors:

Harsh Climates: Motorcycles exposed to extreme weather conditions, such as intense heat, cold, or humidity, may experience accelerated wear. Corrosion, battery degradation, and material stress are common in harsh climates. High-mileage bikes from these environments may require closer inspection.

Terrain Challenges: Riding on rough terrain, such as dirt trails or mountainous roads, subjects the motorcycle to additional stress. Dual-sport and adventure bikes, designed for these conditions, can handle the wear better, but mileage readings should be assessed with the terrain in mind.

Decoding How Many Miles Are Too Much for a Motorcycle.

Intended Use:

What Are the Expectations for Motorcycle Longevity Based on Usage?

The purpose and frequency of motorcycle use influence how mileage should be evaluated.

Commuting and Daily Use:

Impact of Regular Use:

Frequent Riding: Motorcycles used for daily commuting or regular transportation tend to accumulate mileage quickly. However, regular use combined with diligent maintenance can keep the bike in good condition for many years.

Wear and Tear: Daily use results in consistent wear on critical components. Evaluate high-mileage commuter bikes for signs of maintenance adherence and the condition of wear items, such as tires and brakes.

Recreational and Seasonal Use:

Less Frequent Riding:

Weekend Warriors: Motorcycles used primarily for recreational riding often have lower mileage despite their age. These bikes may remain in excellent condition because they experience less wear and tear. However, seasonal storage and starting conditions must be considered.

Seasonal Maintenance: Ensure that motorcycles stored for extended periods, such as during winter, have been properly prepped and maintained. Look for signs of potential storage-related issues, such as fuel system degradation or battery failure.

Decoding How Many Miles Are Too Much for a Motorcycle.

Evaluation and Inspection:

How Should You Inspect a High-Mileage Motorcycle?

Conducting a thorough inspection helps determine whether a high-mileage motorcycle is a reliable purchase or investment.

Visual Inspection:

Initial Assessment:

Exterior Condition: Start with a visual inspection of the motorcycle’s exterior. Check for signs of rust, corrosion, and damage on the frame, engine, and exhaust system. These signs can indicate neglect or extensive use in harsh environments.

Fluid Leaks: Inspect for fluid leaks around the engine, transmission, and suspension components. Oil or coolant leaks can signal underlying issues that may require costly repairs.

Component Check:

Detailed Component Analysis:

Tire Condition: Examine the tires for wear patterns and tread depth. Uneven wear can indicate alignment issues, while low tread depth can necessitate immediate replacement.

Brake System: Check the condition of the brake pads, discs, and lines. Worn pads and discs can compromise safety, while deteriorated lines need replacing to ensure proper braking performance.

Test Ride:

Performance Evaluation:

Engine and Transmission: During the test ride, listen for unusual noises from the engine and transmission. Smooth acceleration and shifting with responsive throttle control indicate a well-maintained engine and gearbox.

Handling and Suspension: Evaluate the motorcycle’s handling and suspension performance. A stable and smooth ride with minimal vibrations and responsive steering suggests that the suspension and frame are in good condition.

Decoding How Many Miles Are Too Much for a Motorcycle.

Mileage Myths and Realities:

What Are Common Misconceptions About Motorcycle Mileage?

How many miles is too much for a motorcycle? Misunderstanding mileage impacts can lead to incorrect assumptions about a motorcycle’s condition.

High Mileage Equals Poor Condition:

Not Always True:

Maintenance Matters: A high-mileage motorcycle that has been meticulously maintained can outperform a low-mileage bike with poor upkeep. Evaluate the overall condition and maintenance history rather than relying solely on the mileage reading.

Engine Longevity: Engines designed for durability, like those in touring bikes, can handle high mileages well. Rebuilt or well-maintained engines can extend the bike’s lifespan significantly.

Older Bikes Can’t Handle High Mileage:

Potential for Longevity:

Vintage Durability: Many older motorcycles, particularly classic models, were built to last and can handle high mileages if maintained properly. Components like air-cooled engines and simple mechanical systems often lend themselves to longevity.

Restoration Potential: Vintage bikes with high mileage can be restored with new parts and meticulous care, maintaining their value and functionality.

Conclusion

Determining whether a motorcycle’s mileage is too high involves considering the type of motorcycle in 2024, its maintenance history, riding conditions, and intended use. How many miles is too much for a motorcycle? Sport bikes typically have shorter lifespans compared to cruisers and touring bikes built for long-distance travel. Maintenance records play a crucial role in assessing a bike’s condition alongside the mileage. Riding conditions, such as urban versus highway and climate, also impact wear and tear. Usage frequency, whether for commuting or recreational purposes, further affects how mileage should be interpreted. Proper inspection, including visual checks and test rides, helps evaluate the true condition of a high-mileage motorcycle. Dispelling common mileage myths emphasizes the importance of maintenance and overall condition over mere mileage numbers. Comprehensive consideration of these factors ensures an informed decision when purchasing or assessing a motorcycle’s longevity.

Posted in Motorcycles | Tagged , , | Leave a comment

How Was the Motorcycle with Viper Engine Engineered?

In the world of motorcycles, enthusiasts and engineers continuously push the boundaries of what’s possible, often experimenting with unconventional and daring designs. One such groundbreaking motorcycle is the beast powered by a Viper engine. This extraordinary machine combines the essence of motorcycle dynamics with the brute force of a Dodge Viper’s V10 engine. How does one integrate such a colossal engine into a two-wheeled vehicle? What are the engineering marvels and challenges involved in this process? This guide delves deep into the fascinating journey of creating and understanding the motorcycle with a Viper engine.

The Genesis of the Viper Motorcycle

Understanding the origins and motivations behind this captivating machine highlights human ingenuity and engineering prowess.

Vision and inspiration

The motorcycle with a Viper engine didn’t start as a typical engineering project. It began as an audacious idea: to merge the sheer power of a Viper V10 engine with the agility of a motorcycle. The concept aimed to push the limits of motorcycle performance and engineering design, capturing the imagination of both car and bike enthusiasts.

Design and conceptualization

Initial sketches and blueprints of the motorcycle had to consider the V10 engine’s enormous size and weight. The Dodge Viper engine, known for its high output and large displacement, created the need for a custom frame and chassis designed to handle the engine’s physical and power demands. The motorcycle’s design had to balance form and function, ensuring that while performance was a priority, the bike also maintained a distinctive and appealing aesthetic.

Engineering team and collaboration

A project of this magnitude required a highly skilled and dedicated team of engineers, designers, and fabricators. Collaborations with Dodge engineers who had worked on the Viper engine were essential to understanding the intricacies of the powerplant. Additionally, motorcycle engineers contributed their expertise to effectively integrate this engine into a two-wheeled chassis.

motorcycle with viper engine  Technical Specifications and Performance
The technical specifications of the motorcycle with a Viper engine reveal the extent of modifications and engineering ingenuity.

Engine details

At the heart of this extraordinary motorcycle is the Dodge Viper’s 8.3-liter V10 engine. Originally designed to power a sports car, this engine produces an astounding 500 horsepower and 525 lb-ft of torque. Modifications had to be made to downsize and slightly tune the engine for motorcycle compatibility while ensuring it retained its raw power.

Frame and chassis

To accommodate the hefty V10 engine, the frame of the motorcycle had to be incredibly robust. Crafted from lightweight yet strong materials like chromoly steel, the custom frame provided the necessary strength and rigidity. The chassis design focused on balancing the weight distribution, ensuring that the motorcycle remained stable and manageable even at high speeds.

Suspension and braking

The motorcycle’s suspension system had to be designed to handle the significant weight and power output of the Viper engine. This necessitated the use of advanced suspension components, including heavy-duty forks and shocks, typically found in high-performance bikes. The braking system implemented was equally robust, featuring dual-disc brakes with premium calipers to ensure adequate stopping power.

Transmission and drivetrain

One of the most challenging aspects of integrating a Viper engine into a motorcycle was designing an appropriate transmission and drivetrain. The sheer torque generated by the V10 required a custom-built transmission capable of handling the power. Additionally, the final drive system had to ensure smooth power delivery while maintaining the thrilling performance characteristics.

motorcycle with viper engine

Challenges in Engineering a Viper-Powered Motorcycle

Engineering a motorcycle with such an unconventional engine brings numerous challenges that require innovative solutions.

Weight management

One of the primary challenges was managing the substantial weight of the V10 engine. Strategies included using lightweight materials for the frame and other components to offset the engine’s weight. Engineers also had to ensure that the weight distribution allowed for balanced handling, preventing the motorcycle from being unwieldy.

Cooling system

The Viper engine generates significant heat, which posed a challenge for cooling in the compact confines of a motorcycle. Engineers designed a specialized cooling system, incorporating large radiators, additional cooling fans, and improved airflow mechanisms to dissipate heat effectively.

Vibration and stability

The massive power and torque of the V10 engine could cause intense vibrations, risking the structural integrity of the motorcycle and rider comfort. Engineers used advanced dampening and isolation techniques to reduce vibrations, enhancing stability and safety during high-speed rides.

Safety and control

Given the extraordinary power output, ensuring rider safety and control was paramount. This included advanced traction control systems, anti-lock braking systems (ABS), and stability control. These features worked in unison to provide a safe yet exhilarating riding experience, allowing riders to harness the Viper engine’s full potential without compromising their safety.

motorcycle with viper engine

Unique Features and Innovations

Examining the unique features and innovations highlights the cutting-edge technology and creativity involved in this project.

Customized electronics

Handling a V10 engine’s power necessitates sophisticated electronic systems. The motorcycle features a custom-built ECU (Engine Control Unit) programmed to manage power delivery, optimize fuel efficiency, and integrate with the bike’s various electronic aids like traction control and ABS.

Aerodynamics

With such a powerful engine, maintaining aerodynamics for high-speed stability was critical. The motorcycle’s bodywork was designed to minimize drag while providing sufficient downforce to keep the bike grounded. Wind tunnel testing and computer simulations played key roles in refining the aerodynamics.

Instrumentation and interfaces

The motorcycle’s instruments and controls had to match its advanced engineering. This included a modern digital dashboard displaying vital information like speed, RPM, and engine temperature. Additionally, controls were designed to be intuitive, allowing the rider to manage the bike’s various systems seamlessly.

Sound and exhaust system

A motorcycle with a Viper engine naturally commands attention, and the exhaust system amplifies this presence. Engineers crafted a custom exhaust to not only enhance performance but also give the motorcycle a distinct and thunderous exhaust note, embodying the spirit of the Viper engine.

Experiencing the Viper-Powered Motorcycle

What can riders expect when they get on a motorcycle powered by such a formidable engine?

Ride and handling

The riding experience of a motorcycle with a Viper engine is unlike any other. The raw power and acceleration can be both exhilarating and intimidating. Riders can expect rapid acceleration, propelling them from 0 to 60 mph in mere seconds. Despite its weight and power, the bike handles well, thanks to the advanced suspension and weight distribution.

Comfort and ergonomics

Despite its aggressive performance, the motorcycle was designed with rider comfort in mind. Ergonomic seating positions, adjustable handlebars, and footpegs ensure that the rider can maintain control comfortably over varying speeds and distances. The seat is cushioned and contoured to reduce fatigue on longer rides.

Street legality and regulations

Ensuring that the motorcycle met legal regulations for street use was a complex process. Issues such as emissions, noise levels, and safety features had to comply with stringent standards. Engineers worked meticulously to ensure the motorcycle not only met these regulations but also maintained the essence of the Viper engine’s performance.

Community and enthusiast reactions

The motorcycle community has been abuzz with excitement and curiosity about this unique machine. Enthusiasts appreciate the engineering achievement and the audacity of integrating a V10 engine into a motorcycle. It has sparked discussions and admiration across various forums and gatherings, solidifying its place as a marvel in the motorcycling world.

Notable Comparisons and Alternatives

Comparing the motorcycle with a Viper engine to other high-performance bikes can provide a clearer picture of its standing in the motorcycle hierarchy.

Comparison with traditional superbikes

Traditional superbikes, such as those from brands like Ducati, Yamaha, and Kawasaki, focus on achieving a balance between power, weight, and handling. In contrast, the motorcycle with a Viper engine emphasizes raw power and unique engineering. While traditional superbikes offer refined performance and are more practical, the Viper-engine motorcycle stands out for its sheer audacity and engineering challenge.

Other unconventional motorcycles

Several other motorcycles have also made headlines for their unconventional designs and powertrains. For instance, the Dodge Tomahawk features a Viper V10 engine, much like the motorcycle discussed here, but is more concept than practical. Another example is the Boss Hoss motorcycles, which use V8 engines. These bikes push the envelope on power and design, though each brings its own set of challenges and engineering feats.

motorcycle with viper engine

Maintenance and Practicality

Owning and maintaining such a unique motorcycle requires special considerations and planning.

Routine maintenance

The Viper engine requires meticulous care and regular maintenance to ensure peak performance. Owners must be diligent about oil changes, cooling system checks, and periodic inspections to keep the motorcycle running smoothly. Specialized technicians with knowledge of both car and motorcycle engines are often needed for maintenance and repairs.

Fuel consumption

Given the immense power of the Viper engine, fuel consumption is significantly higher than traditional motorcycles. Prospective owners must be prepared for frequent refueling stops, especially on longer rides. While this may not be a primary concern for performance enthusiasts, it’s an important consideration for practical use.

Spare parts and service

Sourcing spare parts and service can be challenging due to the custom nature of the motorcycle. Owners often rely on specialized suppliers or custom fabricators for parts and modifications. Establishing a relationship with knowledgeable mechanics who understand the unique requirements of the Viper engine and the motorcycle frame is crucial.

motorcycle with viper engine

Conclusion:

The Legacy of the Viper Engine Motorcycle

A motorcycle viper engine stands as a testament to human creativity, engineering prowess, and the relentless pursuit of pushing boundaries in 2024. From its conception to the technical challenges and rider experiences, it represents a unique fusion of automotive and motorcycle technologies. By exploring the intricacies and achievements of this machine, we gain appreciation not just for its speed and power, but for the ingenuity and effort that made it a reality. The motorcycle with a Viper engine will undoubtedly remain an iconic symbol of extreme performance and innovative engineering in the motorcycle world.

Posted in Motorcycle Accessories, Motorcycles | Tagged , , | Leave a comment

What Is the Most Dangerous Motorcycle Race?

Motorcycle racing has captivated adrenaline junkies and motor enthusiasts for decades, but few events hold as much allure and reputation as the most dangerous motorcycle race in the world. The thrill, the speed, and the risks involved can push riders to their limits, both physically and mentally. The stakes are high—victory brings unmatched glory, but the cost of failure can be devastating. In this comprehensive look, we delve into the details that make this particular race stand out, exploring everything from the challenging course to the brave competitors who dare to participate. Read on to uncover what makes this race the epitome of danger in the world of motorcycle racing.

History of the Isle of Man TT

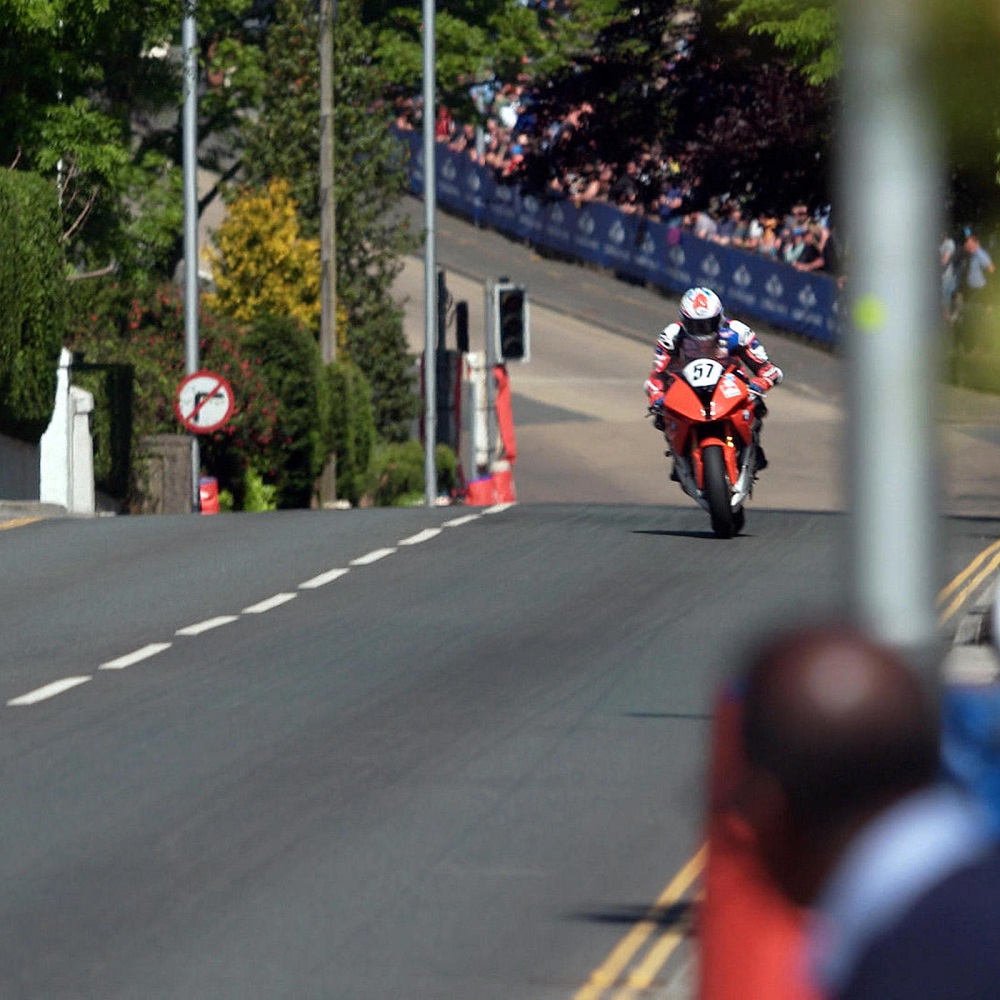
The Isle of Man TT (Tourist Trophy) is a storied event with a rich history dating back over a century. Understanding its origins helps appreciate why it is considered the most dangerous motorcycle race.

  1. Origins: The Isle of Man TT began in 1907, initially as a way to test the reliability of motorcycles over long distances. Located between England and Ireland, the Isle of Man’s natural landscape provided the perfect challenging terrain.
  2. Course Evolution: The original course was a 15-mile stretch, but it soon expanded to the now-famous 37.73-mile Mountain Course. The expanded track includes public roads, villages, and mountain passes, making it one of the most varied and challenging racecourses.
  3. Historic Milestones: Over the years, numerous milestones have defined the Isle of Man TT, from the first lap completed at an average speed of 38 mph in 1907 to modern races where speeds exceed 130 mph. Each era brought technological advancements and new records.
  4. Legacy of Champions: Many legendary racers have etched their names into the TT’s history, establishing themselves as racing icons. From Mike Hailwood’s 14 wins to Joey Dunlop’s astounding 26 victories, the TT has seen unparalleled greatness.
  5. Cultural Impact: Beyond the racing community, the Isle of Man TT has captured popular imagination through media, films, and literature, solidifying its status as a symbol of ultimate racing danger and glory.

Exploring the TT’s history provides context for why the event commands such respect, fear, and fascination.

motorcycle race

The Unforgiving Mountain Course

The Isle of Man TT’s Mountain Course is notorious for its complexity and danger. Delving into its unique characteristics reveals what makes this track so perilous.

  1. Public Roads: Unlike standard racetracks, the Mountain Course uses public roads that are closed for the race. These roads are not built for racing, featuring everyday obstacles like curbs, lamp posts, and walls.
  2. Varied Terrain: The course includes a mix of tight turns, long straight stretches, and steep climbs and descents. These variations require riders to continually adapt their strategies, increasing the likelihood of mistakes.
  3. Surface Quality: The road surface varies significantly throughout the course, with some sections featuring smooth tarmac and others riddled with bumps and potholes. Riders must constantly adjust to these changing conditions.
  4. Weather Extremes: The Isle of Man’s unpredictable weather adds another layer of risk. Rain, fog, and high winds can appear suddenly, drastically altering race conditions and visibility.
  5. High Speeds in Villages: Riders often reach speeds of over 130 mph even as they pass through small villages. The narrow lanes, combined with high speeds, leave no room for error.
  6. Minimal Safety Measures: Unlike professional tracks with extensive safety barriers and escape zones, the Mountain Course features limited safety measures. Crashes often result in severe injuries due to the lack of runoff areas.

The Mountain Course’s attributes make it a supreme test of skill, courage, and endurance, highlighting why it’s known as the most dangerous motorcycle race.

The Thrill of Speed and Risk

For many riders, the Isle of Man TT represents the pinnacle of motorcycle racing. Understanding their motivations reveals why they willingly face such extreme dangers.

  1. Adrenaline Rush: The sheer speed and intensity of the race provide an unmatched adrenaline rush. Riders often describe the feeling as unparalleled excitement that they cannot find elsewhere.
  2. Personal Challenge: Competing in the TT is a personal challenge that tests every aspect of a rider’s ability—skill, concentration, and physical fitness. For many, just finishing the race is an accomplishment.
  3. Historical Legacy: The chance to become part of the race’s storied history is a significant motivator. Racers aspire to join the list of legends who have conquered the Mountain Course.
  4. Sense of Achievement: Winning or even placing in the TT provides a sense of achievement and recognition in the motorcycle racing world that few other events offer.
  5. Community and Camaraderie: The TT fosters a strong sense of community among participants and fans. Shared experiences in such extreme conditions forge deep bonds and mutual respect.

Understanding these motivations offers insight into why riders take on the extraordinary risks associated with the Isle of Man TT.

motorcycle race

Safety Measures and Innovations

Despite its dangers, ongoing efforts aim to improve safety at the Isle of Man TT. Exploring these measures shows the balance between preserving the race’s integrity and enhancing rider safety.

  1. Advanced Medical Support: The race features rapid response medical teams with state-of-the-art facilities. Helicopters are on standby to evacuate injured riders quickly.
  2. Course Inspections: Regular inspections and improvements are made to the course to fix potholes, clear debris, and enhance road signage.
  3. Protective Gear: Advances in protective gear, such as reinforced helmets and specialized racing suits, provide riders with better protection against crashes.
  4. Telemetric Systems: Telemetry and tracking systems monitor rider performance and bike conditions, providing vital data for improving safety.
  5. Race Regulations: Continuous updates to race regulations aim to enhance safety without diluting the essence of the race. These include stricter entry requirements and better training programs for newcomers.
  6. Crash Barriers: Strategic placement of crash barriers in the most perilous sections of the course helps to mitigate severe injuries.

By examining these safety measures, one can see the commitment to protecting riders while preserving the race’s challenging spirit.

Fatalities and Accidents

The Isle of Man TT has a grim history of accidents and fatalities, underscoring its status as the most dangerous motorcycle race. Understanding these incidents helps in recognizing the race’s peril.

  1. Historical Data: Since its inception, the TT has claimed over 250 lives, a statistic that highlights the race’s inherent dangers. Each incident serves as a stark reminder of the risks involved.
  2. Notable Tragedies: Some fatalities have made headlines due to their high-profile nature. For instance, the death of Joey Dunlop, a TT legend, sent shockwaves through the racing community.
  3. Common Causes: Analysis of accidents reveals common causes, such as high-speed crashes, loss of control in treacherous weather, and mechanical failures.
  4. Impact on Families: The loss of riders profoundly affects families and communities. Memorials and tributes are commonplace, reflecting the enduring impact of each life lost.
  5. Lessons Learned: Each accident leads to investigations and reviews, resulting in new safety practices or equipment enhancements aimed at preventing future tragedies.

Understanding the race’s fatal history underscores the importance of safety and the true danger riders face.

Training and Preparation for the TT

Racers undertake extensive preparation and training to tackle the Isle of Man TT. Walking through this preparation reveals the dedication required.

  1. Physical Training: Riders engage in rigorous physical training to build the stamina and strength needed to endure the race’s demands. This includes cardiovascular exercises, strength training, and flexibility routines.
  2. Track Familiarization: Many racers spend months on the island, riding and walking the course repeatedly to memorize its intricacies. Knowledge of every turn and bump can make the difference between success and failure.
  3. Bike Setup: Engineers and mechanics work tirelessly to prepare the bike, ensuring it is optimized for the unique demands of the Mountain Course. Customized suspension settings, tire choices, and aerodynamics all play crucial roles.
  4. Simulations and Practice Runs: Using simulations and practice runs, riders and teams experiment with different strategies and setups. These sessions help in fine-tuning performance and identifying potential issues.
  5. Mental Preparation: Mental toughness is critical for the TT. Riders often work with sports psychologists to develop the focus and resilience needed to handle extreme speeds and the constant threat of danger.

These preparation efforts showcase the immense dedication required to compete in the most dangerous motorcycle race.

  motorcycle raceThe Spectator Experience

For spectators, the Isle of Man TT offers a unique blend of excitement, culture, and community. Exploring this aspect reveals what draws fans from around the world.

  1. Incredible Views: The TT offers unparalleled views of high-speed racing, with vantage points along the course providing close-up experiences rarely seen in other motorsport events.
  2. Cultural Festivities: The event is surrounded by cultural festivities, including concerts, local food stalls, and parades, creating a festival-like atmosphere.
  3. Community Bonding: Fans often form lasting bonds with other spectators, sharing their passion for motorcycle racing and the TT’s unique allure.
  4. Meet the Riders: Unlike many professional sports, the TT allows for close interaction between fans and riders. Autograph sessions, meet-and-greets, and informal conversations create a sense of connection.
  5. Adrenaline-Fueled Excitement: The sheer speed and danger of the race provide an adrenaline rush for spectators, making the experience unforgettable.

The spectator experience adds another layer of fascination and enjoyment to the Isle of Man TT, making it a bucket-list event for racing enthusiasts.

The Future of the Isle of Man TT

The Isle of Man TT continues to evolve, balancing tradition with innovation. Exploring its future direction reveals ongoing efforts to sustain its legacy.

  1. Technological Advances: Advances in bike technology, including electric motorcycles, are expected to make their mark on future races. These innovations could change the race dynamics while maintaining its essence.
  2. Enhanced Safety: Ongoing improvements in safety measures will continue to be a focal point, aiming to reduce accidents and fatalities without compromising the race’s excitement.
  3. Global Reach: Expanding digital and media coverage ensures the TT reaches a global audience, attracting new fans and participants from around the world.
  4. Sustainable Practices: Efforts to introduce sustainable practices, such as reduced carbon footprints and environmentally friendly logistics, reflect a broader commitment to global sustainability.
  5. Regulatory Evolution: As the race evolves, so will the regulations, balancing the thrill of competition with the need for increased safety and inclusivity.

Looking ahead, the Isle of Man TT promises to remain a unique and thrilling event, continually adapting while preserving its storied tradition.

Conclusion

Understanding what is the most dangerous motorcycle race requires a deep dive into the history, challenges, community, and future of the Isle of Man TT. This race epitomizes the exhilaration and peril of motorcycle racing, demanding unparalleled skill, preparation, and bravery from its competitors. As it evolves, the TT continues to captivate, inspire, and, yes, terrify those who dare to take on its formidable Mountain Course. Whether you are a rider aiming for glory or a fan seeking the ultimate racing experience, the Isle of Man TT remains the pinnacle of motorcycle racing danger and allure.

Posted in Motorcycles | Tagged , , | Leave a comment

How to Clean Motorcycle Carburetor?

A dirty or clogged carburetor can vastly affect the performance of your motorcycle, causing it to run poorly, misfire, or even fail to start. Knowing how to clean motorcycle carburetor properly ensures that your bike runs smoothly and efficiently. This guide will take you through detailed steps, from preparation to reassembly, offering specific tips and techniques for a thorough cleaning process. Dive in to uncover the best practices and keep your motorcycle performing at its peak.

Understanding the Importance of a Clean Carburetor

Understanding why you need to keep the carburetor clean helps emphasize the importance of regular maintenance.

  1. Optimal Performance: A clean carburetor ensures the right mix of air and fuel, leading to optimal engine performance and efficiency.
  2. Starting Reliability: Cleaning the carburetor prevents starting issues and helps the bike start more reliably.
  3. Fuel Efficiency: By maintaining a clean Motorcycle carburetor, you ensure better fuel efficiency, which can save money over time.
  4. Reduced Emissions: A well-maintained carburetor helps in reducing the emissions produced by the motorcycle, contributing to a cleaner environment.

Recognizing the benefits motivates regular cleaning and upkeep of your motorcycle’s carburetor.

Preparing for the Cleaning Process

Proper preparation is crucial for a successful carburetor cleaning. Follow these initial steps to set the stage for an effective cleaning session.

  1. Gather Tools and Supplies: You’ll need a carburetor cleaner, basic hand tools (screwdrivers, wrenches), compressed air, a clean workspace, and protective gear like gloves and safety glasses.
  2. Disconnect the Battery: Ensure safety by disconnecting the motorcycle’s battery to prevent any accidental electrical discharge.
  3. Turn Off Fuel Supply: Turn off the fuel supply from the fuel tank to avoid spills and leaks during the removal process.
  4. Consult the Manual: Refer to your motorcycle’s manual for specific instructions related to carburetor removal and cleaning.

Preparing thoroughly ensures a smooth and safe cleaning process, reducing the likelihood of mishaps.

motorcycle carburetor

Removing the Carburetor

Removing the carburetor safely and efficiently is the next crucial step. Here’s how to do it:

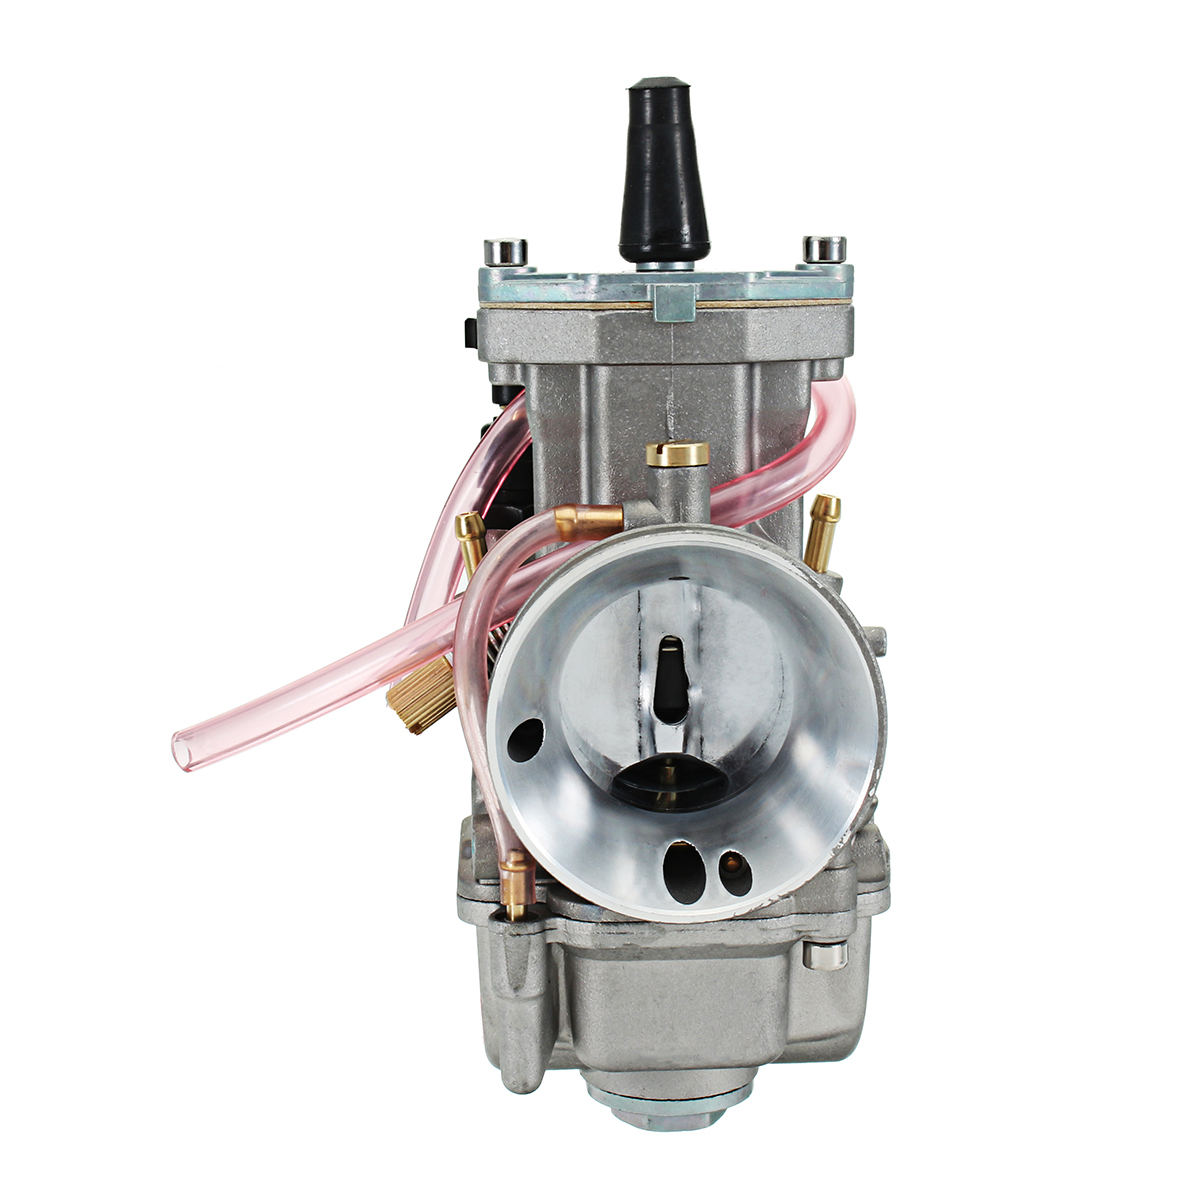
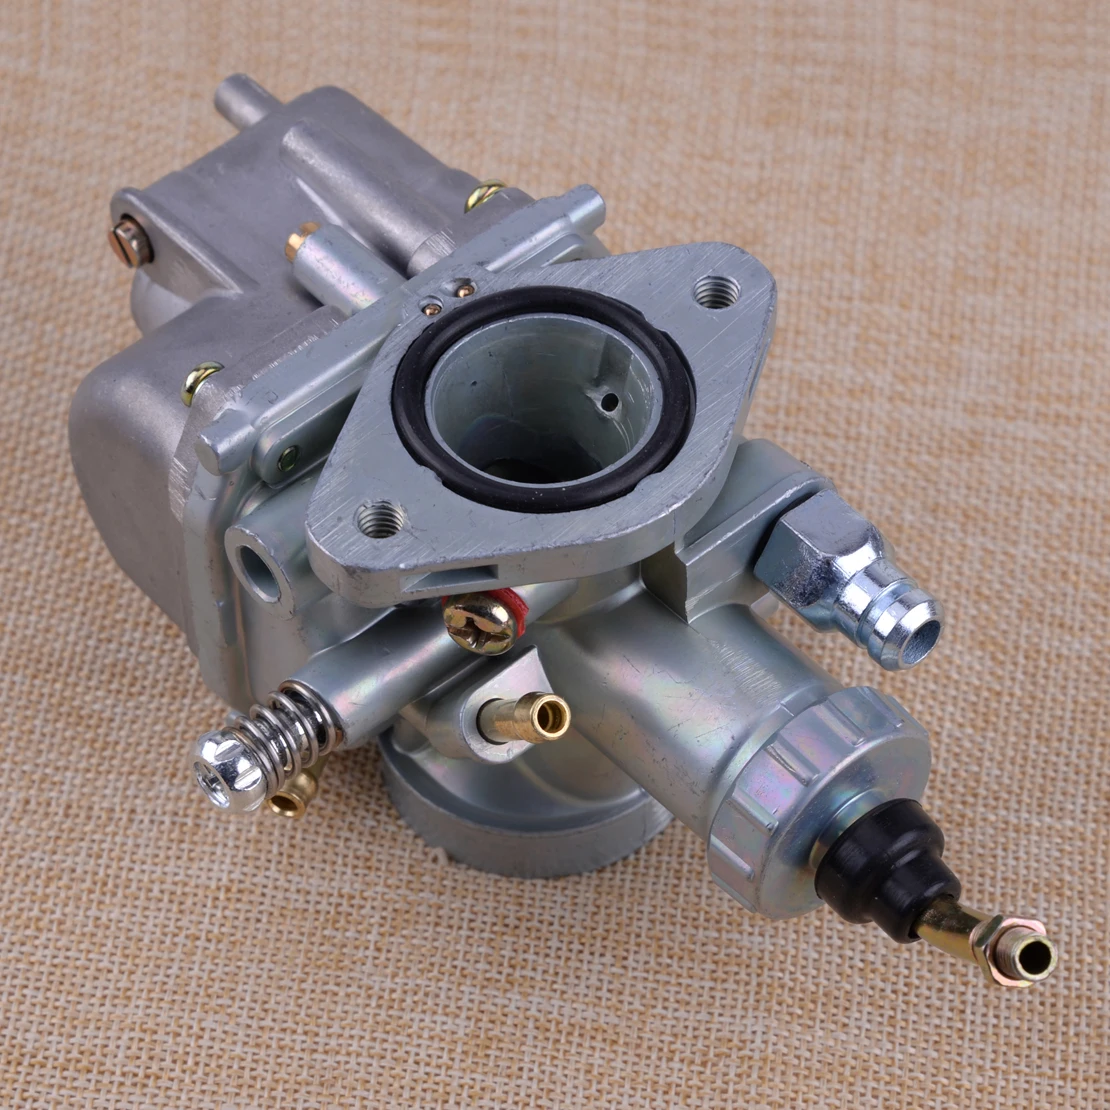
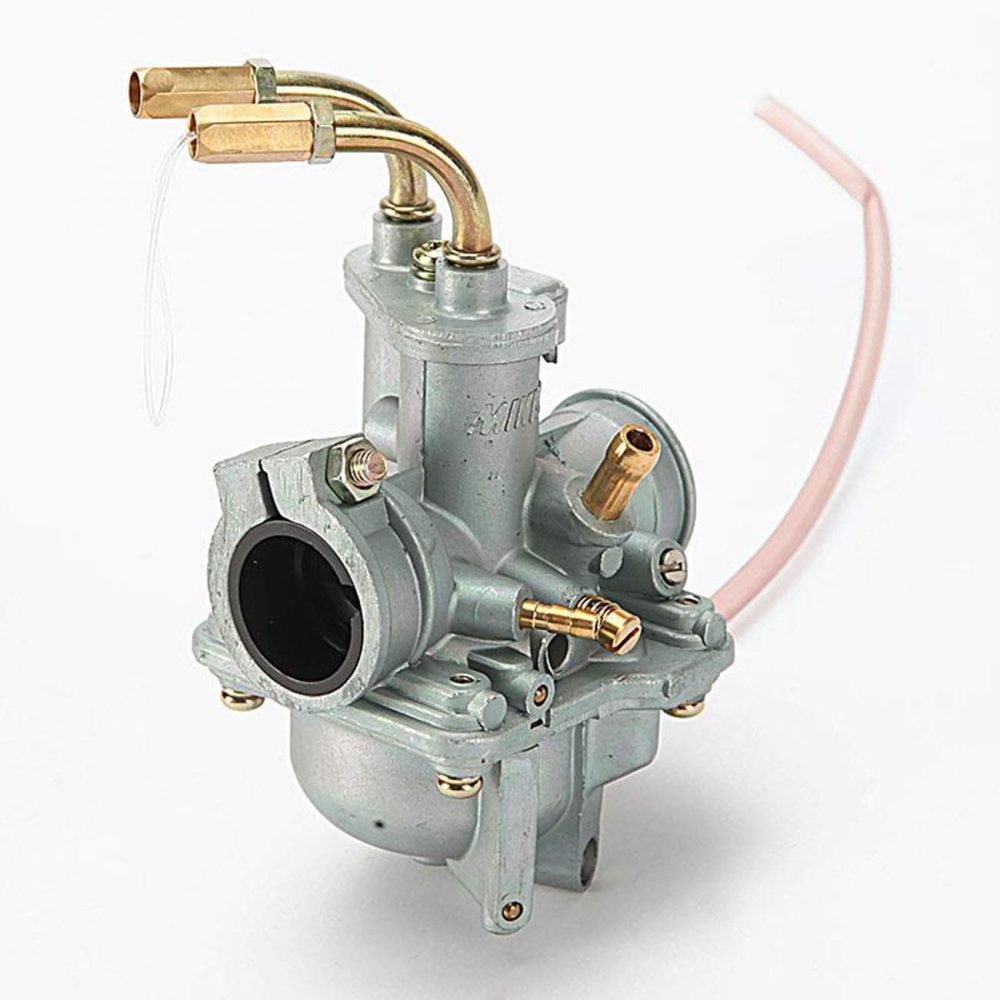
  1. Locate the Carburetor: Find the carburetor, typically positioned between the fuel tank and the engine.
  2. Detach Fuel Lines: Carefully detach the fuel lines connected to the carburetor. Use pliers to loosen any clamps, if necessary.
  3. Remove Throttle Linkage: Carefully unhook the throttle and choke linkages from the carburetor without stretching or damaging the cables.
  4. Unscrew Mounting Bolts: Use a wrench or screwdriver to remove the mounting bolts securing the carburetor to the engine.
  5. Extract the Carburetor: Gently pull the carburetor away from the motorcycle, ensuring you do not damage surrounding components.

Removing the carburetor carefully prevents damage to critical parts and facilitates a more efficient cleaning process.

Disassembling the Carburetor

Disassembling the carburetor allows you to clean each component thoroughly. Follow these steps:

  1. Work in a Clean Area: Ensure you’re working in a clean, well-lit area to keep track of all small parts.
  2. Remove the Float Bowl: Unscrew and remove the float bowl, which is the bottom part of the carburetor that holds a small amount of fuel.
  3. Take Out the Jets: Carefully remove the main jet and pilot jet using a flathead screwdriver. These small parts can clog easily and require thorough cleaning.
  4. Disassemble the Floats: Remove the float and needle valve carefully, as these are delicate parts crucial for fuel regulation.
  5. Separate Other Components: Disassemble other accessible components, such as the choke and throttle valves.

Disassembling meticulously ensures you can clean each part comprehensively and prevents losing any small pieces.

Cleaning the Carburetor Body and Components

Thoroughly cleaning the carburetor body and its components is essential for optimal function. Here’s how to do it:

  1. Spray with Carb Cleaner: Generously spray carburetor cleaner into all orifices and openings of the carburetor body to dissolve grease and residues.
  2. Use Compressed Air: Blow compressed air through all passages and jets to clear out loosened debris and ensure they are not clogged.
  3. Soak Stubborn Parts: Soak any particularly dirty or clogged parts in a bowl of carburetor cleaner for 30 minutes to break down stubborn deposits.
  4. Scrub Gently: Use a soft brush or nylon bristle brush to scrub the components, making sure not to damage any delicate parts.
  5. Rinse and Dry: Rinse the components with clean water (if manufacturer’s instructions allow) and dry thoroughly using compressed air or a clean cloth.

Cleaning each component thoroughly and using the right tools ensures no residue is left that could impair the carburetor’s function.

motorcycle carburetor

Reassembling the Carburetor

Reassembling the carburetor correctly is crucial to restoring its function. Follow these steps for proper reassembly:

  1. Reattach Floats and Needle Valve: Carefully reassemble the float and needle valve, ensuring they are positioned correctly.
  2. Insert the Jets: Place the main jet and pilot jet back in their respective positions, tightening them securely but not over-tightening.
  3. Replace the Float Bowl: Reattach the float bowl and ensure it is sealed properly to prevent fuel leaks.
  4. Reassemble Other Components: Reassemble other components, such as the choke and throttle valves, in the correct order.
  5. Double-Check Assembly: Double-check your assembly against the manual to ensure all parts are correctly fitted and secured.

Proper reassembly is essential to ensure the carburetor functions correctly and efficiently.

Installing the Carburetor Back on the Motorcycle

Reinstalling the carburetor correctly is the final step before testing. Follow these steps:

  1. Position the Carburetor: Position the carburetor back into place between the engine and the fuel tank.
  2. Secure with Mounting Bolts: Use the mounting bolts to secure the carburetor in place, ensuring it is tight and stable.
  3. Reconnect Fuel Lines: Reattach the fuel lines to the carburetor, tightening any clamps securely to prevent leaks.
  4. Attach Throttle Linkage: Reconnect the throttle and choke linkages, ensuring they move freely without any obstruction.
  5. Test for Leaks: Turn on the fuel supply and check for any leaks before reconnecting the battery.

Reinstalling the carburetor carefully ensures everything is securely in place and ready for testing.

Testing the Cleaned Carburetor

Testing the carburetor after cleaning ensures it functions as expected. Here’s how to do it:

  1. Reconnect the Battery: Reconnect the battery to restore electrical power to the motorcycle.
  2. Turn on Fuel Supply: Turn on the fuel supply and prime the carburetor if necessary by opening the fuel valve.
  3. Start the Motorcycle: Start the motorcycle and let it idle. Listen for any unusual noises and observe the engine’s idle behavior.
  4. Check Throttle Response: Twist the throttle to check the engine’s response. It should respond smoothly without hesitation.
  5. Inspect for Leaks: Run the engine for a few minutes and inspect the carburetor area for any signs of fuel leaks.

Testing ensures the carburetor is working properly and the cleaning process was successful.

  motorcycle carburetorRegular Maintenance Tips

Maintaining a clean carburetor involves regular care and preventive measures. Follow these tips:

  1. Use Clean Fuel: Always use clean, high-quality fuel to prevent contaminants from clogging the carburetor.
  2. Install a Fuel Filter: Add a fuel filter if your motorcycle doesn’t have one to catch debris before it reaches the carburetor.
  3. Run the Engine Regularly: Run your motorcycle regularly to keep the fuel flowing and prevent stagnation and buildup.
  4. Store Properly: If storing your motorcycle for extended periods, use a fuel stabilizer to prevent varnish buildup in the carburetor.
  5. Scheduled Cleaning: Incorporate carburetor cleaning into your regular maintenance schedule, ideally once a year or as needed.

Regular maintenance helps ensure the carburetor remains clean and functions efficiently, avoiding major issues.

Troubleshooting Common Carburetor Issues

Sometimes, even after cleaning, you may encounter issues with your carburetor. Here’s how to troubleshoot common problems:

  1. Hard Starting: If the motorcycle is hard to start, check the choke operation and ensure the jets are not clogged.
  2. Rough Idling: Rough idling may indicate air leaks. Inspect the carburetor gaskets and hoses for any signs of wear or damage.
  3. Poor Acceleration: If acceleration is sluggish, ensure the throttle and choke linkages are correctly adjusted and functioning smoothly.
  4. Fuel Leaks: Persistent fuel leaks may require inspecting the float and needle valve for improper seating or damage.
  5. Engine Stalling: If the engine stalls frequently, verify that the air-fuel mixture is correct and there are no obstructions in the fuel passages.

Troubleshooting these common issues helps ensure your motorcycle’s carburetor functions effectively.

Leveraging Professional Help

Sometimes you may need professional assistance for more complex issues. Here’s when to consider it:

  1. Recurring Problems: If you encounter recurring issues despite regular cleaning, it might be time to seek professional help.
  2. Complex Repairs: For complex repairs or if you’re not confident in your ability to fix the problem, consulting a professional ensures reliable repairs.
  3. Annual Check-Up: Schedule an annual check-up with a professional mechanic to ensure your motorcycle remains in top condition.

Recognizing when to seek professional help ensures your motorcycle remains in optimal working condition.

Conclusion

How to Clean Motorcycle Carburetor?

Knowing how to clean motorcycle carburetor is essential for any motorcycle owner. A clean motorcycle carburetor ensures optimal performance, better fuel efficiency, and a smooth-running engine. This comprehensive guide covers everything from preparation and disassembly to cleaning, reassembly, and testing. By following these steps and maintaining regular care, you can keep your motorcycle in peak condition and enjoy smooth rides every time. Happy riding!

Posted in Motorcycle Accessories, Motorcycles | Tagged , , | Leave a comment

Bleeding Motorcycle Brakes: How Do You Do It Properly?

Maintaining your motorcycle’s brake system is crucial for ensuring safe riding experiences. One of the vital maintenance tasks is bleeding the brakes, a process that removes air bubbles from the brake lines to allow for responsive and effective braking. But how do you properly bleed motorcycle brakes? This detailed guide will walk you through the steps and provide essential tips to make sure your bike’s braking system functions optimally.

Understanding the Importance of Bleeding Brakes

Bleeding your motorcycle brakes is a mandatory maintenance process that should not be overlooked. Air bubbles trapped in the brake lines can significantly reduce braking efficiency, leading to a spongy feel at the lever, delayed braking response, and ultimately reduced safety on the road.

When you depress the brake lever or pedal, the brake fluid exerts pressure on the pistons located in the calipers, clamping down on the brake pads and slowing the motorcycle. If there is air in the system, it compresses under pressure, which disrupts this fluid-pressure relationship. This can cause the brake lever to feel soft or squishy, diminishing your brake power and control.

Regularly bleeding your brakes also helps remove any old brake fluid, which can absorb moisture over time and reduce its boiling point. This lowered boiling point increases the risk of brake fade during heavy braking situations, which can be particularly dangerous. Therefore, understanding and performing brake bleeding is paramount for maintaining both brake performance and overall riding safety.

bleeding motorcycle brakes

Gathering the Necessary Tools and Materials

Before starting the process of bleeding motorcycle brakes, gathering the necessary tools and materials is crucial. You’ll need a few specific items to ensure the process goes smoothly.

  1. Brake Fluid: Ensure you have the correct type for your motorcycle. Refer to your owner’s manual to confirm whether you need DOT 3, DOT 4, or DOT 5.1 brake fluid.
  2. Wrenches: Typically, a combination wrench that matches the bleeder valve size is required.
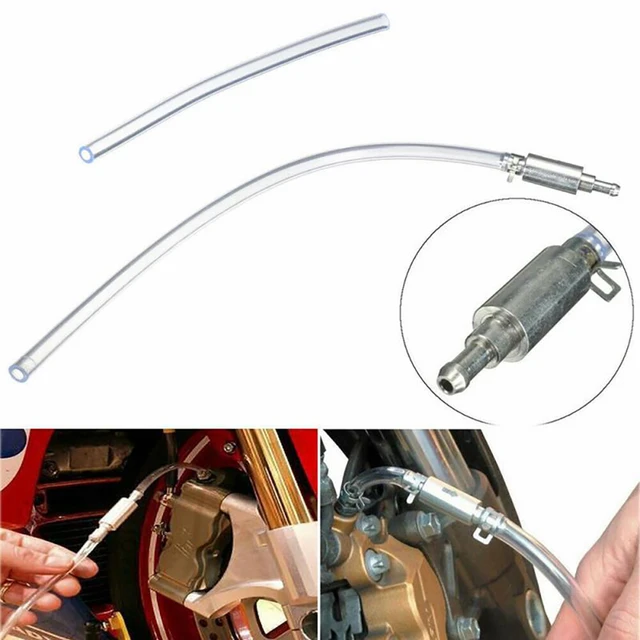
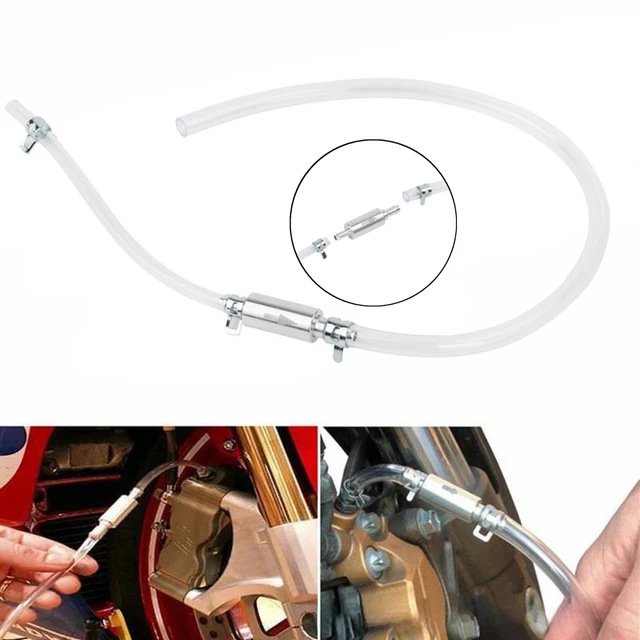
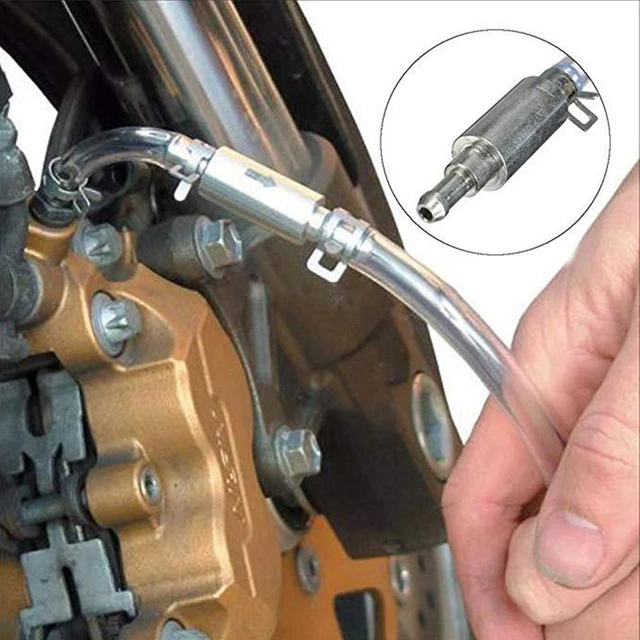
  3. Clear Tubing: A piece of clear plastic tubing to fit over the bleeder valve.
  4. Catch Container: A small container to catch the old brake fluid being expelled.
  5. Brake Bleeder Kit (optional): Tools like a vacuum pump or pressure bleeder can make the job easier but are not strictly necessary.

Having all these tools and materials organized and ready will save you time and make the bleeding process much more straightforward.

Preparing Your Motorcycle

Proper preparation of your motorcycle ensures a smooth and efficient brake bleeding process. Start by positioning your motorcycle on a stable, flat surface using a center stand or a motorcycle lift to keep it upright and stable.

Next, remove the brake reservoir cover. Be cautious while doing this to avoid spilling brake fluid, as it can damage paint and plastic surfaces. Ensure that the brake fluid level is adequate in the reservoir and top it off if necessary. Having an assistant available to monitor and replenish the fluid during the bleeding process can be very helpful.

Attach one end of the clear plastic tubing to the bleeder valve located on the brake caliper. Place the other end into the catch container to collect the expelled brake fluid. Ensuring the tube is firmly connected to the valve and well-placed within the container will prevent spills and messes.

The Bleeding Process

With everything set up, you can proceed with the actual bleeding of the brakes. Start with the brake system furthest from the master cylinder, typically the rear brake, and then move on to the front brakes.

  1. Open the Bleeder Valve: Use the appropriate wrench to loosen the bleeder valve slightly. Be careful not to open it too much; a quarter turn is usually sufficient.
  2. Pump the Brake Lever: Have your assistant pump the brake lever or pedal several times until resistance builds up, then hold the lever or pedal down.
  3. Release Fluid: As the lever or pedal is held down, open the bleeder valve to allow the brake fluid and air bubbles to escape into the clear tubing and catch container. Once the flow slows down, close the valve before your assistant releases the brake lever or pedal to prevent air from being sucked back into the system.
  4. Repeat the Process: Continue this process until you see a steady stream of clear, bubble-free brake fluid flowing through the tubing. Ensure the brake fluid reservoir is topped up throughout this process to avoid running dry and introducing more air into the system.
  5. Move to the Front Brakes: Once the rear brake is properly bled, repeat the same steps for the front brakes. Start with the caliper furthest from the master cylinder if your motorcycle has a dual-disc setup.

Taking your time to ensure all air bubbles are removed during this process is key. Rushing through it can leave air pockets in the system, compromising brake performance.

bleeding motorcycle brakes

Final Steps and Safety Checks

After bleeding both the front and rear brakes, it’s time to wrap up the process with some final steps and safety checks.

  1. Check for Leaks: Inspect all bleeder valves and lines for any signs of leaks. Tighten any connections as necessary but be cautious not to over-tighten, which can damage threads.
  2. Top Off the Fluid: Ensure the brake fluid reservoir is filled to the correct level. Replace the reservoir cover securely to prevent contamination.
  3. Test the Brakes: Before hitting the road, test the brakes while the motorcycle is stationary. The lever should feel firm, and the brakes should engage properly without any sponginess. If the brake lever still feels soft, repeat the bleeding process until you achieve a solid feel.
  4. Clean Up: Dispose of the old brake fluid properly, as it is toxic and should not be poured down the drain. Clean up any spills thoroughly to avoid damage to your motorcycle’s surfaces.

Completing these final steps ensures that your brakes are functioning correctly and safely, providing peace of mind for your rides.

Common Mistakes to Avoid

While bleeding motorcycle brakes might seem straightforward, there are common mistakes that riders can make. Being aware of these can help you avoid them and ensure a successful brake bleeding process.

  1. Running the Reservoir Dry: Always monitor the brake fluid level in the reservoir during the bleeding process. Allowing it to run dry introduces air into the system, negating your efforts.
  2. Over-Tightening the Bleeder Valve: While it’s important to secure the bleeder valve, over-tightening can strip the threads, leading to leaks and further complications.
  3. Using the Wrong Brake Fluid: Mixing different types of brake fluid or using the incorrect type specified for your motorcycle can result in brake failure. Always double-check the recommended type in your owner’s manual.
  4. Incomplete Air Removal: If the brake lever still feels soft after bleeding, air bubbles might still be present. It’s crucial to repeat the process methodically until all air is removed.

By being mindful of these common pitfalls, you can ensure a smoother, more effective brake bleeding experience.

Advantages of Regular Brake Bleeding

Regular maintenance, including bleeding your motorcycle brakes, offers several advantages beyond immediate safety.

First, it enhances overall braking performance, providing more responsive and reliable braking. This responsiveness is critical in emergency situations where split-second reactions are required.

Second, bleeding the brakes helps extend the life of your braking components. Old and contaminated brake fluid can cause corrosion and wear on the internal components of your braking system. Regularly replacing the fluid through the bleeding process keeps your brake system in optimal condition.

Lastly, regular brake bleeding helps you stay in tune with your motorcycle’s overall health. It provides the opportunity to inspect other components and ensure everything is in good working order. Spotting potential issues early can prevent more costly repairs down the line.

Professional Assistance vs. DIY

While bleeding motorcycle brakes is a task many riders feel comfortable performing themselves, there are times when seeking professional assistance might be the best course of action.

If you’re new to motorcycle maintenance or uncomfortable with the process’s intricacies, consulting a professional mechanic can ensure the job is done correctly and safely. Professionals have the experience and specialized tools to handle bleeding brakes efficiently, reducing the risk of errors.

On the other hand, performing the task yourself can be rewarding and can help you develop a deeper understanding of your motorcycle’s mechanics. With the right guidance, tools, and patience, many riders can successfully bleed their brakes and gain confidence in managing their bike’s maintenance tasks.

  bleeding motorcycle brakesAdvanced Techniques and Tools

For those looking to delve deeper into motorcycle maintenance, advanced techniques and tools can make the bleeding process even more efficient.

Vacuum brake bleeders, for example, use suction to draw brake fluid through the system, allowing for quicker and more thorough air removal. Pressure brake bleeders, another advanced option, use pressurized fluid to force air out, providing an alternative method that can sometimes be more effective than manual bleeding.

Both tools can be invaluable for riders who frequently maintain their motorcycles or have multiple bikes. Investing in these tools can save time and effort, making the maintenance process smoother and more manageable.

Conclusion

So, how do you properly bleed motorcycle brakes? The process involves understanding the importance of removing air from the brake lines, gathering the necessary tools and materials, preparing your motorcycle, and following a systematic bleeding process. By completing final safety checks and avoiding common mistakes, you can ensure your motorcycle’s brakes are reliable and responsive.

Whether you choose to perform the task yourself or seek professional assistance, regular brake maintenance is crucial for safety and performance. Investing time in learning and executing the bleeding process can enhance your riding experience and provide peace of mind. Embrace the challenge, follow this guide, and keep your motorcycle’s brakes in top-notch condition for all your future rides.

Posted in Motorcycle Accessories, Motorcycles | Tagged , , | Leave a comment

What Makes a Waterproof Motorcycle Jacket Essential for Riders?

For any motorcyclist, facing the unpredictable elements is part of the adventure. But when the skies open up, being drenched can quickly dampen the spirit of any ride. This is where having a high-quality waterproof motorcycle jacket becomes essential. More than just a riding accessory, it integrates advanced materials, ingenious design features, and comprehensive protection to keep you dry and comfortable. This in-depth guide will explore everything you need to know about waterproof motorcycle jackets, from the materials and construction to the added benefits and top features. Buckle up for a journey through the world of waterproof gear that ensures you can ride no matter the weather.

Materials and Construction

Understanding the materials and construction techniques used in waterproof motorcycle jackets can help you appreciate their effectiveness in keeping you dry.

Gore-Tex and other waterproof membranes

One of the most popular materials used in waterproof motorcycle jackets is Gore-Tex. Known for its exceptional water-resistance and breathability, Gore-Tex membranes consist of micro-thin layers embedded within the jacket’s structure. This innovative material keeps rain out while allowing sweat and moisture to escape, maintaining comfort over long rides. Other comparable waterproof membranes include eVent and D-Dry, each offering different levels of water-resistance and ventilation.

Seam sealing and taping

A waterproof motorcycle jacket is only as good as its weakest link, which is often the seams. High-quality jackets feature fully taped or seam-sealed construction to prevent water ingress. Seam sealing involves applying a waterproof tape over the jacket’s stitched seams, effectively blocking any pathways for water to seep through.

Waterproof zippers and closures

Zippers and closures are also critical components in ensuring a jacket remains watertight. Waterproof zippers are designed with specialized coatings and seals to prevent water from penetrating. Additionally, storm flaps can cover zippers and provide an additional layer of protection, ensuring that even the most torrential downpours can’t breach your defenses.

  waterproof motorcycle jacketImportance of Breathability

While keeping water out is crucial, so is ensuring that the jacket remains breathable to prevent overheating and discomfort.

Ventilation systems

Modern waterproof motorcycle jackets often incorporate advanced ventilation systems. Strategically placed vents, often under the arms or on the back, allow for proper airflow without compromising water resistance. These vents can typically be opened and closed with zippers, giving riders control over their level of ventilation based on the riding conditions.

Moisture-wicking liners

Many waterproof jackets come equipped with moisture-wicking liners designed to draw sweat and moisture away from your skin. These liners are usually made from lightweight, breathable fabrics like polyester or mesh, which promote quick drying and enhance overall comfort. When combined with a breathable waterproof membrane, moisture-wicking liners help maintain a balanced internal environment.

Layering compatibility

A good waterproof motorcycle jacket should offer compatibility with layering systems. This means it should be roomy enough to accommodate additional thermal layers in colder weather while still maintaining its waterproof integrity. Layering adds versatility, allowing the jacket to be used across a wider range of conditions without sacrificing comfort or protection.

Protection and Safety Features

Waterproof motorcycle jackets must also prioritize rider safety through robust protection features.

Impact protection

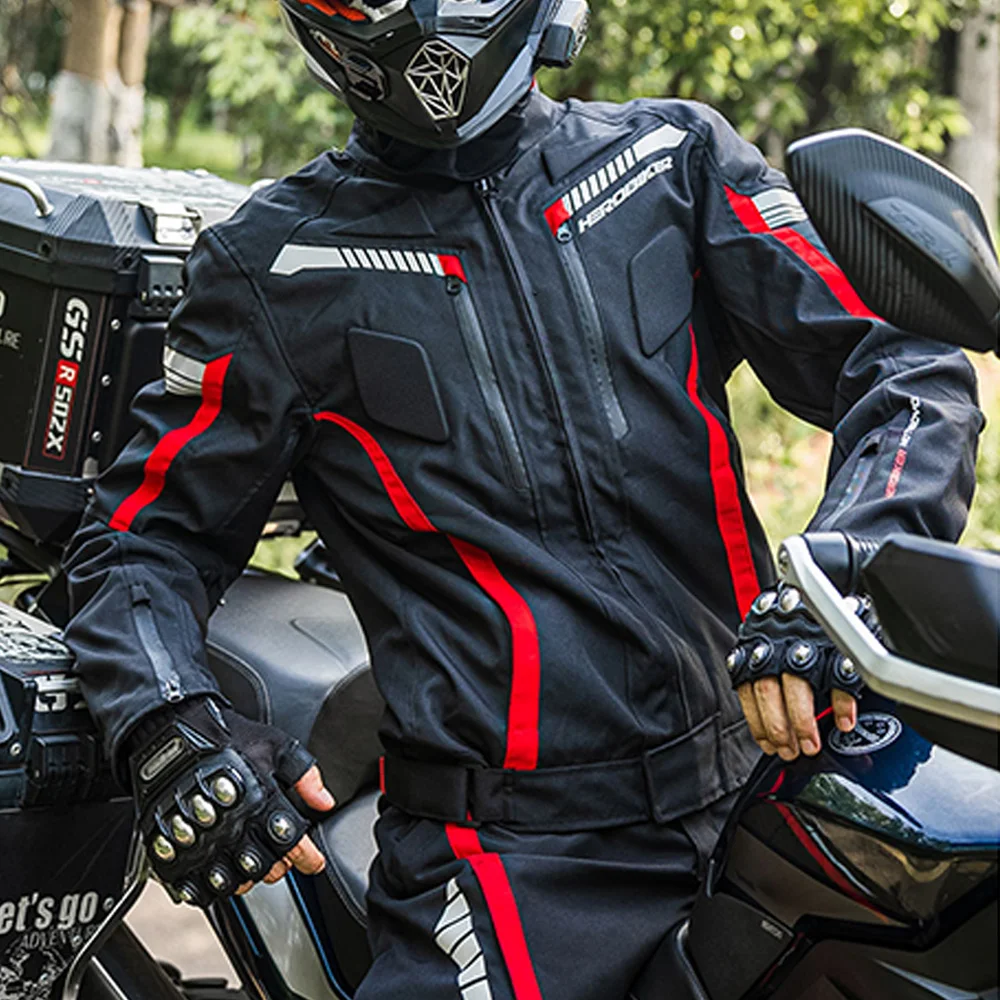
Most waterproof motorcycle jackets are equipped with CE-rated armor at key impact points, including shoulders, elbows, and back. This armor is designed to absorb and dissipate the force of impacts, reducing the risk of injury in the event of a crash. High-quality jackets allow for the replacement or upgrading of this armor, enabling riders to tailor their level of protection.

Reflective elements

Visibility is critical, especially in the wet and often dim conditions when a waterproof jacket is most needed. Many jackets incorporate reflective elements such as strips, logos, or piping to enhance visibility to other road users. These reflective materials catch and reflect light, making you more visible and reducing the likelihood of accidents.

Abrasion resistance

Waterproof motorcycle jackets should also be constructed from abrasion-resistant materials to protect against road rash in the event of a slide. Fabrics such as Cordura, Kevlar, and reinforced textiles provide excellent abrasion resistance while maintaining flexibility and comfort. The combination of these materials, along with waterproof membranes, ensures comprehensive protection.

Comfort and Fit

A waterproof motorcycle jacket must not only protect against the elements but also ensure a comfortable fit for long rides.

Adjustability

To achieve the perfect fit, most waterproof jackets come with various adjustability features. Adjustable cuffs, waistbands, and arm straps help tailor the jacket’s fit to your body shape and preferences. This adjustability ensures that the jacket remains snug and doesn’t flap in the wind, enhancing both comfort and aerodynamics.

Ergonomic design

The ergonomic design of a waterproof motorcycle jacket plays a vital role in rider comfort. Pre-curved sleeves, articulated joints, and strategically placed stretch panels allow for a natural riding position without restricting movement. These design features reduce fatigue on long rides and make the jacket more enjoyable to wear.

Interior amenities

Many waterproof jackets come equipped with interior pockets, headphone loops, and soft linings. These amenities add convenience and enhance the overall riding experience. Soft microfiber linings at the collar and cuffs prevent chafing, while interior pockets provide safe storage for essential items like keys, wallets, and smartphones.

waterproof motorcycle jacket

Top Brands and Models

Several top brands have established themselves as leaders in manufacturing high-quality waterproof motorcycle jackets.

Dainese

Dainese is renowned for its innovation and quality in motorcycle gear. Their waterproof jackets, such as the Dainese D-Explorer 2, combine advanced materials like Gore-Tex with ergonomic designs and comprehensive protection systems. The brand’s attention to detail ensures durability and performance in varying weather conditions.

Alpinestars

Alpinestars is another leader in motorcycle apparel, offering a range of waterproof jackets that cater to different riding styles. Models like the Alpinestars Andes V2 feature a Drystar membrane for superior waterproofing and breathability, along with CE-certified armor and ample ventilation options.

Rev’It!

Rev’It! specializes in creating versatile and functional motorcycle gear. The Rev’It! Sand 3 jacket is a popular choice among adventure riders, featuring a Hydratex® membrane for waterproofing, extensive ventilation, and protective armor. The brand’s commitment to innovation ensures that their jackets perform well in diverse environments.

Klim

Klim focuses on high-performance gear for adventure and off-road riders. Their waterproof jackets, like the Klim Latitude, employ Gore-Tex Pro laminates for unmatched weather resistance and breathability. Klim’s jackets are known for their rugged construction and extensive feature sets, making them ideal for extreme conditions.

Care and Maintenance

Proper care and maintenance prolong the life and performance of a waterproof motorcycle jacket.

Cleaning guidelines

Regular cleaning is essential to maintain the jacket’s waterproof properties. Follow the manufacturer’s cleaning instructions, which typically involve hand washing or using a gentle machine cycle with mild detergent. Avoid using fabric softeners or bleach, as these can degrade the waterproof membranes. After washing, hang the jacket to air dry away from direct sunlight.

Reproofing

Over time, the waterproofing treatment on the jacket’s exterior can wear off. Reproofing sprays or solutions can restore the jacket’s water-repellent properties. Apply the reproofing treatment following cleaning to ensure maximum effectiveness. This maintenance step is crucial for preserving the jacket’s ability to keep you dry.

Storage tips

Proper storage also plays a role in maintaining a waterproof jacket’s longevity. Store the jacket in a cool, dry place away from direct sunlight to prevent material degradation. Avoid folding the jacket tightly or placing heavy objects on top of it, as this can damage the waterproof membrane and other structural components.

waterproof motorcycle jacket

Conclusion: Essential Protection for Every Rider

A waterproof motorcycle jacket is an indispensable piece of gear that combines protection, comfort, and practicality. From advanced waterproof materials and breathability features to robust impact protection and ergonomic design, these jackets are engineered to withstand the rigors of riding in various conditions. Top brands like Dainese, Alpinestars, Rev’It!, and Klim offer models that cater to different needs and preferences, ensuring that every rider can find a suitable option. Proper care and maintenance are key to preserving the jacket’s performance, making it a reliable companion on countless rides. Investing in a high-quality waterproof motorcycle jacket ensures that you stay dry, safe, and comfortable, no matter what the weather throws your way.

Posted in Motorcycle equipment, Motorcycles | Tagged , , | Leave a comment

Motorcycle Won’t Start? Troubleshooting Guide For You

Introduction:

Not being able to start your motorcycle can be incredibly frustrating, especially when you’re eager to hit the road. Several issues can cause a motorcycle not to start, ranging from simple fixes to more complex problems. What should you do when your motorcycle won’t start, and how can you diagnose and resolve the issue? This guide will walk you through common causes and effective troubleshooting steps to get your bike up and running again.

motorcycle

Motorcycle Won’t Start?

Troubleshooting Guide

Battery Issues

A common reason motorcycles won’t start is a faulty or discharged battery. Motorcycles rely heavily on their batteries to power the starter motor and other electrical components.

Corroded or Loose Battery Connections

Corrosion or loose connections can interrupt the electrical flow. Begin by inspecting the battery terminals for any signs of corrosion, which appears as a white or greenish powder. If you find any, clean the terminals using a wire brush and a mixture of baking soda and water. Tighten any loose connections to ensure a secure electrical pathway.

Battery Voltage

Use a multimeter to check the battery’s voltage. A fully charged motorcycle battery should read around 12.6 to 12.8 volts. If the voltage is below 12 volts, the battery may be discharged and need recharging. If the battery cannot hold a charge, it might be time to replace it.

motorcycleFuel System Problems

If your battery is in good condition, the next step is to check the fuel system. Without adequate fuel delivery, the engine cannot start or run smoothly.

Empty Fuel Tank

It may seem obvious, but sometimes an empty fuel tank is the culprit. Ensure your tank has enough fuel. If you’ve run the tank dry, it might take a few attempts to get the fuel system primed and the bike started again.

Clogged Fuel Filter

A clogged fuel filter can restrict fuel flow, preventing the engine from starting. Locate the fuel filter, which is usually along the fuel line between the tank and the carburetor or fuel injectors. Replace the filter if it appears dirty or clogged.

Fuel Pump Issues

Modern motorcycles might have an electric fuel pump. Listen for a humming sound when you turn the ignition on, indicating the pump is working. If you don’t hear it, the pump might be faulty. Check the fuse and relay associated with the fuel pump and replace them if necessary.

Spark Plug Problems

For an engine to start, the spark plugs need to ignite the fuel-air mixture in the cylinders. Faulty spark plugs can cause starting issues.

Inspecting Spark Plugs

Remove the spark plugs and inspect them for signs of wear, fouling, or damage. A healthy spark plug should have a light brown or gray-colored electrode. Black, oily, or damaged spark plugs indicate issues. Clean or replace the spark plugs as needed.

Checking Spark

To test if the spark plugs are functioning, reattach the spark plug wire and ground the plug’s electrode against the engine block. Crank the engine and look for a spark. If there’s no spark, you may have a problem with the ignition system.

motorcycleIgnition System Issues

The ignition system is crucial for starting the engine. Problems here can prevent the bike from starting, even if other components are working correctly.

Ignition Switch

Ensure the ignition switch is functioning correctly. Sometimes, a faulty ignition switch can prevent the bike from starting. Try turning the key back and forth a few times to see if it makes a difference.

Kill Switch

The kill switch is designed to stop the engine instantly. Make sure the kill switch is in the “run” position. Accidentally leaving it in the “off” position is a common mistake that prevents the motorcycle from starting.

Starting System Problems

The starting system comprises components like the starter motor, starter relay, and solenoid. Issues with these parts can stop your bike from starting.

Starter Motor

If you hear a clicking sound when trying to start the motorcycle, the starter motor might be at fault. It can be stuck or faulty. Tap it gently with a wrench to see if it loosens and allows the engine to start.

Starter Relay and Solenoid

Check the starter relay and solenoid for proper operation. Use a multimeter to test for continuity. If you don’t get a proper reading, these components may need to be replaced.

Air System Check

An adequate air supply is essential for the combustion process. Blockages in the air intake system can hinder starting.

Air Filter

Inspect the air filter for dirt and debris. A clogged air filter can restrict airflow to the engine. Clean or replace the filter if it appears dirty. Regular maintenance of the air filter can prevent starting issues.

Engine Cut-off Sensors

Modern motorcycles come with various sensors for safety and performance. Sometimes, these sensors can prevent the engine from starting.

Side Stand Sensor

Many motorcycles have a safety feature that prevents starting if the side stand is down. Ensure the side stand is up and the sensor is working correctly. Sensor faults can sometimes cause the system to think the stand is down.

Clutch Lever Sensor

Similarly, some bikes require the clutch to be pulled in for the engine to start. Make sure the clutch lever sensor is functioning correctly. If the sensor is faulty, it might need replacement or adjustment.

motorcycleDiagnostic Tools

Using diagnostic tools can streamline the process of identifying issues. Many modern motorcycles come with onboard diagnostics that help pinpoint the problem.

OBD-II Scanner

For motorcycles equipped with an OBD-II port, using a scanner can read error codes and help identify the root cause of the issue. These scanners are available at most auto parts stores and can save time in diagnosing the problem.

Service Manual

Refer to your motorcycle’s service manual for specific troubleshooting steps and diagnostic procedures. It provides detailed information on your bike’s components and systems, aiding in accurate diagnosis.

Professional Assistance

If all troubleshooting steps fail, seeking professional help might be necessary. Experienced mechanics have the tools and expertise to diagnose and fix complex issues.

Identifying Complicated Problems

Some problems may be beyond a DIY fix. Issues with electronic control units (ECUs) or internal engine components often require professional assessment. A mechanic can perform advanced diagnostics and repairs.

Routine Maintenance

Regular servicing by a professional can prevent many starting issues from occurring in the first place. Scheduled maintenance ensures all components are in optimal condition, enhancing reliability and performance.

motorcyclePreventive Measures

Taking preventive measures can reduce the likelihood of starting issues in the future. Regular maintenance and mindful riding habits go a long way.

Regular Battery Checks

Keep the battery terminals clean and ensure the connections are tight. Use a battery tender during long storage periods to maintain charge levels and prolong battery life.

Fuel Quality

Always use high-quality fuel and empty the tank or add a fuel stabilizer if the motorcycle will be stored for an extended period. This prevents fuel degradation and contamination.

Scheduled Maintenance

Follow the manufacturer’s recommended maintenance schedule for oil changes, spark plug replacements, and air filter cleaning. Regular inspections can catch potential problems before they escalate.

Conclusion:

Ensuring Your Motorcycle Starts

Experiencing a non-starting motorcycle can be frustrating, but understanding the possible causes and knowing how to troubleshoot them can save you time and hassle. Whether it’s a battery issue, a fuel system problem, or something more complex like ignition troubles, systematically addressing each potential cause can help you identify and fix the issue.

Regular maintenance and preventive measures play crucial roles in keeping your motorcycle in top condition, minimizing the chances of encountering starting problems. Should you find yourself stuck despite your best efforts, never hesitate to seek professional help. With the right approach, you can ensure your motorcycle stays reliable, providing a smooth and enjoyable ride every time.

Posted in Motorcycle Maintenance, Motorcycles | Tagged , | Leave a comment

M109R Motorcycle: Why the Suzuki Boulevard M109R Stands Out

Introduction:

The Suzuki Boulevard M109R is known for its bold design, powerful performance, and impressive engineering. As a standout in the cruiser segment, it combines classic cruiser aesthetics with modern technology and performance capabilities. This comprehensive guide explores various aspects of the M109R, including its design, engine, handling, comfort, safety features, and maintenance. By understanding these elements, you can appreciate what makes the Suzuki Boulevard M109R a significant contender in the cruiser motorcycle market.

motorcycle

M109R Motorcycle:

What Makes the Suzuki Boulevard M109R a Standout Cruiser?

Design and Aesthetics:

How Does the M109R’s Design Stand Out?

The Suzuki Boulevard M109R features an imposing and aggressive design that turns heads on the road.

Bold Styling:

Muscular Appearance:

Sculpted Bodywork: The M109R boasts a muscular and sculpted look, with wide, curvaceous body panels giving it a robust appearance. The chiseled fuel tank and aggressive lines emphasize its powerful persona.

V-Twin Silhouette: The prominent V-twin engine and massive exhaust pipes enhance its aggressive stance, while the iconic Suzuki emblem on the tank adds a touch of brand heritage.

Unique Features:

Distinctive Elements:

Headlamp and Taillight Design: The headlamp is encased in a sleek, aerodynamic nacelle that lends a futuristic appearance. The LED taillight and indicators add modern flair while improving visibility.

Customizable Options: The M109R offers various customization options, allowing owners to personalize their bikes with different accessories and aftermarket parts, enhancing both functionality and aesthetics.

motorcycleAttention to Detail:

Premium Finish:

High-Quality Materials: The motorcycle features premium materials and finishes, including chrome accents and high-quality paintwork. These elements contribute to its luxurious appearance and durability.

Ergonomic Design: Despite its bold looks, the M109R is designed with rider ergonomics in mind. The layout of the handlebars, seat, and foot controls ensures a comfortable riding position, even on long journeys.

Engine and Performance:

What Powers the M109R?

The heart of the Suzuki Boulevard M109R is its powerful engine, which delivers impressive performance and an exhilarating riding experience.

Engine Specifications:

V-Twin Powerhouse:

Displacement and Configuration: The M109R is powered by a 1,783cc, liquid-cooled, DOHC, 54-degree V-twin engine. This large-displacement engine provides immense torque and power, making it one of the most potent cruisers on the market.

Fuel Injection System: The advanced fuel injection system ensures optimal fuel delivery for improved performance, throttle response, and fuel efficiency. Twin 56mm throttle bodies with Suzuki’s Dual Throttle Valve (SDTV) system further enhance the engine’s efficiency and power delivery.

Performance Metrics:

Torque and Horsepower:

Impressive Output: The M109R generates significant torque, especially in the low to mid-range, providing substantial pulling power for quick acceleration and effortless overtaking. The engine produces around 128 horsepower and 118 lb-ft of torque, catering to performance enthusiasts.

Transmission: The bike features a five-speed constant mesh transmission, optimized for smooth shifting and robust power transfer. The shaft drive system ensures reliability and low maintenance, making it suitable for long-distance rides.

motorcycleRiding Experience:

Throttle Response and Sound:

Intake and Exhaust: The M109R’s large airbox and dual exhaust system contribute to its throaty intake and deep exhaust notes, enhancing the riding experience. The resonance of the exhaust system amplifies the bike’s powerful presence.

Torque Rich: The bike’s torque-rich engine allows for easy cruising and spirited riding, delivering a blend of power and smoothness that defines the cruiser experience.

Handling and Suspension:

How Does the M109R Handle Different Riding Conditions?

Handling and suspension are critical aspects of the Suzuki Boulevard M109R, affecting its performance and comfort.

Frame and Geometry:

Stability and Agility:

Double Cradle Frame: The double cradle steel frame provides a solid foundation, ensuring stability at high speeds and a balanced ride in various conditions. The frame’s geometry is designed to offer a mix of nimbleness and steadiness.

Rake and Trail: The rake and trail settings are optimized for cruiser dynamics, providing stable handling in straight lines and confident cornering capabilities.

Suspension Components:

Ride Comfort and Control:

Inverted Forks: The front suspension consists of 46mm inverted forks, offering excellent rigidity and handling precision. The forks provide a smooth ride over uneven surfaces, enhancing ride comfort.

Rear Shock Absorber: The rear suspension features a single shock absorber with spring preload adjustment. This setup ensures a comfortable and controlled ride by absorbing road imperfections effectively.

Braking System:

Stopping Power:

Dual Disc Brakes: The M109R is equipped with dual 310mm front disc brakes and a single 275mm rear disc brake. The brake system provides substantial stopping power and control, essential for a bike of its size and performance.

ABS Option: Some models come with an anti-lock braking system (ABS), enhancing safety by preventing wheel lock-up during hard braking, especially on slippery surfaces.

Comfort and Ergonomics:

What Makes the M109R Suitable for Long Rides?

Comfort and ergonomics play a significant role in making the Suzuki Boulevard M109R a favorable choice for long rides.

Seating Position:

Comfort and Control:

Rider and Passenger Seats: The M109R features a wide, contoured seat designed for maximum rider comfort. The seat offers excellent support, reducing fatigue during long rides. The passenger seat is also spacious, ensuring comfort for both the rider and passenger.

Forward Controls: The forward foot controls contribute to a relaxed riding posture, distributing weight evenly and enhancing long-distance comfort. The handlebars are positioned to allow easy reach and control without straining the rider.

Wind Protection:

Reducing Fatigue:

Windshield Options: While the standard model may not include a windshield, aftermarket options are available to provide wind protection. A good windshield reduces wind fatigue and enhances rider comfort, especially at higher speeds.

Fairing Design: Some models feature a small fairing that helps deflect wind and reduce aerodynamic drag, contributing to a smoother ride.

Storage Solutions:

Practicality for Touring:

Saddlebags and Storage: The M109R can be equipped with saddlebags and other storage accessories, making it suitable for touring. These accessories enhance the bike’s practicality, allowing riders to carry essential items for long trips.

Cargo Racks: Cargo racks and backrests further improve storage capacity and passenger comfort, making the bike adaptable for various riding needs.

Safety and Technology:

What Advanced Features Enhance Safety and Performance?

The Suzuki Boulevard M109R incorporates several safety and technology features to enhance the riding experience.

Lighting System:

Visibility and Safety:

LED Headlights: LED headlights ensure excellent visibility during night rides while consuming less power. Enhanced illumination improves safety by making the road ahead more visible.

Indicator and Taillights: The bike features bright indicator lights and taillights, enhancing visibility to other road users and improving overall safety.

motorcycleElectronic Features:

Modern Technology:

Digital Instrument Cluster: A digital instrument cluster provides essential information like speed, RPM, fuel level, and gear position. It offers clear visibility in various lighting conditions and contributes to a modern look.

Riding Modes: Some models may come with selectable riding modes, allowing riders to adjust throttle response, power delivery, and traction control to suit different riding conditions. These modes enhance performance and safety by optimizing the bike’s settings.

Traction Control: Traction control systems help prevent wheel spin during acceleration, especially on slippery surfaces. This feature enhances stability and rider confidence.

Maintenance and Reliability:

How Do You Keep the M109R in Top Condition?

Proper maintenance ensures the Suzuki Boulevard M109R remains reliable and performs at its best.

motorcycleRegular Inspections:

Preventive Care:

Scheduled Maintenance: Follow the manufacturer’s recommended maintenance schedule for tasks like oil changes, filter replacements, and brake inspections. Regular maintenance prevents issues and prolongs the bike’s lifespan.

Component Checks: Regularly inspect key components like the chain, tires, brakes, and suspension for wear and tear. Addressing these issues early prevents more significant problems down the line.

Engine Care:

Optimal Performance:

Oil and Fluid Changes: Regular oil and fluid changes are crucial for engine health. Use high-quality motor oil and recommended fluids to ensure optimal performance and longevity.

Cooling System: Keep the cooling system in good condition by regularly checking coolant levels and ensuring there are no leaks or blockages. A well-maintained cooling system prevents overheating.

Tire and Brake Maintenance:

Safety and Performance:

Tire Inspection: Regularly check tire pressure and tread depth to ensure safe riding conditions and optimal handling. Replace worn tires promptly.

Brake System: Maintain the brake system by inspecting pads, discs, and fluid levels. Ensure the hydraulic system is free of air bubbles by bleeding the brakes as needed.

Storage Tips:

Preserving Condition:

Off-Season Storage: If storing the bike for an extended period, take precautions like using a fuel stabilizer, disconnecting the battery, and covering the motorcycle to protect it from dust and moisture.

Regular Start-Up: Start the motorcycle periodically during the off-season to keep the engine and other components in good condition.

Conclusion

The Suzuki Boulevard M109R stands out in the cruiser segment with its bold design, powerful V-twin engine, and high-performance capabilities. Its muscular appearance, attention to detail, and customizable options make it visually striking and personalized. The bike’s powerful engine and impressive performance metrics deliver an exhilarating riding experience, while the robust braking and suspension systems ensure control and safety in various conditions. Comfort and ergonomics are optimized for long rides, with features like a spacious seat, forward controls, and wind protection. Advanced safety and technology features like LED lighting, a digital instrument cluster, and traction control enhance rider confidence and safety. Proper maintenance, including regular inspections, engine care, and tire and brake maintenance, ensures the M109R remains reliable and performs at its best. By understanding these detailed aspects, riders can appreciate what makes the Suzuki Boulevard M109R a standout cruiser and enjoy its powerful, comfortable, and safe riding experience.

Posted in Motorcycles | Tagged , | Leave a comment

Motorcycle Tire Number Meaning: How Do You Ensure Safety?

Introduction:

Understanding the numbers and markings on motorcycle tires is crucial for selecting the right tires for your bike, ensuring safety, and optimizing performance. These numbers provide vital information about size, load capacity, speed rating, and more. This comprehensive guide explains how to read and interpret motorcycle tire numbers, enabling you to make informed decisions when purchasing tires.

motorcycle tire

Motorcycle Tire Number Meaning:

How Do You Ensure Safety?

Tire Size Markings:

What Do the Numbers and Letters on a Motorcycle Tire Indicate?

Motorcycle tires feature a series of numbers and letters indicating their size, capability, and performance characteristics. Understanding these markings helps ensure you choose the correct tire for your bike.

Basic Tire Size Formula:

Breaking Down the Code:

Example Code: A typical motorcycle tire code might look like 180/55ZR17 M/C (73W). Each segment of this code provides specific information about the tire’s dimensions and capabilities.

Width (180): The first number in the code (180) represents the tire’s width in millimeters, measured from sidewall to sidewall. Wider tires generally offer better grip and stability, particularly in corners.

Aspect Ratio (55): The second number (55) is the aspect ratio, expressed as a percentage. It’s the ratio of the tire’s height (from bead to tread) to its width. In this example, the tire’s height is 55% of its width. Lower aspect ratios, like 55, typically indicate sportier tires capable of better cornering performance.

Speed Rating and Type (ZR): The letters following the aspect ratio indicate the tire’s speed rating and type. “Z” is a common speed rating for high-performance tires, while “R” signifies that the tire is of radial construction. Radial tires typically offer better heat dissipation and ride comfort compared to bias-ply tires.

motorcycle tire

Rim Diameter (17): The number following the speed rating (17) indicates the diameter of the wheel rim in inches. This measurement ensures that the tire fits the wheel correctly.

Motorcycle (M/C): The abbreviation “M/C” indicates that the tire is specifically designed for motorcycles. This designation ensures compatibility with motorcycle wheel specifications.

Load and Speed Index (73W):

Detailed Performance Specs:

Load Index (73): The load index number (73) corresponds to the tire’s load-carrying capacity. Each index number has a corresponding load capacity in kilograms. For instance, a load index of 73 means the tire can support up to 365 kg (804 lbs). It’s important to choose a tire with an appropriate load index to match your bike’s requirements.

Speed Rating (W): The speed rating letter (W) indicates the maximum speed at which the tire can safely operate under its maximum load. In this case, a “W” rating means the tire can handle speeds up to 270 km/h (168 mph). Ensure the speed rating matches your riding style and typical speeds.

Types and Construction:

How do Different Tire Constructions Affect Performance?

Understanding the construction and type of motorcycle tires helps you choose the right tire for your riding conditions and style.

Radial vs. Bias-Ply:

Comparing Constructions:

Radial Tires: Radial tires feature layers of ply cords extending radially from the center of the tire. This construction allows for better heat dissipation, a smoother ride, and longer tread life. Radial tires are preferred for high-performance and touring motorcycles.

Bias-Ply Tires: Bias-ply tires have layers of ply cords crisscrossing diagonally, forming a sturdier structure. While they typically provide a stiffer ride and shorter tread life than radial tires, they can be more suitable for heavy-duty or off-road bikes due to their durability.

motorcycle tire

Tubeless vs. Tube-Type:

Internal Structure:

Tubeless Tires: Tubeless tires are designed without an inner tube. The air is held between the tire and the wheel rim, which is sealed to maintain air pressure. These tires often offer better heat distribution and are less prone to sudden deflation. They require a perfectly sealed rim surface to prevent leaks.

Tube-Type Tires: These tires use an inner tube to hold air within the tire. While they can be easier to repair in certain situations, they are generally heavier and can experience more rapid deflation if punctured. Tube-type tires are still common in off-road and classic bikes.

Tread Patterns:

How Do Different Tread Designs Impact Performance and Riding Conditions?

The tread pattern on a motorcycle tire affects traction, handling, and overall ride quality. Different designs are optimized for various riding conditions.

Performance Treads:

For High-Speed Stability:

Sport Tires: Sport tires have a slick or semi-slick tread pattern, maximizing the contact patch for better traction and handling at high speeds. They are ideal for sportbikes and high-performance motorcycles used on paved roads and racetracks.

Touring Tires: Touring tires feature a more pronounced tread pattern designed for long-distance rides. They offer a good balance between traction, durability, and comfort, making them suitable for road use in various weather conditions.

Off-Road Treads:

Optimal Off-Road Traction:

Knobby Tires: Knobby tires have large, spaced-out lugs that dig into loose surfaces like dirt, mud, and gravel. These tires provide excellent traction and stability for off-road adventures, making them ideal for motocross and dirt bikes.

Dual-Sport Tires: These tires are designed for both on-road and off-road use. They feature a hybrid tread pattern that provides a compromise between off-road traction and on-road stability. Dual-sport tires are suitable for adventure and dual-sport motorcycles.

Wet Weather Treads:

Ensuring Safety in Rain:

Rain Tires: Also known as wet tires, these have deep, wide grooves designed to channel water away from the contact patch, reducing the risk of hydroplaning. They provide enhanced grip on wet surfaces and are crucial for riding in rainy conditions.

All-Weather Tires: These tires offer a tread pattern designed to perform well in a variety of weather conditions, including rain and light snow. They provide good overall performance and safety for year-round use.

Date Code:

How Can You Determine the Age of a Motorcycle Tire?

Understanding how to read the date code on a motorcycle tire is important for assessing its age and remaining lifespan.

DOT Code Interpretation:

Finding the Date:

Location: The DOT (Department of Transportation) code is typically found on the sidewall of the tire. It includes a string of letters and numbers that provide manufacturing information.

motorcycle tire

Reading the Date Code:

Last Four Digits: The last four digits of the DOT code indicate the week and year of manufacture. For example, a code ending in 1219 means the tire was manufactured in the 12th week of 2019.

Assessing Tire Age:

Safety Considerations:

Age Limit: Even if a tire appears to be in good condition, it’s recommended to replace it after 5-6 years from the date of manufacture, as the rubber compounds degrade over time, affecting safety and performance.

Visual Inspection: Perform regular visual inspections for signs of aging, such as cracks, dry rot, or hardening of the rubber. These signs indicate that the tire’s integrity is compromised and requires replacement.

motorcycle tire

Load and Speed Ratings:

How Do They Affect Tire Selection and Performance?

Selecting tires with appropriate load and speed ratings ensures that your motorcycle performs safely and efficiently.

Understanding Load Ratings:

Capacity Knowledge:

Load Index Values: Each load index number corresponds to a specific load-carrying capacity. For instance, a load index of 73 means the tire can support up to 365 kg (804 lbs). Ensure the load rating matches or exceeds the requirements for your motorcycle, especially if you regularly carry passengers or heavy loads.

Speed Rating Insights:

Matching Riding Style:

Speed Ratings: The speed rating letter indicates the maximum speed the tire can sustain safely under its maximum load capacity. Common ratings include H (up to 210 km/h or 130 mph) and W (up to 270 km/h or 168 mph). Choose a speed rating that aligns with your typical riding speeds for safety and performance.

Conclusion

Decoding motorcycle tire numbers and understanding the related markings is essential for selecting the right tires, ensuring safety, and optimizing performance. By knowing how to read size, type, tread pattern, load and speed ratings, and date codes, you can make informed decisions that match your riding style and conditions. Regular maintenance, proper installation, and adherence to manufacturer guidelines further ensure that your tires provide reliable performance and safety on the road. Investing time and attention in understanding and maintaining your motorcycle tires pays off in a smoother, safer, and more enjoyable riding experience.

Posted in Motorcycle equipment, Motorcycles | Tagged , | Leave a comment

Ladies Motorcycle Boots: Essential for Female Riders

Introduction:

Motorcycling is as much about safety and functionality as it is about style. Women’s motorcycle boots are designed to meet these needs by offering protection, comfort, and an aesthetic appeal. This guide explores the features, types, and considerations for choosing the right motorcycle boots for women, as well as tips for maintenance and care.

ladies motorcycle boots

Ladies Motorcycle Boots:

Why Are They Essential for Female Riders?

Protection:

How Do Motorcycle Boots Enhance Rider Safety?

Safety is paramount when it comes to motorcycling, and boots play a critical role in ensuring a rider’s well-being.

Ankle Support:

Prevent Injuries:

Stability and Support: Ladies motorcycle boots are designed to provide robust ankle support, minimizing the risk of sprains and fractures. The reinforced structures stabilize the ankle, offering better control of the motorcycle and protecting against twisting injuries during sudden movements or falls.

Impact Resistance:

Armor and Padding:

Shock Absorption: High-quality motorcycle boots incorporate impact-resistant materials such as TPU (Thermoplastic Polyurethane) reinforcements in critical areas like the toes, heels, and ankles. This padding absorbs shocks and protects the feet from injuries caused by debris or accidents.

Abrasion Resistance:

Durable Materials:

Protection Against Scrapes: The durable materials used in these boots, such as leather and specialized textiles, provide excellent abrasion resistance. This characteristic is vital during falls, as it minimizes the severity of scrapes that can occur when the foot skids across the pavement.ç

ladies motorcycle boots

Weather Protection:

Waterproof and Insulated:

Stay Dry and Warm: Many ladies motorcycle boots come equipped with waterproof membranes to keep feet dry during wet rides. Additionally, insulated linings help retain warmth in colder conditions, ensuring comfort without compromising on safety.

Design:

What Features Make Ladies Motorcycle Boots Distinctive?

Design elements specifically tailored for women riders set these boots apart from their male counterparts.

Stylish Appearance:

Form and Function:

Attractive Designs: Ladies motorcycle boots blend functionality with style, featuring sleek designs and feminine touches such as varied color options, elegant stitching, and subtle embellishments. This attention to aesthetics allows female riders to express their personal style while staying protected.

Comfort and Fit:

Ergonomic Design:

Customized Fit: These boots are ergonomically designed to accommodate the specific shape and contours of a woman’s foot, offering a better fit and enhanced comfort. Adjustable features such as buckles, laces, and Velcro straps allow for a customized fit that improves both security and comfort during rides.

Easy Wear:

Convenient Closures:

Quick Access: Ladies motorcycle boots often include convenient closure systems like side zippers or quick-release buckles, making them easy to put on and take off. This practicality is particularly beneficial for those who need to transition quickly between riding and other activities.

Versatility:

Multiple Uses:

Everyday Wear: Many designs are versatile enough to be worn both on and off the bike, making them suitable for daily wear. This means riders do not have to compromise between wearing protective motorcycle gear and maintaining a fashionable appearance.

ladies motorcycle boots

Types:

What Are the Varieties of Women’s Motorcycle Boots?

Various types of ladies motorcycle boots cater to different riding styles and preferences.

Touring Boots:

Long-Distance Comfort:

Extended Protection: Touring boots are designed for long-distance rides, emphasizing comfort and weather resistance. They typically feature high shafts for added leg protection, waterproofing, and ample padding to ensure sustained comfort over extended periods.

Sport Boots:

High-Performance Riding:

Speed and Agility: Sport boots cater to riders who prefer high-speed and performance-oriented riding. These boots offer maximum protection with features like reinforced shanks, sliders, and extensive armor, all while providing a snug fit to enhance control and agility.

Adventure Boots:

Tackle Diverse Terrains:

Versatile Design: Adventure or dual-sport boots are built for versatility, accommodating both on-road and off-road conditions. They provide robust protection and support, with features like reinforced outsoles for better traction on uneven ground and waterproofing for all-weather use.

Cruiser Boots:

Casual and Stylish:

Relaxed Comfort: Cruiser boots are designed for relaxed rides and often feature a more casual, stylish appearance. They prioritize comfort and ease of use, making them ideal for riders who enjoy both short rides and longer journeys with a touch of classic style.

Considerations:

What Should You Look for When Choosing Ladies Motorcycle Boots?

Several key factors should guide your choice to ensure the best protection, comfort, and style.

Material Quality:

Durability and Comfort:

Leather and Synthetics: Opt for boots made from high-quality materials such as genuine leather or advanced synthetics. Quality materials ensure durability, comfort, and adequate protection.

Fit and Comfort:

Try Before You Buy:

Perfect Fit: Always try on boots to ensure they fit properly. A poor fit can compromise safety and comfort. Pay attention to width, arch support, and overall snugness. Consider trying them on with the type of socks you would typically wear while riding.

Protection Features:

Safety First:

Check for Reinforcements: Look for boots that offer ample protective features such as reinforced toes and heels, ankle support, and impact-resistant armor. Ensure that these elements do not compromise the comfort and flexibility of the boots.

Weather Resistance:

Adapt to Conditions:

Waterproof and Insulated Options: If you ride in varying weather conditions, choose boots with waterproof and breathable membranes. Consider insulated options for colder climates to maintain warmth without sacrificing mobility.

ladies motorcycle boots

Sole Design:

Grip and Stability:

Non-Slip Soles: Examine the sole design for adequate grip and stability. Non-slip, oil-resistant soles are essential for maintaining traction on both the bike and slippery surfaces.

Style and Appearance:

Express Yourself:

Aesthetics Matter: Select a pair that matches your style preferences while ensuring they meet all safety and comfort criteria. Modern ladies motorcycle boots come in various designs, so find the right balance between aesthetics and functionality.

Maintenance:

How Do You Care for Ladies Motorcycle Boots?

Proper maintenance extends the lifespan of your boots and ensures they remain effective and attractive.

Regular Cleaning:

Keep Them Fresh:

Dust and Dirt Removal: Regularly clean your boots to remove dust and dirt. Use a damp cloth for routine cleaning and a mild soap solution for stubborn stains. Ensure the boots are completely dry before storing them to prevent mold and mildew.

Conditioning and Waterproofing:

Maintain Flexibility:

Leather Care: For leather boots, apply a leather conditioner periodically to maintain flexibility and prevent cracking. Reapply waterproofing treatments as needed to ensure the boots remain impervious to water over time.

Storing Properly:

Avoid Deformation:

Store Right: Store your boots in a cool, dry place away from direct sunlight. Use boot trees or stuff them with newspaper to maintain their shape and prevent creases. Avoid folding or bending them excessively during storage.

Checking Wear and Tear:

Inspect Regularly:

**Preventative Maintenance:: Regularly check for signs of wear and tear, such as worn-out soles, frayed stitching, or diminished padding. Address any issues promptly to prevent them from worsening and compromising the safety features of the boots.

ladies motorcycle boots

Brand and Model Recommendations:

What Are Some Trusted Options for Women’s Motorcycle Boots?

Several brands are renowned for their quality and reliability in producing ladies motorcycle boots.

Alpinestars Stella SMX-6 V2:

Track and Road Versatility:

High Performance: The Alpinestars Stella SMX-6 V2 boots offer excellent protection and comfort, suitable for both track and road use. With features such as TPU ankle reinforcement, integrated shin protectors, and replaceable toe sliders, they are a top choice for performance riders.

Dainese Aurora D-WP:

Weatherproof Comfort:

All-Weather Ready: The Dainese Aurora D-WP boots are designed with a focus on all-weather use, featuring a waterproof membrane and a durable leather construction. These boots provide a balance of protection, comfort, and style, ideal for both commuting and touring.

Sidi Gavia Gore-Tex:

Ultimate Protection:

Premium Materials: The Sidi Gavia Gore-Tex boots are known for their top-tier protection and comfort. Made with a Gore-Tex waterproof membrane and reinforced with TPU, these boots ensure maximum safety and durability in various riding conditions.

TCX Lady Blend Waterproof Boots:

Stylish and Functional:

Classic Look: The TCX Lady Blend Waterproof boots combine classic style with modern functionality. Their full-grain leather construction, waterproof lining, and reinforced toe and heel areas make them a great option for riders who value both aesthetics and performance.

Conclusion

Ladies motorcycle boots are an essential part of a female rider’s gear, offering unparalleled protection, comfort, and style. From providing robust ankle support and impact resistance to incorporating stylish designs and practical features, these boots cater to the unique needs of women riders. Various types of boots, such as touring, sport, adventure, and cruiser boots, ensure that every rider can find the perfect pair for their specific riding style and preferences. When choosing a pair, consider factors like fit, material quality, protection features, and weather resistance to ensure you get the best value and performance. Proper maintenance, including regular cleaning and conditioning, will help extend the lifespan of your boots, keeping them effective and looking great for years to come. With trusted brands like Alpinestars, Dainese, Sidi, and TCX offering high-quality options, finding the right ladies motorcycle boots to match your needs and style is easier than ever.

Posted in Motorcycle equipment, Motorcycles | Tagged , | Leave a comment