Mastering Motorcycle Shifting: A Comprehensive Guide

Introduction

Learning to shift gears is an essential skill for any motorcycle rider. Proper shifting techniques ensure smooth acceleration, efficient power transfer, and overall control of the bike. In this comprehensive guide, we will delve into the intricacies of motorcycle shifting, exploring the step-by-step process and highlighting key considerations. From the basics of clutch control to understanding gear engagement and mastering shifting techniques, this guide will provide specific details to help you become proficient in shifting gears on your motorcycle.
motorcycle

Mastering Motorcycle Shifting: A Comprehensive Guide

I. Understanding the Basic Components

  1. Clutch Lever:

  • The clutch lever is located on the left handlebar of the motorcycle. It engages and disengages the clutch, allowing for gear changes. Pulling the lever in fully disengages the clutch, while releasing it gradually engages the clutch.
  1. Gear Shift Lever:

  • The gear shift lever, also known as the shift pedal, is located on the left side of the motorcycle, typically positioned in front of the left foot peg. It is used to shift up or down through the gears.
motorcycle

II. Shifting Sequence: From Neutral to Higher Gears

  1. Starting in Neutral:

  • The neutral gear is the resting position between gears and is denoted by the “N” on the gear indicator. Start your motorcycle in neutral by ensuring the gear shift lever is in the middle position (vertical). With the clutch disengaged, start the engine.
  1. Engaging First Gear:

  • With the engine running and the clutch lever pulled in, gently press down on the gear shift lever with your left foot to engage first gear. The gear shift lever will move downward from its neutral position. Keep your left foot on the shift lever to prevent accidental shifts while you prepare to release the clutch.
  1. Smooth Release of the Clutch:

  • As you gradually release the clutch lever, you will feel the friction point—the point at which the clutch engages and the motorcycle starts to move forward. Release the clutch slowly while simultaneously applying slight throttle to avoid stalling the engine.
  1. Shifting to Higher Gears:

  • Once the motorcycle is in motion, gradually increase speed before shifting to a higher gear. To shift up, use your left foot to press firmly on the gear shift lever, lifting it upward. This will move the lever into the next gear position. Continue adjusting the throttle and releasing the clutch smoothly as you shift through the gears.

III. Shifting Down: Lower Gears and Braking Techniques

  1. Applying Brakes:

  • When preparing to shift to a lower gear, use the motorcycle’s brakes to decrease speed gradually. Applying both the front and rear brakes helps balance the motorcycle and ensures smooth gear changes.
  1. Downshifting Process:

  • To downshift, release the throttle and pull the clutch lever in fully while simultaneously pressing down on the gear shift lever with your left foot. This will move the lever into a lower gear position. With the clutch lever still held in, slowly release the clutch while adjusting throttle to match the engine speed.
  1. Rev-Matching Technique:

  • Advanced riders often practice a rev-matching technique during downshifts to ensure smooth gear engagement and prevent rear-wheel instability. Rev-matching involves blipping the throttle and matching the engine speed to the gear and road speed while the clutch is disengaged. This technique requires practice and helps minimize harsh engagement during downshifts.
motorcycle

IV. Shifting Technique Considerations

  1. Timing of Shifting:

  • Proper timing is crucial for smooth gear changes. Aim to shift gears when the engine’s RPM (revolutions per minute) is within the ideal power range. This range varies for each motorcycle model and is often indicated in the owner’s manual. Shifting within this range maximizes acceleration and prevents engine strain.
  1. Smooth and Predictable Inputs:

  • Applying smooth and predictable inputs is essential for effective shifting. Gradually release the clutch while adjusting the throttle to match the engine speed. Avoid sudden clutch releases or throttle adjustments, as they can lead to jerky gear engagement or loss of control.
  1. Matching Road Speed:

  • When shifting gears, it’s important to match the road speed with the gear selection. Lower gears provide more torque and are suitable for lower speeds, while higher gears are intended for cruising at higher speeds. Properly matching the road speed to the gear improves engine performance, fuel efficiency, and overall riding comfort.

V. Practicing and Refining Your Shifting Technique

  1. Familiarize Yourself with the Bike:

  • Each motorcycle has its unique shifting characteristics, so spend time getting acquainted with your specific motorcycle. Practice shifting gears in a controlled environment to familiarize yourself with the feel and positioning of the gear shift lever and clutch.
  1. Start with Low Gear Changes:

  • When first learning to shift, focus on shifting between lower gears. This allows you to become comfortable with clutch control, throttle coordination, and the overall mechanics of shifting.
  1. Gradually Progress to Higher Gears:

  • As your confidence and skill improve, practice shifting to higher gears. Gradually increase your speed and gain a better understanding of the ideal engine RPM for each gear.
  1. Ride in Different Riding Conditions:

  • To further refine your shifting technique, practice riding in a variety of conditions, such as uphill and downhill gradients, stop-and-go traffic, and varying road surfaces. Each scenario will present different challenges that will help you develop versatility in your shifting skills.
motorcycle

VI. Safety Considerations and Additional Tips

  1. Wear Appropriate Protective Gear:

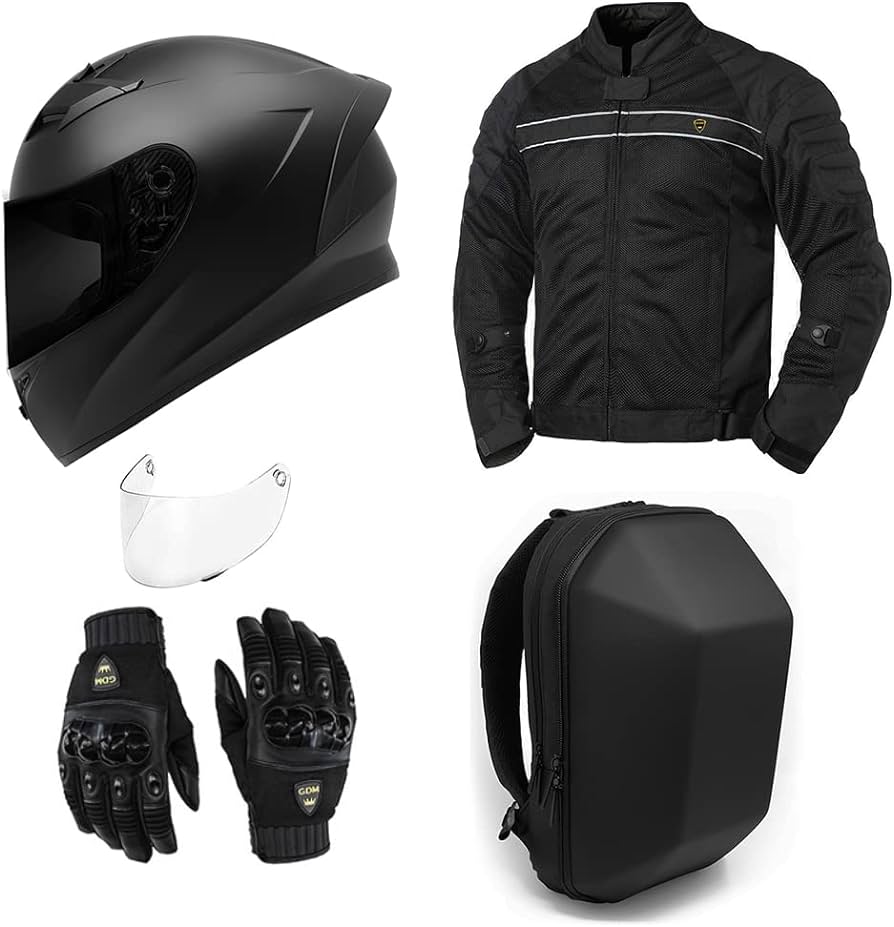
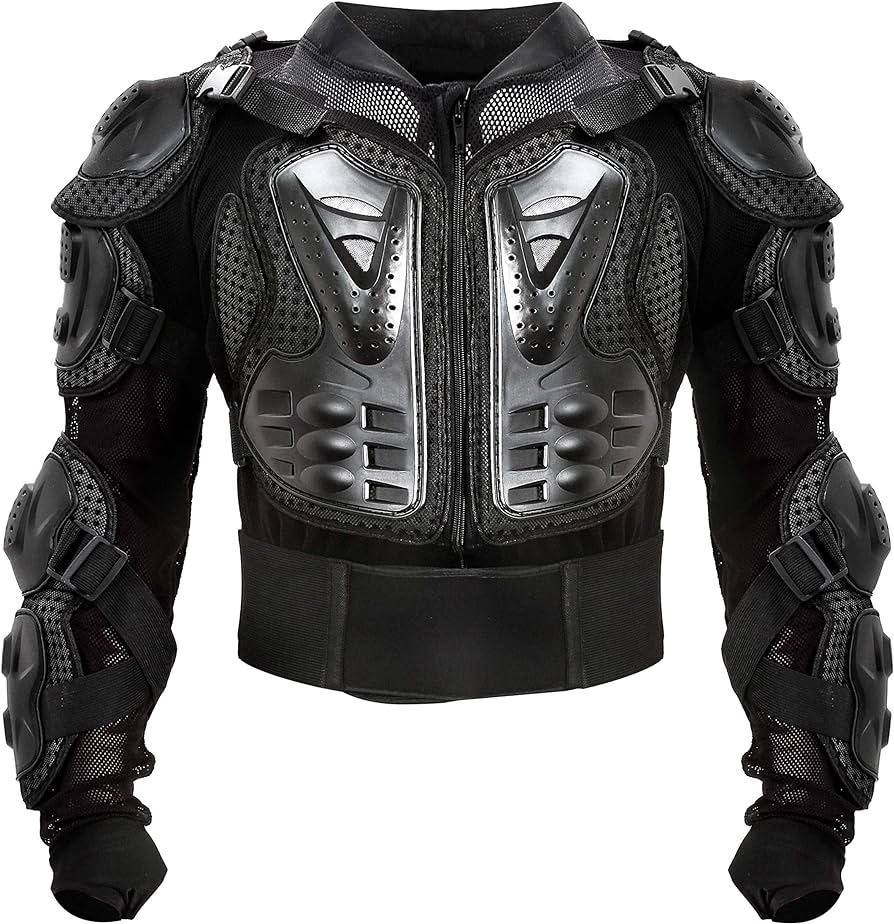
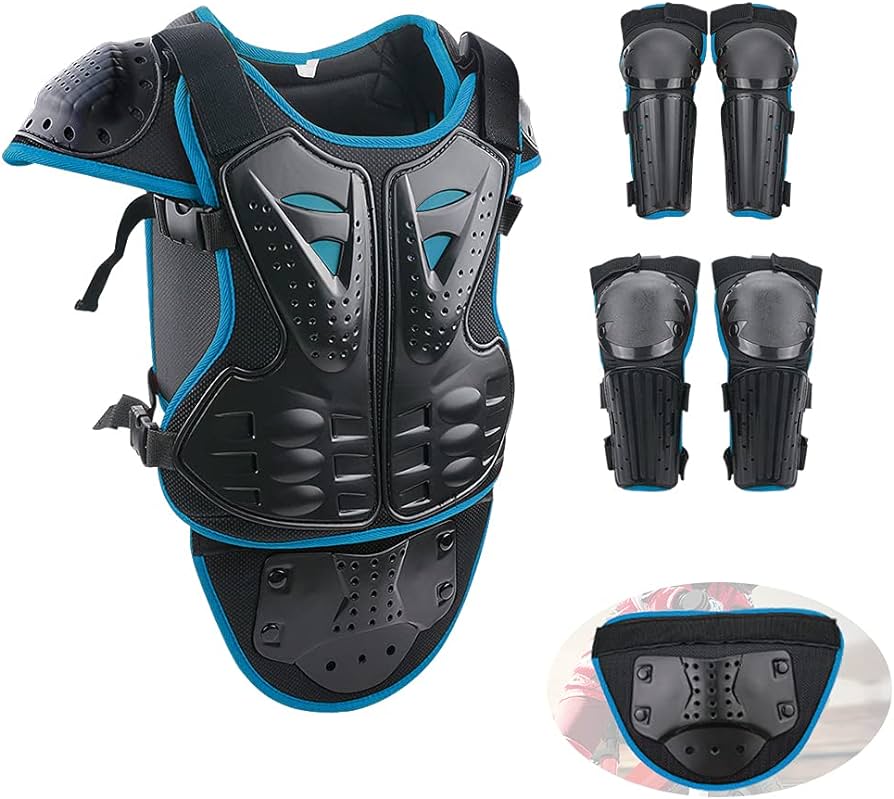
  • Prioritize your safety by wearing proper protective gear, including a helmet, gloves, riding jacket, pants, and boots. Protective gear provides essential protection in the event of an accident or fall.
  1. Stay Focused and Alert:

  • Concentration and situational awareness are vital when riding a motorcycle. Stay focused on the road ahead, observe traffic conditions, and anticipate potential hazards to ensure a safe riding experience.
  1. Use Your Clutch Wisely:

  • While learning to shift gears, it’s important to use the clutch effectively. Practice finding the friction point and gradually releasing the clutch to smoothly engage the gear. With time and practice, you will develop a feel for the clutch and become more proficient in gear changes.
  1. Maintain a Regular Maintenance Schedule:

  • Ensure your motorcycle is well-maintained by following the manufacturer’s recommended maintenance schedule. Regular inspections of the clutch, gear shift linkage, and transmission will help prevent any issues that may affect shifting performance.
motorcycle

VII. Conclusion: Mastering the Art of Motorcycle Shifting

Mastering motorcycle shifting is a fundamental skill that contributes to a safe and enjoyable riding experience. By understanding the basics of clutch control and gear engagement, and by practicing smooth shifting techniques, you can confidently shift gears on your motorcycle, enhancing your control and overall riding comfort.

Remember to focus on timing, use smooth and predictable inputs, and match the road speed to the appropriate gear selection. Refine your shifting skills through regular practice and exposure to different riding conditions.

With time, patience, and dedication to honing your shifting technique, you will become a proficient rider, seamlessly transitioning through gears and navigating various terrains with confidence and ease. Enjoy the journey and happy shifting!

Posted in Motorcycle Maintenance, Motorcycles | Tagged , | Leave a comment

Preparing Your Motorcycle for Winter: A Guide to Winterizing

Introduction

As the winter months approach, it’s crucial to properly winterize your motorcycle to ensure its optimal condition and longevity. Cold temperatures, moisture, and road salt can all cause damage if your motorcycle is not adequately prepared. In this comprehensive guide, we will explore the steps to effectively winterize your motorcycle. From fuel stabilization and maintenance to storage and protection, we will provide specific instructions to help you safeguard your motorcycle during the winter season. Get ready to preserve your investment and be ready to hit the road again when spring arrives.

motorcycle

Preparing Your Motorcycle for Winter: A Comprehensive Guide to Winterizing

I. Perform a Thorough Inspection

Conduct a thorough inspection of your motorcycle before winterizing:

  1. Check Fluid Levels:

  • Inspect the oil, coolant, and brake fluid levels. If any fluids require topping up or replacement, do so according to the manufacturer’s guidelines.
  1. Assess Brake Pads and Fluid:

  • Check the brake pads for wear and replace them if necessary. Consider bleeding the brake lines or having a professional service performed to ensure the brake system is in optimal condition.
  1. Inspect Tires:

  • Examine your tires for any signs of wear or damage. Ensure they have adequate tread depth and proper inflation. Replace any worn or damaged tires before storing your motorcycle for winter.
  1. Test Lights and Electrical Systems:

  • Check that all lights, indicators, and electrical systems are functioning correctly. Replace any faulty bulbs or address electrical issues before winterizing.

motorcycle

II. Fuel Stabilization

Prevent fuel-related issues during winter storage by stabilizing the fuel:

  1. Add Fuel Stabilizer:

  • Pour a high-quality fuel stabilizer into your motorcycle’s gas tank according to the manufacturer’s recommended dosage. This will prevent the fuel from breaking down and causing issues such as clogged fuel lines or carburetor problems.
  1. Run the Engine:

  • Start your motorcycle and let it run for a few minutes to allow the treated fuel to circulate throughout the system.
  1. Ride to Distribute Treated Fuel:

  • Take a short ride to further distribute the treated fuel and ensure it reaches the engine and fuel lines.
  1. Turn Off Fuel Supply:

  • Locate the fuel shut-off valve, typically found near the fuel tank or on the fuel line, and turn it off to prevent fuel from flowing into the carburetor or fuel injection system.

III. Maintenance and Lubrication

Perform maintenance tasks and ensure proper lubrication to protect your motorcycle over the winter:

  1. Change the Oil:

  • Change the engine oil and oil filter before winter storage to remove any contaminants that could potentially cause damage. Fresh oil will also better protect internal engine components during storage.
  1. Lubricate Moving Parts:

  • Apply lubricant to key components such as the drive chain, throttle, cables, and pivot points. This will prevent corrosion and ensure smooth operation when you start your motorcycle again.
  1. Clean and Protect the Airbox:

  • Remove the air filter, clean it if necessary, and reapply any necessary filter oil or replace it if needed. This will help protect your engine from dust, debris, and moisture during storage.
  1. Spray Rust Inhibitor:

  • Use a rust inhibitor or motorcycle-specific protectant spray to coat metal surfaces, such as the exhaust system and exposed areas susceptible to corrosion. Wipe away any excess spray to ensure an even application.

motorcycle

IV. Battery Maintenance

Properly preserve and maintain your motorcycle battery during winter storage:

  1. Disconnect the Battery:

  • Disconnect the battery cables, starting with the negative terminal, to prevent any unintentional electrical drainage during storage.
  1. Clean Battery Terminals:

  • Thoroughly clean the battery terminals and cables using a wire brush and a mixture of baking soda and water. Rinse with clean water and dry before reattaching.
  1. Charge the Battery:

  • If you have a maintenance charger or battery tender, connect it to your motorcycle’s battery and follow the manufacturer’s instructions for charging during storage. This will help maintain the battery’s charge level and prolong its lifespan.
  1. Store in a Safe Location:

  • Find a cool, dry, and well-ventilated location to store your motorcycle battery. Avoid placing it directly on concrete, as this can cause discharge. Use a battery tender or maintainer as recommended during storage.

V. Proper Storage

Store your motorcycle correctly during the winter season to protect it from the elements:

  1. Choose an Appropriate Location:

  • Select a location for winter storage that is dry, cool, and protected from extreme temperatures and direct sunlight. Consider a dedicated motorcycle storage area, a garage, or a climate-controlled storage facility if available.
  1. Elevate the Motorcycle:

  • Elevate your motorcycle off the ground using stands or a center stand. This helps relieve pressure on the tires and prevents flat spots from developing during prolonged periods of inactivity.
  1. Cover Your Motorcycle:

  • Use a breathable motorcycle cover specifically designed for indoor storage. Ensure the motorcycle is clean and dry before covering it to prevent moisture buildup.
  1. Maintain Ventilation:

  • Provide proper ventilation in the storage area to prevent condensation and moisture buildup. If needed, use a dehumidifier or moisture-absorbing products to maintain ideal humidity levels.

motorcycle

VI. Check Periodically

Regularly check on your motorcycle during the winter months to ensure its well-being:

  1. Inspect for Moisture:

  • Periodically inspect your motorcycle for signs of moisture or condensation. Wipe away any moisture and ensure the storage area remains dry.
  1. Check Tire Pressure:

  • Check the tire pressure occasionally and adjust as needed to maintain the proper inflation level.
  1. Charge the Battery:

  • If you notice a drop in battery voltage, recharge it using a battery tender or maintainer as recommended.
  1. Prevent Pest Infestations:

  • Keep an eye out for signs of pests, such as rodents or insects, that might seek shelter in your motorcycle during winter storage. Use appropriate repellents or traps to prevent infestations.

VII. Spring Startup Preparation

Prepare your motorcycle for the spring season with these essential steps:

  1. Fuel System Check:

  • Inspect the fuel system for any signs of degradation or blockages. If necessary, replace fuel lines, filters, or clean the carburetor or fuel injectors before attempting to start your motorcycle.
  1. Battery Reinstallation:

  • Reconnect the charged battery, ensuring the correct polarity, and secure the cables tightly. Double-check the battery’s voltage prior to reinstallation.
  1. Check Fluid Levels:

  • Once your motorcycle is ready to start, check and top up fluids as needed, including engine oil, coolant, and brake fluid.
  1. Test Ride Responsibly:

  • Before embarking on a full ride, take your motorcycle for a short test ride in a safe and controlled environment. Be attentive to any unusual sounds, vibrations, or handling issues that may require further attention.

motorcycle

VIII. Conclusion: Safeguard Your Motorcycle for Winter

By following these comprehensive steps, you can effectively winterize and protect your motorcycle during the winter months. Proper fuel stabilization, maintenance, lubrication, battery care, and storage ensure that your motorcycle remains in optimal condition and ready for the road when spring arrives.

Invest the time and effort to prepare your motorcycle for winter properly, and you can enjoy the peace of mind that comes from knowing your motorcycle is protected from potential damage caused by harsh weather conditions. When the warmer seasons return, you’ll be able to hit the road with confidence, knowing your motorcycle is in great shape and ready for new adventures.

Posted in Motorcycle Maintenance, Motorcycles | Tagged , | Leave a comment

Ride in Style: Exploring the Best Motorcycle Riding Boots

Introduction

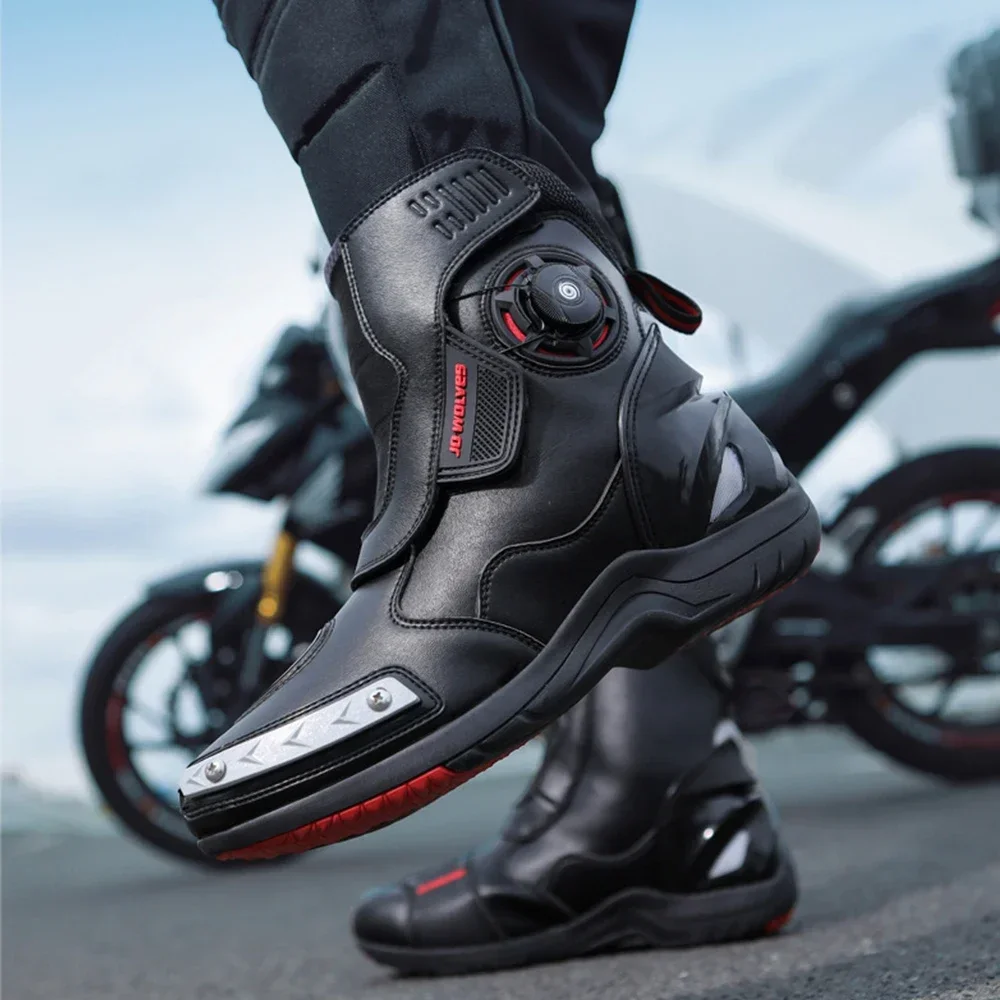
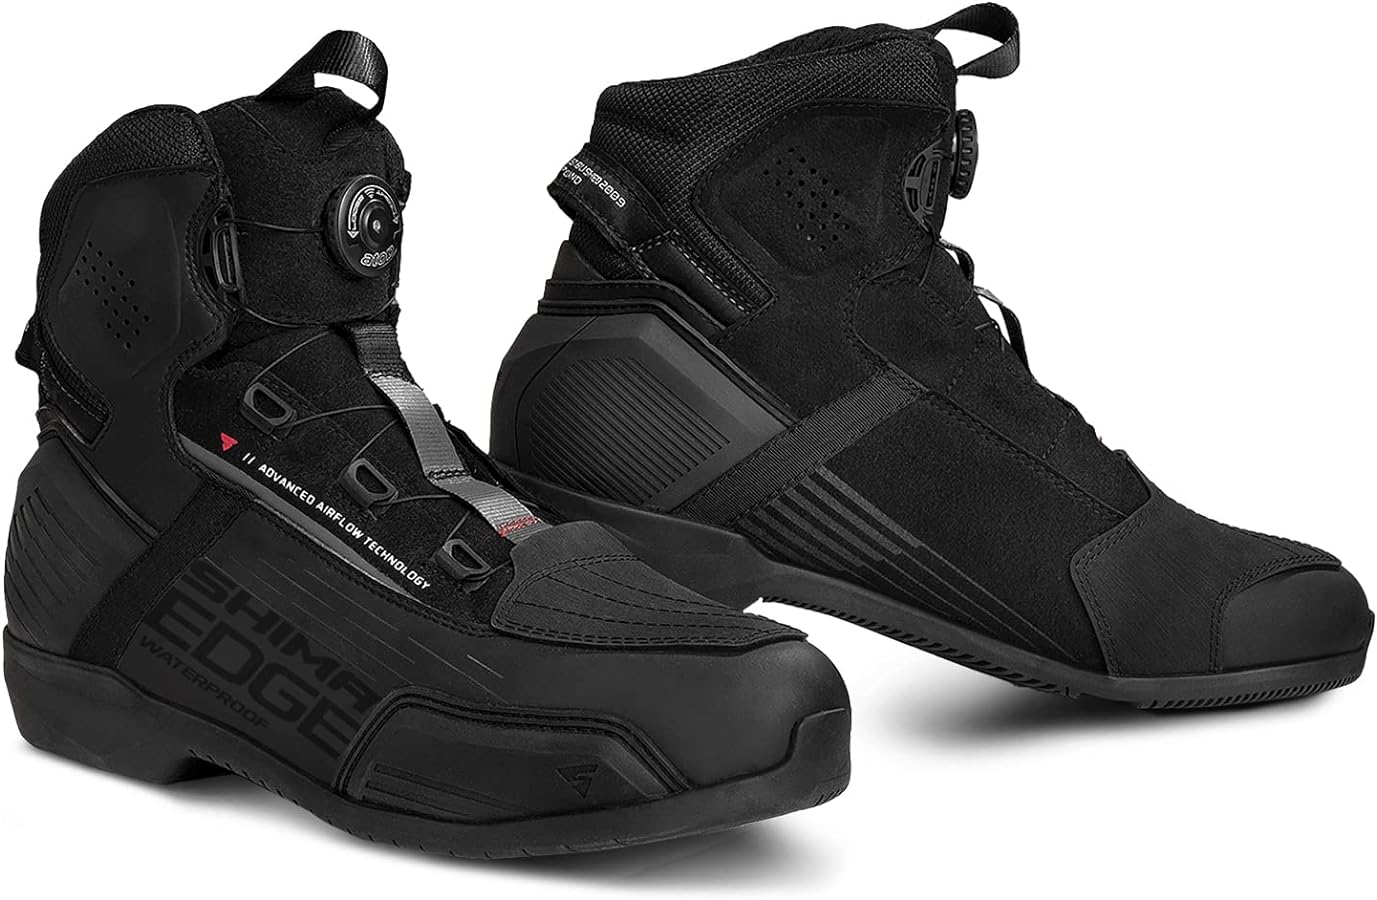
Choosing the right motorcycle riding boots is essential for ensuring both style and safety while on the road. A well-designed pair of motorcycle boots can provide protection for your feet, ankles, and lower legs, as well as enhance your riding experience. In this comprehensive guide, we will explore the best motorcycle riding boots available on the market. From their protective features and material construction to their comfort and style, we will provide detailed information to help you make an informed decision. Get ready to gear up with the best motorcycle riding boots for ultimate riding enjoyment.

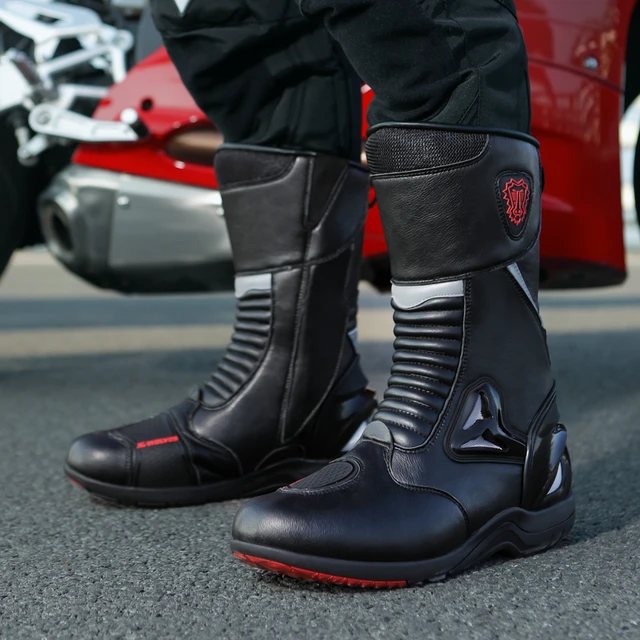
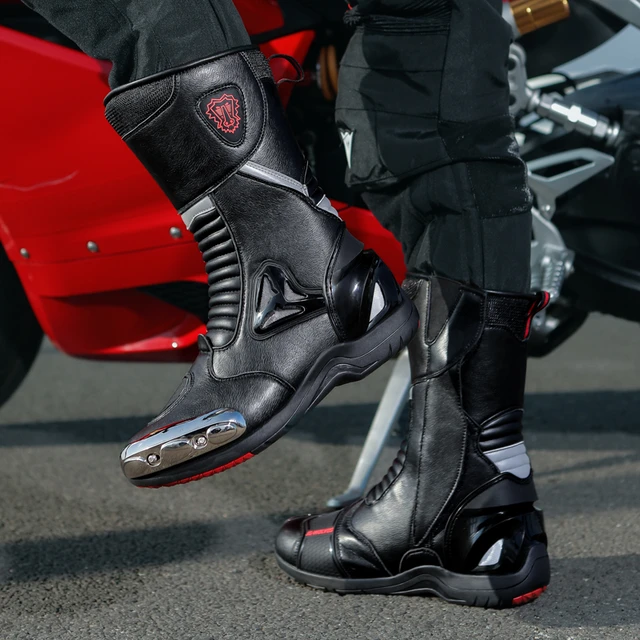
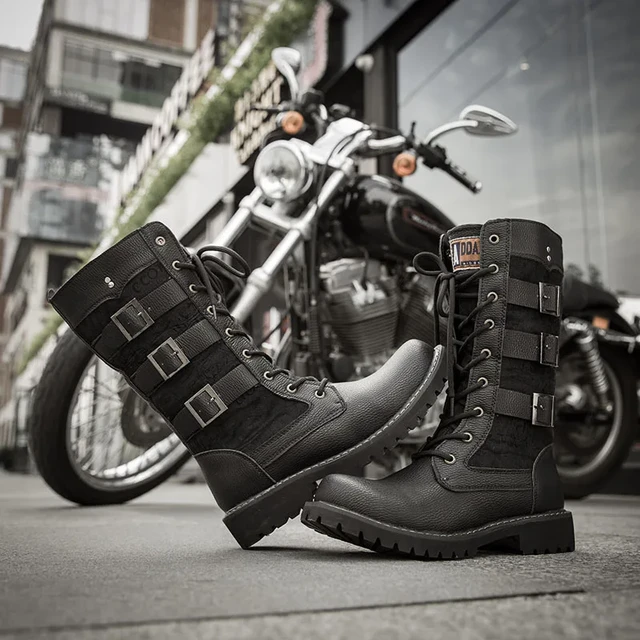
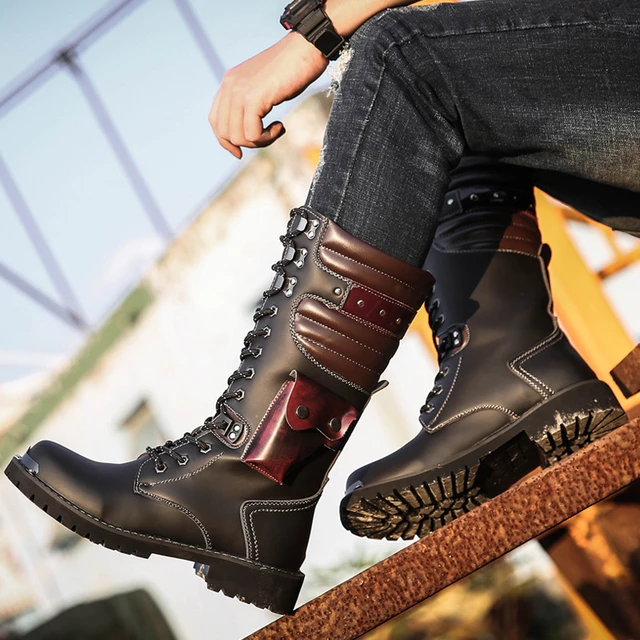
motorcycle boots

Ride in Style and Protection: Exploring the Best Motorcycle Riding Boots

I. Importance of Motorcycle Riding Boots

Discover the significance of motorcycle riding boots and why they are an essential part of your riding gear:

  1. Protection:

  • Motorcycle riding boots offer crucial protection for your feet, ankles, and lower legs. They are designed to withstand impact, protect against abrasion, and provide stability during riding.
  1. Grip and Control:

  • The grip provided by motorcycle riding boots ensures better control over the bike’s foot controls. This enhances your riding experience and contributes to safer maneuvering on the road.
  1. Weather Resistance:

  • Motorcycle boots are typically weather-resistant and constructed to withstand various conditions, such as rain, mud, and wind. They keep your feet dry and maintain comfort, regardless of the weather.
  1. Style and Aesthetics:

  • Motorcycle boots come in a variety of styles, from classic to modern designs. They add a touch of personality to your riding gear, allowing you to ride in style and express your unique taste.

motorcycle boots

II. Protective Features

Explore the protective features to look for in the best motorcycle riding boots:

  1. Reinforced Toe and Heel:

  • The best motorcycle boots often feature reinforced toe and heel areas. These reinforcement elements provide added protection against impact, ensuring the safety of your feet in case of an accident or collision.
  1. Ankle and Shin Protection:

  • Look for boots that offer ample ankle and shin protection. This can include features such as built-in ankle armor, reinforced padding, or externally placed hard-shell protectors.
  1. Abrasion Resistance:

  • Excellent motorcycle boots are constructed using durable materials such as leather or synthetic materials designed to resist abrasion. This protects your feet and lower legs in the event of a slide or fall.
  1. Shin Guards:

  • Some high-quality motorcycle boots feature integrated shin guards. These additional protective elements offer superior protection against potential impacts or injury to the shin area.

III. Material Construction

Consider different materials used in the construction of motorcycle riding boots:

  1. Leather:

  • Leather is a popular material choice for motorcycle boots due to its durability, flexibility, and natural resistance to abrasion. Leather boots offer excellent protection and can often be repaired if damaged.
  1. Synthetic Materials:

  • Motorcycle boots made of synthetic materials, such as synthetic leather or textile fabrics, offer similar levels of protection as leather boots. They are typically lighter in weight, more breathable, and often more affordable.
  1. Waterproofing:

  • Look for waterproof or water-resistant features in motorcycle boots. Many boots incorporate materials and treatments that keep your feet dry during wet weather conditions, adding an extra layer of comfort and convenience.

motorcycle boots

IV. Comfort and Fit

Ensure maximum comfort and a precise fit for your motorcycle riding boots:

  1. Ankle Support:

  • The best motorcycle boots provide adequate ankle support to prevent sprains or injuries. Look for boots with padded or cushioned ankle collars and adjustable straps for better stability.
  1. Inner Lining:

  • Consider boots with a comfortable inner lining, such as breathable mesh or moisture-wicking materials. These linings help keep your feet cool, dry, and odor-free during long rides.
  1. Arch and Footbed Support:

  • Opt for boots with proper arch and footbed support. This helps reduce fatigue and discomfort, allowing you to ride comfortably for extended periods.
  1. Sizing and Adjustment:

  • Proper fit is crucial for comfort and safety. Ensure that the boots you choose offer adjustable closures, such as laces, buckles, or Velcro straps, to achieve a secure and customized fit.

motorcycle boots

V. Style and Design

Discover different styles and designs available in motorcycle riding boots:

  1. Classic Heritage Style:

  • Classic heritage-style motorcycle boots often feature a timeless design with rugged leather construction, buckles, and lace-up closures. These boots offer iconic style and are a popular choice among riders.
  1. Sport or Racing Boot:

  • Sport or racing boots are designed for high-performance riding. They provide excellent protection and often feature streamlined designs, reinforced areas, and advanced closure systems for a secure fit.
  1. Adventure or Touring Boot:

  • Adventure or touring boots offer a balance between performance and comfort. They are designed for long rides and varying terrains, providing protection, support, and extended comfort for riders exploring new destinations.
  1. Casual/Urban Style:

  • Casual or urban-style motorcycle boots blend functionality and fashion for riders who value comfort and versatility. These boots often resemble everyday footwear while incorporating protective features suitable for riding.

VI. Research and Reviews

Conduct research and read reviews to make an informed decision:

  1. Manufacturer Websites:

  • Visit the websites of established motorcycle gear manufacturers to explore their range of riding boots. Read product descriptions, specifications, and customer reviews to gather information.
  1. Online Retailers:

  • Browse online retailers specializing in motorcycle gear. Read customer reviews and ratings for specific boots to gauge their performance, durability, and overall quality.
  1. Motorcycle Gear Forums:

  • Engage with motorcycle gear forums or online communities where fellow riders discuss their experiences with different motorcycle boots. Ask for recommendations and opinions from experienced riders to gain insights.

motorcycle boots

VII. Conclusion: Choose Your Ideal Motorcycle Riding Boots

Investing in the best motorcycle riding boots is a key step toward ensuring safety, comfort, and style while out on the road. By considering protective features, material construction, comfort and fit, and various styles available, you can select the perfect boots that suit your riding preferences and individual tastes.

Remember to prioritize safety and protection while also ensuring a comfortable fit and style that reflects your personality. Make the most of the wealth of information available through manufacturer websites, online retailers, and motorcycle gear forums to make an informed decision.

Gear up with the best motorcycle riding boots and enjoy the open road in style, comfort, and with the peace of mind that comes from having optimal protection for your feet and lower legs.

Posted in Motorcycle equipment, Motorcycles | Tagged , | Leave a comment

Budget-friendly electric motorcycles for adults

Introduction

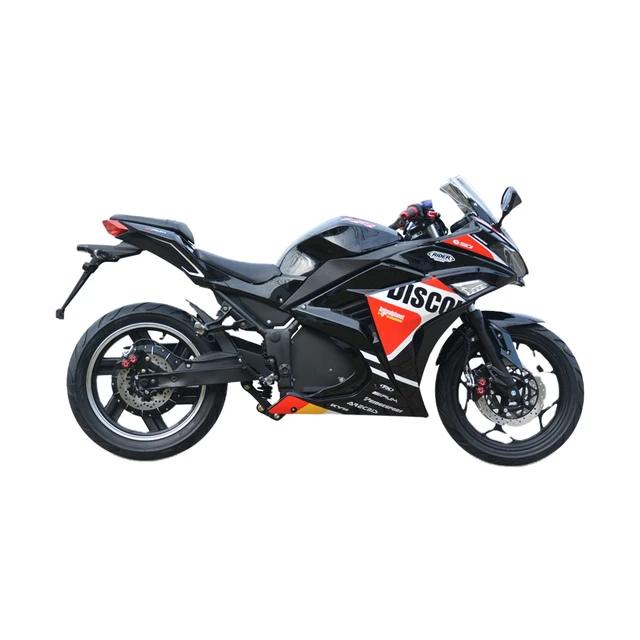
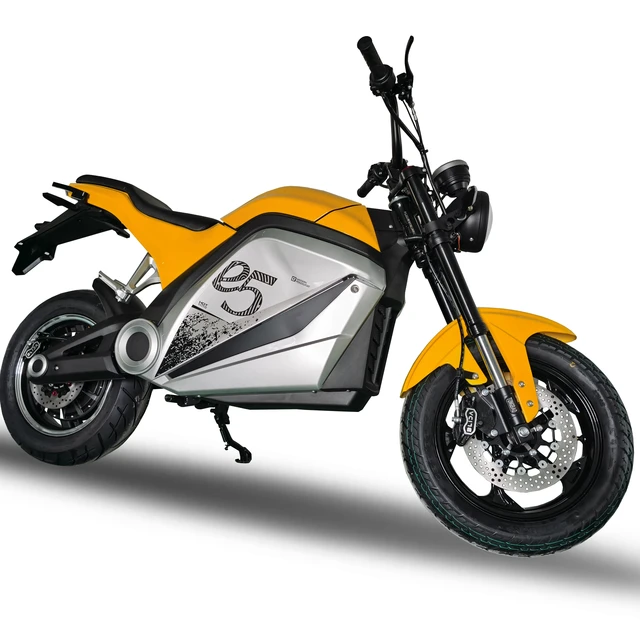
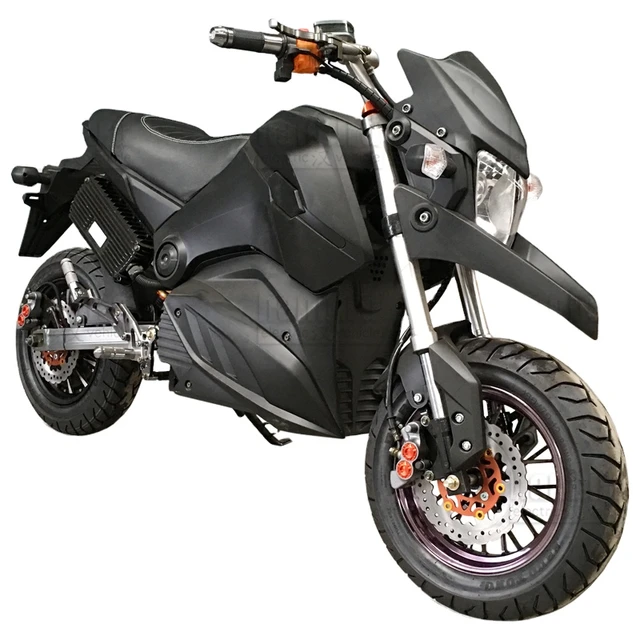
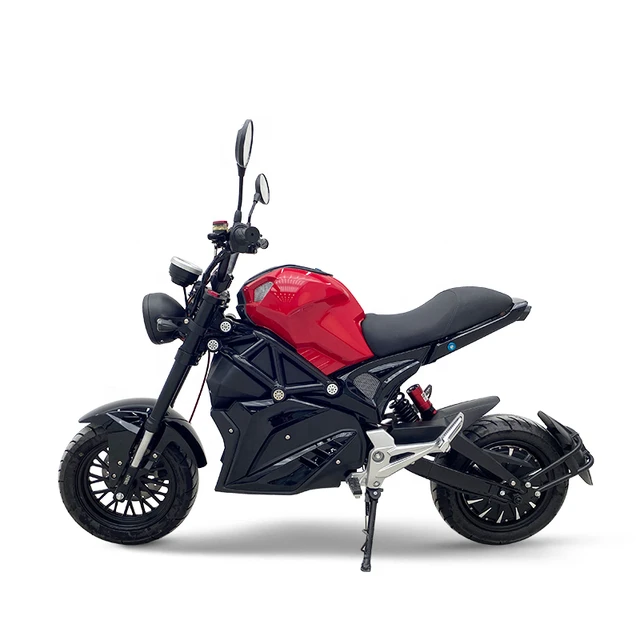
Electric motorcycles have gained popularity for their eco-friendly nature and cost-saving benefits. While some electric models may carry a higher price tag, there are options available for those seeking a cheap electric motorcycle for adults. In this guide, we will explore the advantages of affordable electric motorcycles, discuss key factors to consider when searching for budget-friendly options, and highlight some top models that offer excellent value for money.

electric motorcycle for adults

Budget-friendly electric motorcycles for adults

I. Advantages of Affordable Electric Motorcycles

  1. Cost Savings:

  • One of the primary advantages of affordable electric motorcycles is the potential for significant cost savings compared to conventional gasoline-powered motorcycles. These savings can be attributed to reduced fuel costs, as electricity is generally more affordable than gasoline, and lower maintenance requirements due to fewer moving parts and simpler systems.
  1. Environmental Benefits:

  • Despite being budget-friendly, affordable electric motorcycles still provide the environmental benefits associated with electric transportation. They produce zero tailpipe emissions, reducing air pollution and contributing to a greener and more sustainable future. By choosing an electric option, riders can lower their carbon footprint without straining their budget.
  1. Simplicity and Ease of Use:

  • Many affordable electric motorcycles are designed with simplicity and ease of use in mind. These models often have straightforward controls, allowing riders to focus on the enjoyment of the ride rather than complex systems. The simplicity also translates into easier maintenance and lower long-term ownership costs.

electric motorcycle for adults

II. Factors to Consider when Choosing an Affordable Electric Motorcycle

  1. Range:

  • The range of an electric motorcycle refers to the distance it can travel on a single charge. When considering an affordable electric motorcycle, it’s important to evaluate the range to ensure it meets your commuting or riding needs. Consider factors such as your typical travel distance and the availability of charging infrastructure in your area to make an informed decision.
  1. Charging Time:

  • Affordable electric motorcycles may have different charging times depending on the battery size and charging capabilities. Consider your daily routine and charging options to determine if the charging time aligns with your lifestyle. Some models may offer fast-charging capabilities, allowing for quicker charging sessions when needed.
  1. Performance and Speed:

  • While affordability is a key factor, it’s also important to consider the performance and speed of the electric motorcycle. Determine if the model offers a sufficient top speed and acceleration for your riding preferences. Remember that different electric motorcycles cater to varying skill levels and intended uses, so finding a balance between performance and affordability is crucial.
  1. Quality and Reliability:

  • When searching for an affordable electric motorcycle, focus on models from reputable manufacturers known for their quality and reliability. Research customer reviews and consider the manufacturer’s warranty to gain insights into the longevity and dependability of the motorcycle. Investing in a reliable model can save you money in the long run by reducing the likelihood of expensive repairs or premature replacements.

electric motorcycle for adults

III. Top Models of Affordable Electric Motorcycles

  1. Super Soco TC Max:

  • The Super Soco TC Max is a budget-friendly electric motorcycle known for its attractive styling and decent performance. It offers a top speed of 59 mph (95 km/h) and a range of around 80 miles (128 km), making it suitable for urban commuting and short rides. The TC Max features a removable battery, allowing for convenient charging at home or at public charging stations.
  1. NIU NQi GTS Pro:

  • The NIU NQi GTS Pro is a versatile and affordable electric scooter that delivers a smooth and enjoyable riding experience. With a top speed of 45 mph (72 km/h) and a range of up to 80 miles (128 km), it is suitable for both city commuting and leisurely rides. The NQi GTS Pro incorporates advanced features such as regenerative braking and a smart dashboard, enhancing its overall value.
  1. CSC City Slicker:

  • The CSC City Slicker is a lightweight and affordable electric motorcycle that offers a practical and efficient urban commuting solution. With a top speed of 46 mph (74 km/h) and a range of up to 40 miles (64 km), it is ideal for shorter commutes and local explorations. The City Slicker features a removable lithium-ion battery for convenient charging and a low seat height for ease of use.

electric motorcycle for adults

IV. Affordable Electric Motorcycles: Maintenance and Longevity

  1. Regular Maintenance:

  • While affordable electric motorcycles generally have simpler maintenance requirements compared to gasoline-powered counterparts, regular maintenance is still vital for optimal performance and longevity. Follow the manufacturer’s guidelines for routine maintenance, including checking and maintaining tire pressure, inspecting electrical connections, and keeping the battery in good condition.
  1. Battery Care:

  • Proper care for the electric motorcycle’s battery is essential for maximizing its lifespan and maintaining performance. Follow charging guidelines, avoid deep discharges, and store the battery appropriately during periods of inactivity. Regularly monitor the battery’s health and seek professional assistance if any issues arise.
  1. Warranty and Support:

  • When purchasing an affordable electric motorcycle, consider the warranty offered by the manufacturer. A solid warranty demonstrates the manufacturer’s confidence in their product and provides peace of mind for the rider. Additionally, ensure that the manufacturer or authorized service centers offer reliable customer support and readily available replacement parts for easier maintenance and repairs.

electric motorcycle for adults

VI. Accessorizing and Personalizing Your Affordable Electric Motorcycle

  1. Safety Gear:

  • When riding any motorcycle, safety should always be a top priority. Invest in high-quality safety gear, such as a DOT-approved helmet, gloves, sturdy boots, and protective clothing. These essential accessories not only enhance your safety but also add to your overall riding experience.
  1. Storage Solutions:

  • Consider adding storage options to your affordable electric motorcycle to increase its practicality for everyday use. Look for saddlebags, trunk boxes, or tank bags that are compatible with your model. These accessories can help you carry essential items like a lock, rain gear, or small personal belongings during your rides.
  1. Comfort Upgrades:

  • Enhance your riding comfort by adding accessories like a comfortable seat pad, handlebar grips, or wind deflectors. These small upgrades can make a significant difference, especially during long rides or adverse weather conditions, creating a more enjoyable and comfortable riding experience.
  1. Personalization Options:

  • Personalize your affordable electric motorcycle by adding accessories that reflect your unique style. Custom decals, wrap kits, or paint jobs can transform the appearance of your motorcycle and make it stand out from the crowd. Additionally, consider adding LED lights or accent lighting to add flair and visibility to your rides.


V. Conclusion: Budget-Friendly Electric Motorcycles for All

Affordable electric motorcycles provide a budget-friendly and sustainable option for adult riders. With their cost-saving benefits, reduced environmental impact, and simplicity of use, these models are an excellent choice for those seeking an economical and eco-friendly transportation solution.

When selecting an affordable electric motorcycle, consider factors such as range, charging time, performance, and the reputation of the manufacturer. Top models like the Super Soco TC Max, NIU NQi GTS Pro, and CSC City Slicker offer excellent value for money without compromising on quality or functionality.

Embrace the future of sustainable transportation by choosing an affordable electric motorcycle that suits your needs and budget. Enjoy the benefits of zero emissions, reduced operating costs, and a thrilling riding experience, all while contributing to a greener and more sustainable future.

Posted in Motorcycle Maintenance, Motorcycles | Tagged , | Leave a comment

How to waterproof motorcycle boots?

Introduction

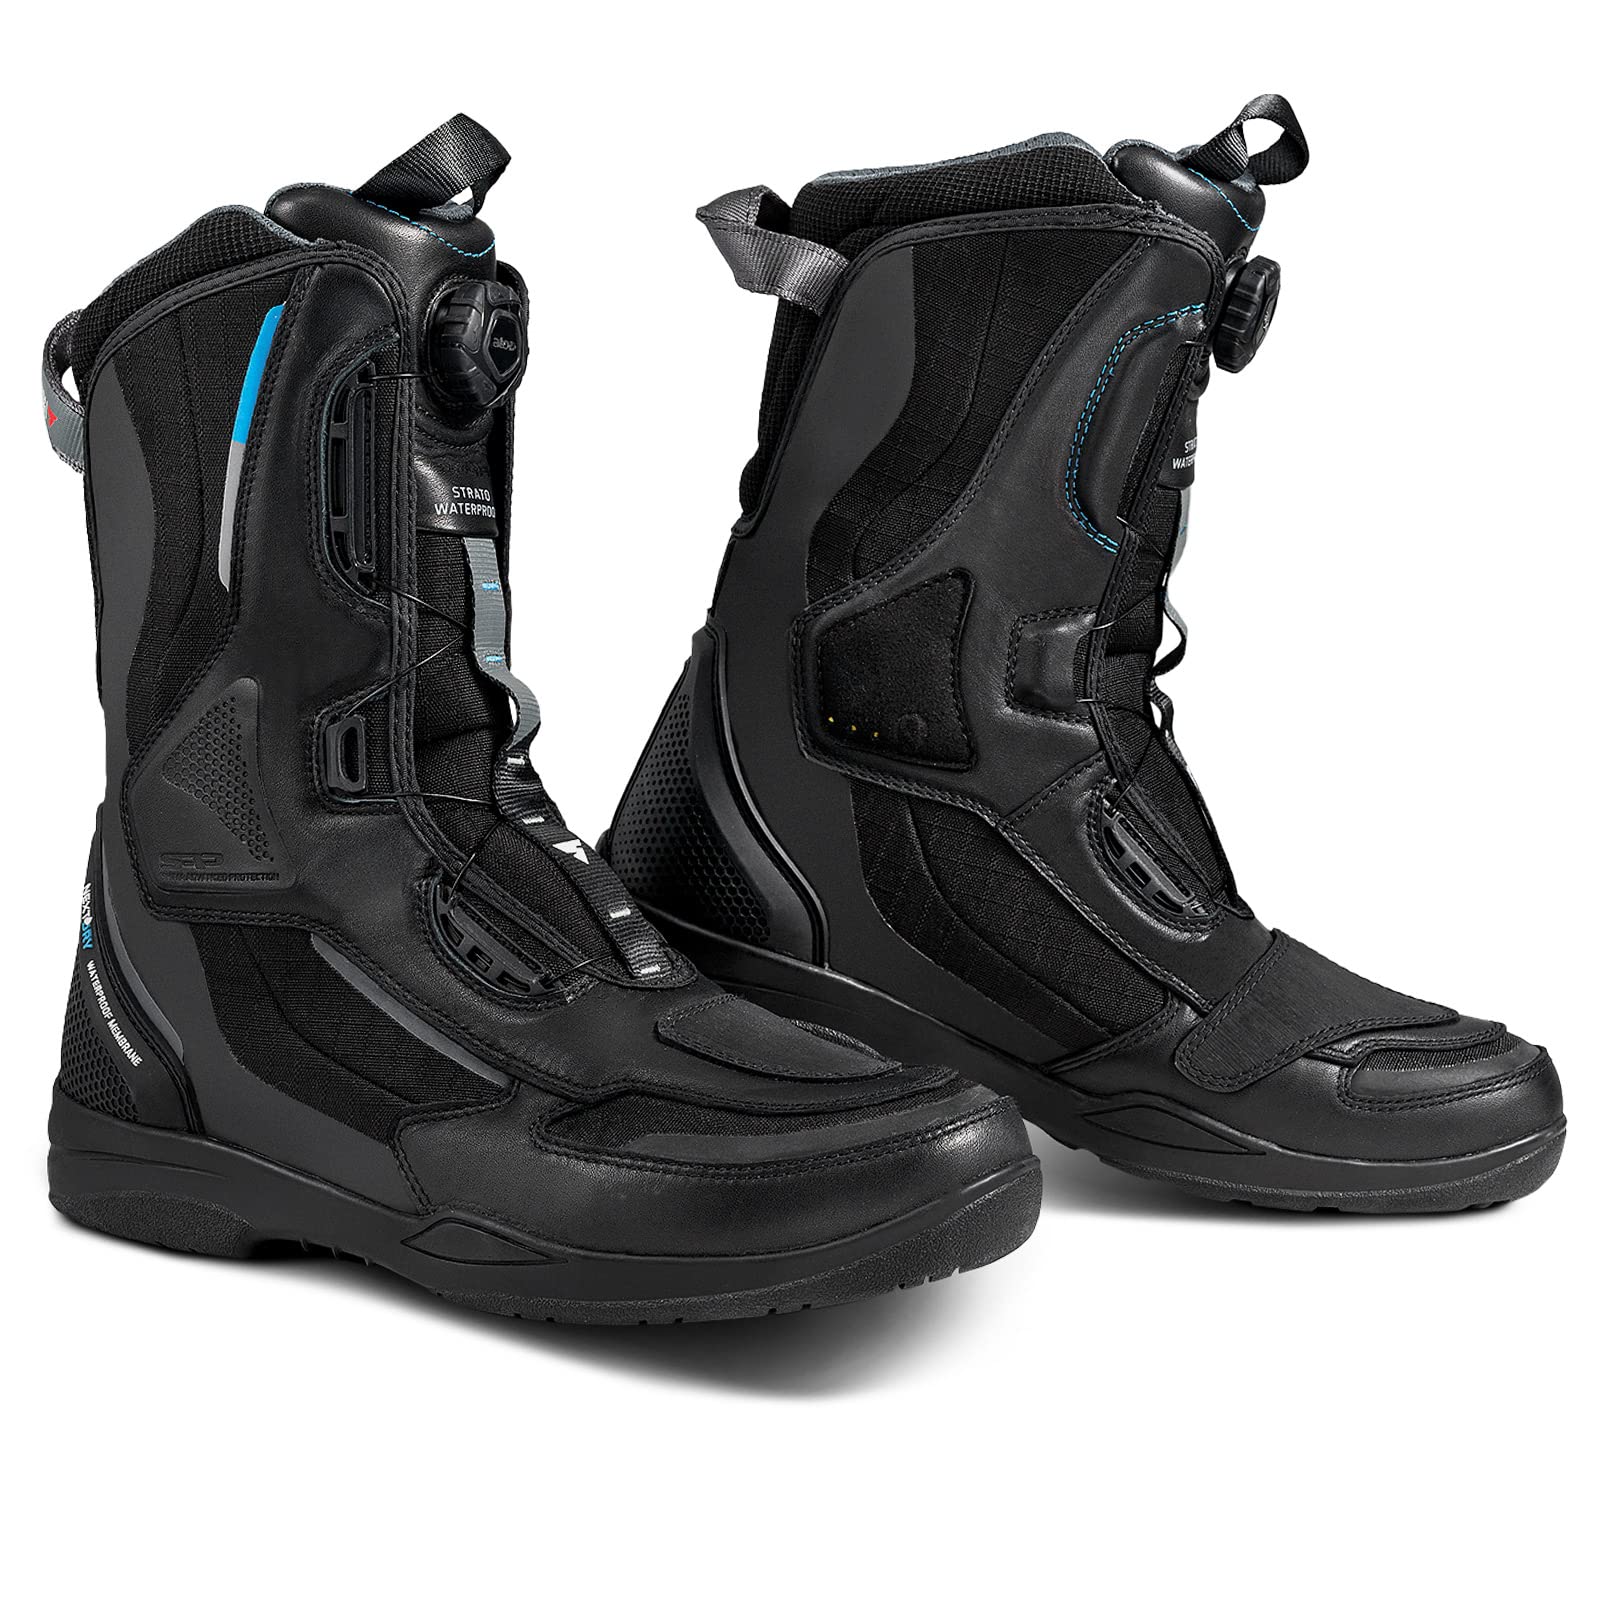
Motorcycle boots are an essential component of a rider’s gear, providing protection and support during rides. However, keeping your feet dry and comfortable in wet weather conditions can often be challenging. Fortunately, there are several effective methods to waterproof motorcycle boots, ensuring optimal performance and protection in any weather. In this guide, we will explore various techniques to waterproof your boots, from using waterproofing products to applying DIY sealants, keeping your feet dry and comfortable on your rides.

waterproof motorcycle boots

How to waterproof motorcycle boots?

I. Understanding Waterproofing Products

  1. Waterproofing Sprays:

  • Waterproofing sprays are specially formulated products designed to create a barrier on the surface of materials, making them resistant to water penetration. These sprays are the most widely used and convenient method for waterproofing motorcycle boots.
  1. Wax-Based Waterproofing Products:

  • Wax-based waterproofing products, such as beeswax or paraffin wax, offer an alternative to sprays. These products are applied directly to the boot’s surface and create a waterproof barrier by coating the leather and sealing any potential entry points for water.
  1. Silicone-Based Waterproofing Products:

  • Silicone-based waterproofing products are effective for sealing seams, stitching, or other areas that are more prone to water ingress. They contain silicone, which forms a protective layer over vulnerable parts of the boots, preventing water from seeping in.

waterproof motorcycle boots

II. Preparing Your Boots for Waterproofing

  1. Clean the Boots:

  • Before applying any waterproofing treatment, ensure that your boots are clean and free from dirt, dust, or oils. Use a soft brush or cloth to remove any debris from the surface of the boots.
  1. Drying the Boots:

  • It is crucial to completely dry your boots before waterproofing them. If your boots are wet, allow them to air dry naturally in a well-ventilated area. Do not use direct heat sources, such as heaters or hairdryers, as these can damage the leather or materials.

III. Using Waterproofing Sprays

  1. Read the Instructions:

  • Always read and follow the instructions provided by the manufacturer of the waterproofing spray. Different sprays may have specific application techniques or requirements for optimal results.
  1. Test in an Inconspicuous Area:

  • Prior to applying the waterproofing spray, conduct a patch test in an inconspicuous area of the boot. This will ensure that the spray does not discolor or damage the material.
  1. Apply Evenly:

  • Hold the spray can approximately 6-8 inches away from the boot’s surface. Using sweeping motions, apply the spray evenly, making sure to cover the entire surface of the boot. Pay extra attention to areas that are more susceptible to water exposure, such as stitching or seams.
  1. Allow for Drying Time:

  • After applying the waterproofing spray, allow the boots to dry completely according to the manufacturer’s instructions. This typically involves leaving the boots in a well-ventilated area for a specified period of time.
  1. Reapply as Needed:

  • Depending on the specific spray and the frequency of use, it may be necessary to reapply the waterproofing spray periodically. Follow the manufacturer’s guidelines for reapplication intervals to ensure optimum protection.

waterproof motorcycle boots

IV. Wax-Based Waterproofing Methods

  1. Choose the Right Wax:

  • Select a suitable wax product for your boots, such as beeswax or paraffin wax. Ensure that the wax does not contain any harsh chemicals that may damage the leather or other materials.
  1. Preparation:

  • Before applying the wax, clean the boots thoroughly and allow them to dry completely. Warm the wax slightly to soften it for easier application.
  1. Apply the Wax:

  • Using a clean, soft cloth or sponge, apply the wax to the surface of the boot, making sure to cover the entire area. Focus on seams, stitching, and any other areas that may be prone to water ingress.
  1. Heat and Buff:

  • After applying the wax, use a hairdryer or heat gun on low heat to melt the wax into the leather or fabric. While the wax is still warm, buff the boots gently with a soft cloth to ensure an even distribution of the wax and to remove any excess.
  1. Allow for Curing:

  • Allow the boots to cure overnight or for the duration suggested by the wax manufacturer. This will allow the wax to fully bond with the material, providing an effective waterproof barrier.

waterproof motorcycle boots

V. Silicone-Based Waterproofing Methods

  1. Identify Vulnerable Areas:

  • Inspect your boots and identify areas that may require additional protection. This could include seams, zippers, or areas where the boots are joined together.
  1. Apply the Silicone-Based Waterproofing Product:

  • Using a small brush or applicator, apply the silicone-based waterproofing product to the vulnerable areas of the boots. Ensure that the product covers the seams and any stitching, creating a protective barrier against water.
  1. Smooth and Spread:

  • After applying the silicone-based product, use a clean brush or cloth to smooth and spread the product evenly over the vulnerable areas. This will help ensure thorough coverage and optimal waterproofing.
  1. Allow for Drying and Curing:

  • Give the boots sufficient time to dry and cure after applying the silicone-based waterproofing product. Follow the manufacturer’s instructions for the recommended drying time to ensure proper bonding and effectiveness.

VI. Additional Tips

  1. Regular Maintenance:

  • Regularly inspect and clean your boots to maintain their waterproofing effectiveness. Remove any dirt or debris that may compromise the water-resistant properties of the boots.
  1. Reapply as Needed:

  • Depending on the frequency and intensity of use, it may be necessary to reapply the waterproofing treatment periodically. Pay attention to signs of decreased waterproofing performance, such as water seeping through the boots or a dulling of the water-resistant properties.
  1. Seek Professional Assistance:

  • If you are unsure about the best method or product for waterproofing your boots, consult a professional shoe or boot repair specialist. They can provide guidance on the most suitable techniques and products for your specific boots.

waterproof motorcycle boots

VII. Conclusion: Dry and Comfortable Rides with Waterproof Boots

Waterproofing your motorcycle boots is essential for maintaining comfort and protection during wet weather conditions. With the proper techniques and products, you can effectively enhance the water-resistant properties of your boots, keeping your feet dry and ensuring optimal performance while riding.

Whether you choose to use waterproofing sprays, wax-based products, or silicone-based treatments, the key is to prepare your boots properly, apply the waterproofing product evenly, and allow for sufficient drying and curing time. Regular maintenance and reapplication, as needed, will help preserve the waterproofing properties of the boots over time.

By taking the necessary steps to waterproof your motorcycle boots, you can enjoy dry and comfortable rides, even when facing challenging weather conditions.

Posted in Motorcycle equipment, Motorcycles | Tagged , | Leave a comment

Is Kevlar good for motorcycle riding?

Introduction

Motorcycle riding comes with inherent risks, making proper protective gear essential. Among the various options available, Kevlar stands out as a material known for its strength and durability. Kevlar is widely used in the motorcycle industry for its exceptional protective qualities. In this comprehensive guide, we will explore the benefits of Kevlar for motorcycle riding. By examining its abrasion resistance, durability, impact protection, and thermal properties, we aim to provide a thorough understanding of why Kevlar is a good choice for motorcycle riders.

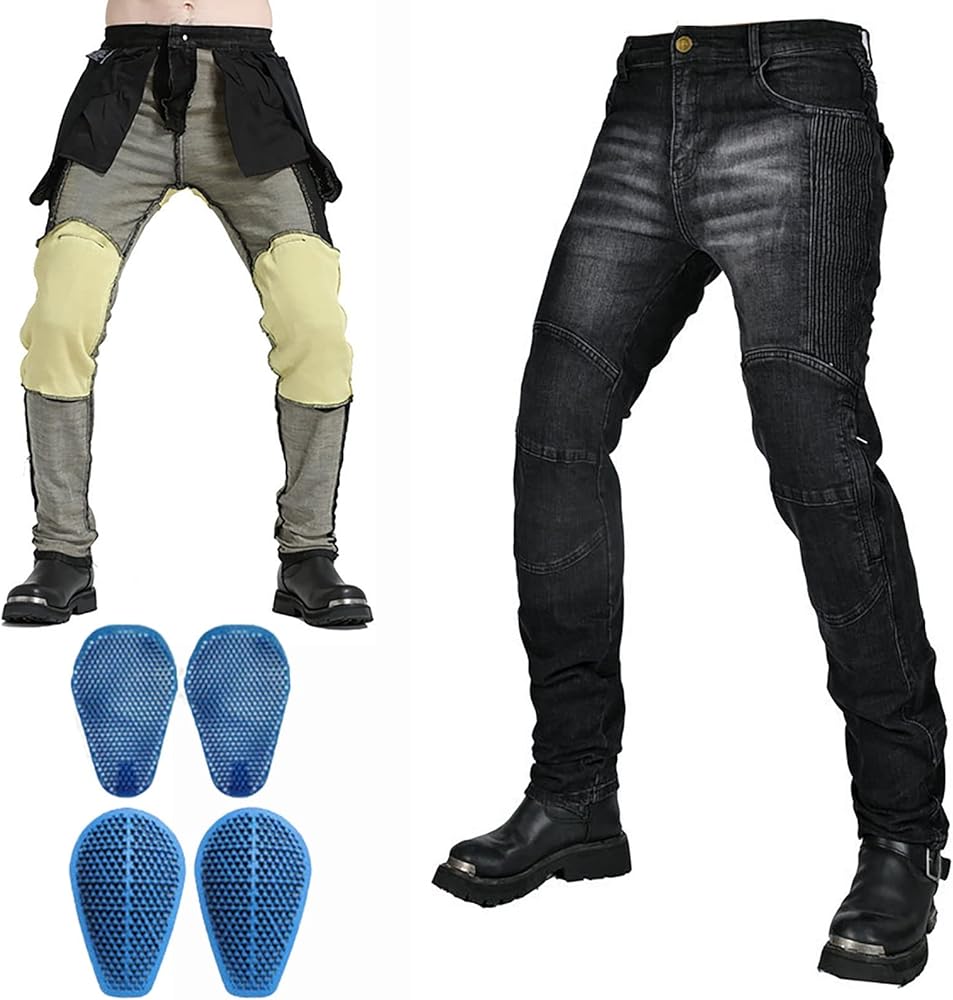
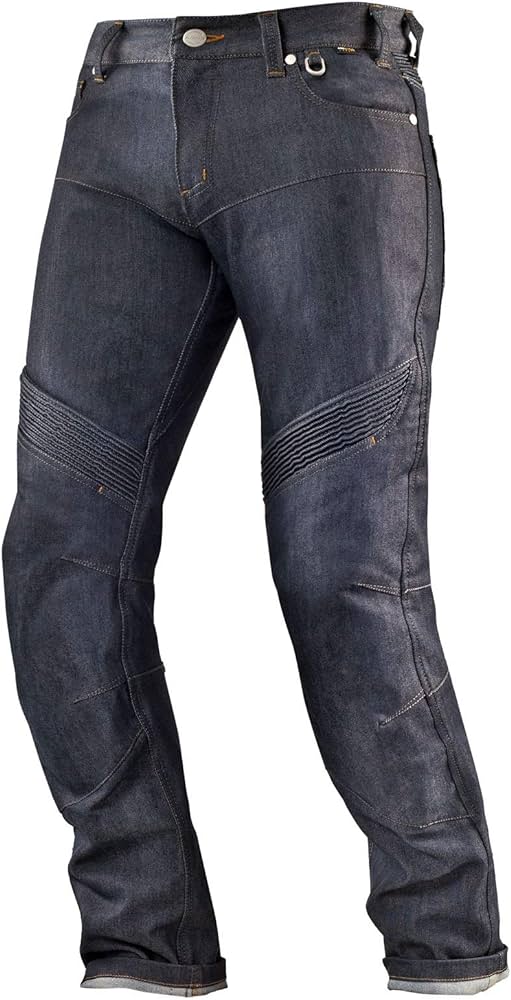
kevlar motorcycle jeans

Is Kevlar good for motorcycle riding?

I. Exceptional Abrasion Resistance

  1. Enhanced Protection:

  • Kevlar has remarkable abrasion resistance, offering increased protection compared to traditional materials. Its strong molecular structure allows it to withstand friction and prevent road rash injuries during slides or crashes.
  1. Reduction of Abrasion-Related Injuries:

  • Kevlar gear, such as jackets, pants, or gloves, effectively reduces the risk of abrasion-related injuries by providing a robust barrier between the rider’s body and the road surface. This can be crucial in the event of accidents or falls.

II. Durability and Longevity

  1. Strength and Sturdiness:

  • Kevlar is known for its exceptional strength, making it highly durable and resistant to impact. This attribute ensures that Kevlar gear can withstand the rigors of motorcycle riding, providing long-lasting protection for riders.
  1. Ability to Withstand Wear and Tear:

  • Kevlar’s resistance to scratches, tearing, and punctures ensures that motorcycle gear made from this material can endure regular use and adverse conditions. Kevlar gear is less likely to deteriorate and offers riders a reliable form of protection over an extended period.

kevlar motorcycle jeans

III. Impact Protection

  1. Enhanced Impact Resistance:

  • Beyond its exceptional abrasion resistance, Kevlar also possesses high impact resistance. Kevlar gear can help reduce the force of impacts and minimize the risk of injuries, particularly during accidents or collisions.
  1. Protection against Contusions and Fractures:

  • Kevlar’s impact resistance is especially beneficial in protecting riders from contusions and fractures resulting from high-velocity collisions or falls. It acts as a buffer, helping to absorb and disperse impact energy, reducing the severity of injuries.

IV. Lightweight and Comfortable

  1. Lightweight Design:

  • Kevlar offers the advantage of being lightweight compared to other materials commonly used in motorcycle gear. This lightweight property ensures that riders can enjoy comfortable mobility and flexibility without compromising the protective qualities of their gear.
  1. Increased Comfort:

  • Kevlar gear provides a comfortable riding experience due to its flexibility and ability to conform to the rider’s body. By offering a snug yet comfortable fit, Kevlar gear allows for unrestricted movement, enhancing overall comfort during extended rides.

V. Heat and Flame Resistance

  1. Thermal Protection:

  • Kevlar has a high resistance to heat and flame, making it an excellent choice for motorcycle gear. In the event of fire or contact with hot surfaces, Kevlar material provides an additional layer of protection against burns and thermal injuries.
  1. Minimization of Heat Transfer:

  • Kevlar’s thermal properties help minimize the transfer of heat through the gear, reducing discomfort caused by sunlight or the engine’s heat. This makes Kevlar gear particularly suitable for riders in warmer climates or during rides under direct sunlight.

kevlar motorcycle jeans

VI. Weather Resistant

  1. Water Resistance:

  • Kevlar is naturally water-resistant, allowing it to repel water on the surface of gear made from this material. Water resistance ensures that Kevlar gear remains dry and comfortable, even during rainy rides, preventing the gear from becoming heavy or causing discomfort.
  1. Quick Drying:

  • In situations where Kevlar gear does become wet, it dries quickly due to its inherent hydrophobic properties. This quick drying feature helps riders stay comfortable and maintain the gear’s protective capabilities.

VII. Versatility and Style

  1. Versatile Design:

  • Kevlar can be incorporated into various types of motorcycle gear, including jackets, pants, gloves, and boots. Its versatility allows for the creation of well-designed gear that meets riders’ different needs and preferences.
  1. Stylish Options:

  • Kevlar gear often combines style with functionality. Manufacturers offer an array of designs, colors, and styles to cater to riders who prioritize fashion alongside protection. This allows riders to express their personal style while ensuring optimum safety.

VIII. Considerations and Limitations

  1. Supplementary Protective Gear:

  • While Kevlar gear provides excellent protection, it is essential to complement it with additional protective gear like helmets, knee pads, and gloves. This comprehensive approach establishes a more complete protective system for riders.
  1. Individual Safety Practices:

  • Wearing Kevlar gear does not guarantee complete protection from all risks. Riders must prioritize safe riding practices, obey traffic rules, and maintain situational awareness to minimize the potential for accidents and injuries.

kevlar motorcycle jeans

X. Ordering and Care Instructions for Kevlar Gear

  1. Ordering Kevlar Gear:

  • When ordering Kevlar gear, ensure that you select the appropriate size based on your measurements. Refer to the manufacturer’s sizing chart and consider reviews from other riders to find the best-fitting gear. Opt for reputable brands known for their quality and protective capabilities.
  1. Care Instructions:

  • To maintain the integrity and effectiveness of Kevlar gear, follow the care instructions provided by the manufacturer. Generally, Kevlar gear can be machine washed using a delicate cycle and mild detergent. It is important to avoid using bleach or harsh chemicals that can weaken the Kevlar fibers. Hang the gear to dry, keeping it away from direct sunlight or heat sources.
  1. Inspection and Replacement:

  • Regularly inspect your Kevlar gear for any signs of wear, damage, or degradation. Look for frayed stitching, tears, or thinning material. If any such issues are found, consider replacing the gear to ensure continued protection. It is recommended to replace Kevlar gear after a significant impact or collision, as the fibers may have been compromised.

XI. Cost Considerations

  1. Long-Term Investment:

  • While Kevlar gear may have a higher initial cost compared to regular gear, it is important to view it as a long-term investment in safety. The durability, protective capabilities, and extended lifespan of Kevlar gear often justify the initial expense.

kevlar motorcycle jeans

IX. Conclusion: A Valuable Investment for Motorcycle Riders

The benefits of Kevlar for motorcycle riding are significant and make it an excellent choice for riders seeking effective and durable protective gear. Kevlar’s exceptional abrasion resistance, durability, impact protection, thermal resistance, and water-repelling properties contribute to heightened safety and increased comfort during rides.

However, it is important to remember that motorcycle gear should work in harmony with safe riding practices and other protective equipment. By prioritizing comprehensive safety measures, such as defensive riding techniques and adherence to traffic regulations, riders can fully leverage the protective advantages offered by Kevlar.

Investing in Kevlar gear ensures that riders have reliable protection against abrasion, impacts, and other potential hazards on the road. With the combination of Kevlar’s beneficial properties and responsible riding practices, motorcycle riders can enjoy a safer and more enjoyable riding experience.

Posted in Motorcycle equipment, Motorcycles | Tagged , | Leave a comment

Do Kevlar motorcycle jeans work?

Introduction

Motorcycle safety gear is crucial for riders, and one popular option for lower body protection is Kevlar motorcycle jeans. These jeans are made with a blend of Kevlar, a highly durable and abrasion-resistant material, and denim, offering a stylish and casual look while providing enhanced protection. In this comprehensive guide, we will explore the effectiveness of Kevlar motorcycle jeans as a protective gear option. By examining the material properties, construction techniques, durability, and real-world performance, we aim to provide insights into the protective capabilities of Kevlar motorcycle jeans.

kevlar motorcycle jeans

Do Kevlar motorcycle jeans work?

I. Understanding Kevlar and Its Properties

  1. Kevlar:

  • Kevlar is a high-performance synthetic fiber created by DuPont. It is known for its exceptional strength, heat resistance, and durability. Kevlar has molecular properties that make it highly resistant to abrasion and impact, making it an ideal material for protective motorcycle gear like jeans.
  1. Abrasion Resistance:

  • One of the primary benefits of Kevlar is its outstanding abrasion resistance. Kevlar motorcycle jeans can provide a high level of protection against abrasion-related injuries in the event of a crash or slide on the road.
  1. Tear and Puncture Resistance:

  • Kevlar also possesses excellent tear and puncture resistance. Tests have shown that Kevlar can withstand significant force and minimize the extent of injuries that can result from tears or punctures during a motorcycle accident.

kevlar motorcycle jeans

II. Material Construction and Design

  1. Kevlar Lining:

  • Kevlar motorcycle jeans typically feature a Kevlar lining or panels in critical areas, such as the hips, thighs, and knees. This Kevlar reinforcement adds an extra layer of protection to these high-risk areas, increasing the jeans’ overall effectiveness.
  1. Denim Blend:

  • Kevlar motorcycle jeans commonly incorporate a blend of Kevlar and denim. This blend combines the fashionable appearance of denim with the durability and protective qualities of Kevlar. The denim material provides a more casual and comfortable feel while still offering a degree of protection.
  1. Stitching and Seams:

  • The construction of Kevlar motorcycle jeans is often reinforced with additional stitching and durable seams to enhance their strength and prevent tearing or bursting upon impact. Double or triple stitching techniques are commonly employed to ensure the jeans withstand the rigors of motorcycle riding.

III. Real-World Performance and Testing

  1. Abrasion Tests:

  • Kevlar motorcycle jeans undergo rigorous testing to evaluate their abrasion resistance. These tests involve simulating sliding or skidding scenarios on abrasive surfaces. Kevlar jeans consistently perform well in such tests, offering a substantially higher level of protection compared to regular denim jeans.
  1. CE Certification:

  • Some Kevlar motorcycle jeans carry CE (Conformité Européene) certification, which indicates compliance with specific safety standards. CE-certified clothing undergoes comprehensive testing to assess its level of protection and performance, providing riders with assurance regarding the garment’s protective capabilities.
  1. Impact Protection:

  • While Kevlar motorcycle jeans excel in terms of abrasion resistance, it’s important to note that they offer limited impact protection. In the event of a high-velocity impact or collision, additional protective gear, such as knee or hip armor, is essential to minimize the risk of injuries.

kevlar motorcycle jeans

IV. Durability and Longevity

  1. Longevity of Kevlar:

  • Kevlar is known for its durability and exceptional lifespan. When incorporated into motorcycle jeans, Kevlar can withstand repeated wear and potential impacts, making Kevlar motorcycle jeans a long-lasting investment.
  1. Resistance to Wear and Tear:

  • Kevlar motorcycle jeans are designed to withstand the rigors of riding, including exposure to wind, debris, and friction. The inherent strength of Kevlar ensures the jeans hold up well against common wear and tear, maintaining their protective properties over time.
  1. Proper Care and Maintenance:

  • To ensure the longevity of Kevlar motorcycle jeans, it is crucial to follow the manufacturer’s care instructions. Proper cleaning, avoiding harsh chemicals, and limiting exposure to extreme heat or direct sunlight will help preserve the integrity and functionality of the jeans.

V. Considerations for Effectiveness

  1. Proper Fit:

  • To fully realize the benefits of Kevlar motorcycle jeans, ensuring a proper fit is essential. Jeans that are too loose or too tight may affect the level of protection offered and compromise the overall effectiveness. Consider trying different brands or styles to find the best fit for your body shape and riding preferences.
  1. Layered Protection:

  • For maximum safety, consider layering Kevlar motorcycle jeans with additional protective gear. Knee armor, hip protectors, and armored motorcycle jackets can offer further protection against impact injuries, complementing the abrasion resistance provided by the jeans.
  1. Account for Different Riding Scenarios:

  • The effectiveness of Kevlar motorcycle jeans can vary depending on the riding conditions and scenarios. If engaging in more aggressive or off-road riding, additional protective gear, such as leather pants or specialized motorcycle racing suits, may be more suitable for the higher levels of impact and abrasion that can be involved.

kevlar motorcycle jeans

VII. Maintenance and Care

  1. Cleaning:

  • Proper cleaning is crucial for maintaining the effectiveness of Kevlar motorcycle jeans. Follow the manufacturer’s instructions to wash the jeans and avoid using harsh detergents or bleach that may degrade the Kevlar fibers. Regular cleaning helps remove dirt, debris, and sweat that can accumulate on the jeans during rides.
  1. Inspection:

  • Regularly inspect your Kevlar motorcycle jeans for any signs of wear, tear, or damage. Look for frayed seams, loose threads, or areas where the Kevlar lining may be exposed. If you notice any issues, consider repairing or replacing the jeans to ensure optimum protection.
  1. Storage:

  • When not in use, store your Kevlar motorcycle jeans in a cool and dry place away from direct sunlight. Avoid folding or creasing them excessively, as this may weaken the Kevlar fibers over time. Proper storage helps maintain the jeans’ structural integrity and extends their lifespan.

VIII. Cost Considerations

  1. Price Range:

  • The cost of Kevlar motorcycle jeans can vary depending on factors such as brand, design, materials used, and additional features or certifications. In general, Kevlar motorcycle jeans tend to be more expensive than regular denim jeans due to the specialized materials and construction techniques involved.
  1. Long-Term Investment:

  • While the upfront cost of Kevlar motorcycle jeans may be higher compared to regular jeans, they offer long-term value. The durability and enhanced protection provided by Kevlar make them a worthwhile investment for riders seeking reliable and long-lasting motorcycle gear.

IX. Real-World Rider Experiences

  1. Testimonials and Reviews:

  • Many riders have shared their experiences wearing Kevlar motorcycle jeans, often expressing satisfaction with the jeans’ level of protection and overall comfort. Reading reviews and testimonials can provide valuable insights into real-world performance and help guide the decision-making process.
  1. Individual Experiences:

  • It is essential to keep in mind that individual experiences may vary based on factors such as riding style, frequency, and the specific circumstances of accidents or falls. While Kevlar motorcycle jeans offer enhanced protection, no gear can guarantee complete safety in all situations. Riders should exercise caution and prioritize comprehensive safety practices, including defensive riding techniques and proper use of protective gear.

X. Legal Requirements and Regulations

  1. Local Laws and Regulations:

  • Different countries and jurisdictions have varying laws and regulations regarding the use of protective gear, including Kevlar motorcycle jeans. Familiarize yourself with local requirements to ensure compliance and prioritize your own safety.
  1. Safety Standards:

  • Kevlar motorcycle jeans may meet specific safety standards, such as CE certification, which can provide reassurance regarding their protective capabilities. Consider choosing jeans that meet recognized safety standards for an added layer of confidence.

kevlar motorcycle jeans

VI. Conclusion: A Worthwhile Investment

Kevlar motorcycle jeans, with their blend of style and protection, are a popular choice for riders seeking a casual yet protective riding gear option. Their exceptional abrasion resistance and durability make them a valuable investment in the realm of motorcycle safety. However, it is essential to understand their limitations and consider supplementary protective gear to ensure comprehensive coverage against potential accidents or impacts.

When choosing Kevlar motorcycle jeans, prioritize proper fit, durability, and compliance with safety standards. By selecting high-quality jeans and complementing them with appropriate protective gear, riders can enhance their overall safety and enjoy the benefits of Kevlar’s exceptional durability and protective properties while riding motorcycles.

Posted in Motorcycle equipment, Motorcycles | Tagged , | Leave a comment

Why is motorcycle safety gear important?

Introduction

Motorcycle safety gear is not merely a fashion statement; it plays a vital role in protecting the rider from potential injuries and ensuring a safe riding experience. The inherent risks associated with motorcycle riding necessitate the use of proper safety gear to mitigate the potential consequences of accidents or falls. In this comprehensive guide, we will explore the importance of motorcycle safety gear and delve into the specific ways in which it safeguards the rider. By understanding the significance of safety gear, riders can make informed choices and prioritize their well-being on the road.

motorcycle gear

Why is motorcycle safety gear important?

I. Mitigating Injuries: The Fundamental Purpose

  1. Minimizing Head Trauma:

  • Helmets are the cornerstone of motorcycle safety gear. They provide crucial protection to the rider’s head, reducing the risk of traumatic brain injuries, skull fractures, and fatalities in the event of a crash or impact.
  1. Protecting the Body:

  • Safety gear such as jackets, pants, gloves, and boots are designed to minimize injuries from abrasions, lacerations, and fractures. They act as a shield against road rash, debris, and potential impact during falls or collisions.

motorcycle gear

II. Physical Protection: Shielding Against External Factors

  1. Impact Protection:

  • Safety gear, particularly armor inserts or padding incorporated into jackets, pants, and gloves, offers impact resistance. These components disperse and absorb the force of impacts, reducing the risk of serious injuries to specific areas of the body.
  1. Abrasion Resistance:

  • Motorcycle-specific clothing made from durable materials like leather, textile, or Kevlar® are designed to withstand abrasion and minimize road rash in the event of a slide along the pavement. These materials prevent direct contact between the rider’s skin and the road surface, reducing the severity of injuries.
  1. Weather Protection:

  • Safety gear serves as a barrier against adverse weather conditions. Jackets and pants with weatherproof features or removable liners keep riders dry and insulated in rainy or cold weather, preventing discomfort or distraction that may compromise safety.

III. Enhancing Visibility: Promoting Awareness on the Road

  1. Reflective Features:

  • Safety gear with reflective elements significantly improves visibility, especially during low-light conditions or when riding at night. These reflective features increase the likelihood of other motorists detecting and perceiving the presence of a motorcyclist, thereby reducing the risk of accidents.
  1. High-Visibility Colours:

  • Safety gear incorporating high-visibility colors, such as bright neon hues or fluorescent shades, increases the rider’s visibility to others on the road. This heightened visibility improves the likelihood of early recognition, reducing the risk of collisions due to other road users failing to notice the motorcyclist.

motorcycle gear

IV. Comfort and Focus: Optimal Riding Experience

  1. Comfortable Riding Posture:

  • Safety gear, such as motorcycle jackets and pants, is designed with ergonomic considerations in mind. They offer freedom of movement, flexibility, and ventilation that enhance comfort during rides, allowing riders to maintain focus and concentration on the road.
  1. Protection from Elements:

  • Safety gear protects riders from adverse weather conditions, shielding them from rain, wind, extreme temperatures, or excessive exposure to sunlight. By maintaining a comfortable and protected riding environment, safety gear contributes to a more enjoyable and distraction-free ride.

V. Legal Requirements and Compliance

  1. Legal Obligations:

  • Many jurisdictions have specific laws and regulations mandating the use of safety gear, including helmets and protective clothing. Compliance with these legal requirements ensures not only the rider’s safety but also avoids potential fines or penalties.
  1. Insurance Coverage:

  • Some insurance policies may stipulate that the use of safety gear is a prerequisite for coverage in the event of an accident. Adhering to these guidelines ensures that riders have the necessary protection and financial support in case of injuries or damages.

VI. Setting an Example: Influencing Others

  1. Promoting Safety Culture:

  • By consistently wearing safety gear, riders influence others within the motorcycle community and set a positive example for responsible riding behaviors. Encouraging the use of safety gear as a standard practice fosters a safety-focused culture that benefits all motorcyclists.
  1. Inspiration for New Riders:

  • Riders who consistently wear safety gear, demonstrate their commitment to safety, and share their experiences can motivate novice riders to prioritize their safety on the road. Employing safety gear becomes an inherent part of their motorcycle journey from the outset.

motorcycle gear

VIII. Maintenance and Replacement

  1. Regular Inspection:

  • Regularly inspect your safety gear for any signs of wear, tear, or damage. Pay close attention to helmets for cracks or other structural issues, clothing for worn-out materials, and gloves and boots for fraying or compromised protection. Proper maintenance and prompt replacement of damaged gear are essential to ensure continued effectiveness.
  1. Helmet Replacement:

  • Helmets should be replaced after any significant impact, even if no visible damage is apparent. The structural integrity of the helmet may be compromised, decreasing its ability to protect in subsequent accidents. Additionally, helmets have an expiration date specified by the manufacturer due to the degradation of materials over time. Adhere to these guidelines and replace your helmet accordingly.
  1. Clothing and Gear Care:

  • Follow the manufacturer’s instructions for cleaning and caring for your safety gear. Proper care helps maintain its functionality, durability, and overall performance. Avoid using harsh chemicals or abrasive cleaners that can damage the protective properties of the materials. Regularly clean and dry your gear to prevent the growth of bacteria or mold.
  1. Fit and Adjustment:

  • Periodically reassess the fit of your safety gear, especially as your body may change over time. Ensure that helmets fit snugly without being overly tight, and clothing and gloves provide a comfortable yet secure fit. Adjust straps, buckles, and closures to maintain optimal support and protection.

IX. Importance of Comprehensive Gear Usage

  1. Every Ride, Every Time:

  • Make it a habit to wear safety gear every time you ride, regardless of the distance or purpose of the trip. Even short rides or familiar routes can present unexpected risks, and not wearing safety gear increases the likelihood of severe injuries in case of an accident.
  1. Full Coverage:

  • Aim for comprehensive coverage with safety gear that protects your head, body, hands, and feet. Each component plays a vital role in safeguarding against specific forms of injury. By investing in and using a complete set of safety gear, you ensure maximum protection in all riding scenarios.
  1. Lead by Example:

  • Embrace safety gear as a non-negotiable aspect of your riding routine. By consistently wearing and advocating for safety gear, you demonstrate responsibility as a motorcyclist and encourage others to prioritize their own safety.

motorcycle gear

VII. Conclusion

The importance of motorcycle safety gear cannot be overstated. It serves as a critical line of defense against potential injuries by minimizing head trauma, protecting the body from impact and abrasions, enhancing visibility, and ensuring comfort throughout the ride. Wearing safety gear not only fulfills legal obligations but also promotes a safety-conscious culture within the motorcycle community. By instilling a sense of responsibility and setting a positive example, riders can inspire others to prioritize their safety and well-being on the road. Embracing safety gear not only reduces the severity of injuries but also allows riders to confidently enjoy the unmatched thrill of riding a motorcycle. Let safety gear be an inseparable companion on every journey, safeguarding riders and enabling them to ride with peace of mind.

Posted in Motorcycle equipment, Motorcycles | Tagged , | Leave a comment

What safety gear do I need to ride a motorcycle?

Introduction

Motorcycle riding offers a thrilling and liberating experience, but it’s important to prioritize safety on the road. To protect yourself from potential hazards and minimize the risk of injury, it is crucial to wear appropriate safety gear. This comprehensive guide outlines the essential safety gear required for motorcycle riding. From helmets to protective clothing and accessories, we will cover each component in detail to ensure you have a safe and enjoyable ride.

motorcycle gear

What safety gear do I need to ride a motorcycle?

I. Helmet: Your Lifesaver on the Road

  1. Importance of Helmet:

  • A helmet is the most critical safety gear for a motorcyclist. It protects your head from severe injuries and potential fatalities in the event of a collision or fall.
  1. Certification:

  • When choosing a helmet, ensure it meets safety standards set by reputable organizations such as the Department of Transportation (DOT), Economic Commission for Europe (ECE), or Snell Memorial Foundation. Look for the certifications to ensure your helmet meets rigorous safety requirements.
  1. Helmet Types:

  • Full-face helmets offer the most comprehensive protection, covering the entire head, face, and chin. Modular helmets combine features of both full-face and open-face helmets, allowing the front section to be raised. Open-face helmets provide coverage to the top and sides of the head, leaving the face exposed. Whichever type you choose, prioritize safety over aesthetics.
  1. Proper Fit:

  • Select a helmet that fits snugly and comfortably on your head. It should not be loose or feel tight, as this may cause discomfort and compromise its effectiveness. Consult sizing charts provided by manufacturers or seek professional assistance to ensure a proper fit.

motorcycle gear

II. Eye Protection: Guarding Your Vision

  1. Importance of Eye Protection:

  • Eye protection shields your eyes from wind, debris, insects, and other elements that can impair visibility and cause eye irritation. It also helps prevent eye fatigue during long rides.
  1. Options for Eye Protection:

  • Motorcycle goggles, riding glasses/sunglasses with shatterproof lenses, or helmet visors are common options for eye protection. Consider the specific design and level of sun protection needed for your riding conditions.
  1. Tinted Visors:

  • Tinted visors provide protection against strong sunlight, reducing glare and improving visibility. Opt for visors with different tint levels to adapt to changing light conditions.
  1. Anti-Fog Features:

  • Some eye protection options, such as helmet visors or riding glasses, feature anti-fog coatings or ventilation systems, which reduce fogging caused by temperature and humidity changes. This ensures clear vision in diverse weather conditions.

III. Jacket and Pants: Shielding Your Body

  1. Material and Construction:

  • Choose motorcycle jackets and pants made from abrasion-resistant and tear-resistant materials, such as leather or textile with reinforced sections or armor inserts in critical areas like shoulders, elbows, knees, and back.
  1. Fit and Adjustability:

  • Ensure the jacket and pants fit properly to minimize flapping or restriction of movement. Adjustable straps, closures, and ventilation systems help achieve a comfortable and secure fit while adapting to varying weather conditions.
  1. Ventilation:

  • Look for jackets and pants with ventilation systems, such as vents or mesh panels, to improve airflow and prevent overheating during warm weather rides. This helps maintain comfort and focus while on the road.
  1. High-Visibility Features:

  • Consider wearing jackets or pants with high-visibility colors or reflective materials, especially for riding in low-light conditions or in areas with heavy traffic. These features enhance your visibility to other motorists, reducing the risk of accidents.

motorcycle gear

IV. Gloves: Protecting Your Hands

  1. Importance of Gloves:

  • Motorcycle gloves offer protection against abrasions, impacts, and weather conditions. They also improve grip and dexterity, ensuring optimal control of the motorcycle’s controls.
  1. Materials:

  • Choose gloves made of durable materials, such as leather or textile with reinforced sections, to provide abrasion resistance. Look for gloves with padding or armor on the knuckles and palms for impact protection.
  1. Weather Resistance:

  • Consider weather conditions when selecting gloves. Opt for waterproof or weather-resistant gloves with thermal insulation for cold or wet riding conditions, while breathable and ventilated gloves are more suitable for hot weather.
  1. Proper Fit:

  • Gloves should fit snugly without being too tight or restrictive, allowing for comfortable hand movement and proper grip on the motorcycle’s controls.

V. Boots: Securing Your Feet and Ankles

  1. Purpose of Motorcycle Boots:

  • Motorcycle boots provide protection, support, and grip, safeguarding your feet and ankles from injuries caused by impact, abrasions, and weather conditions.
  1. Sturdy Construction:

  • Look for boots made from sturdy materials, such as leather or reinforced textile, with reinforced ankle support. The sole should provide a good grip on both the footpegs and the ground.
  1. Height and Fit:

  • Boots should offer sufficient ankle coverage and fit snugly to provide protection and prevent movement that could lead to foot fatigue while riding.
  1. Extra Features:

  • Some boots have additional safety features, including toe protection, ankle armor, or additional reinforcement in critical areas. Assess your riding style and preferences to determine which features are most important for your safety.

motorcycle gear

VI. Additional Safety Accessories

  1. Back Protectors:

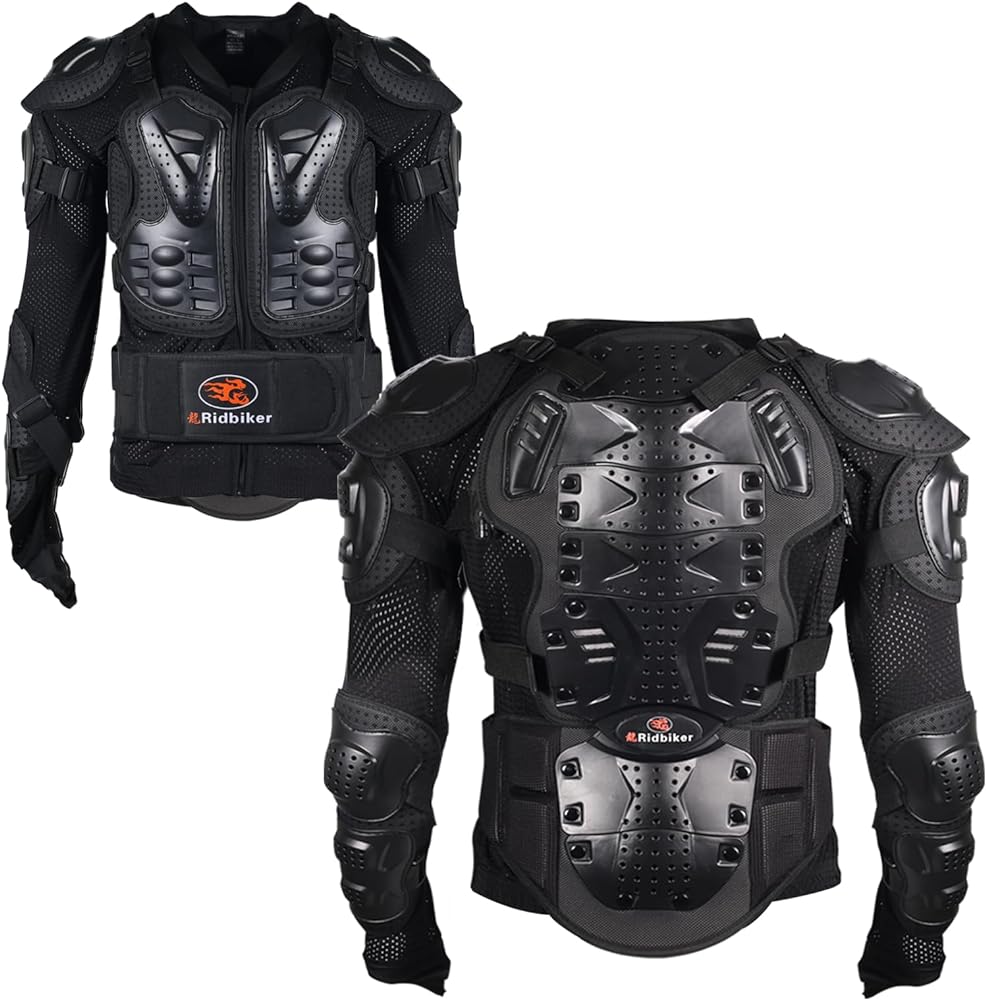
  • A back protector, worn beneath the jacket or attached to it, provides added support and protection to the spine and surrounding areas. Consider investing in this accessory for enhanced safety during rides.
  1. Knee and Elbow Guards:

  • Riders with a preference for higher levels of protection may opt for separate knee and elbow guards, which provide added shield against impacts and abrasions. Attachable or integrated armor in jackets and pants can also offer similar protection.
  1. Reflective Gear:

  • Consider wearing reflective gear, such as vests or armbands, to increase your visibility to other motorists, especially during night rides or in low-light conditions. This supplementary gear enhances safety by significantly improving your presence on the road.

VII. Maintenance and Upkeep

  1. Regular Inspection:

  • Ensure all safety gear is in good condition by inspecting it regularly for any signs of wear, tears, or damaged components. Replace gear if it no longer provides adequate protection.
  1. Cleaning and Care:

  • Follow manufacturer instructions for cleaning and caring for each piece of safety gear. Proper maintenance extends the lifespan and effectiveness of your gear, ensuring constant protection on the road.

motorcycle gear

VIII. Conclusion

Prioritizing safety gear when riding a motorcycle is essential to protect against injuries and enhance overall riding experience. Wearing a certified helmet, using proper eye protection, and donning well-fitted jackets, pants, gloves, and boots go a long way in mitigating risks and safeguarding your body. Additional accessories like back protectors and knee and elbow guards provide further protection. Regular maintenance and inspections help ensure that your safety gear remains in excellent condition. By adhering to the guidelines outlined in this comprehensive guide, you can enjoy the thrill of motorcycle riding while minimizing the potential risks and maximizing your safety on the road.

Posted in Motorcycle equipment, Motorcycles | Tagged , | Leave a comment

How do you stay dry while riding a motorcycle in the rain?

Introduction

Riding a motorcycle in the rain can be a wet and challenging experience, but with the right gear and precautions, you can stay dry and comfortable throughout your journey. From waterproof riding gear to strategic riding techniques, there are several measures you can take to shield yourself from the rain. In this guide, we will explore effective strategies and gear to help you stay dry while riding your motorcycle in wet weather conditions.

motorcycle

How do you stay dry while riding a motorcycle in the rain?

I. Invest in Quality Waterproof Riding Gear

  1. Waterproof Jacket:

  • A waterproof motorcycle jacket is the first line of defense against rain. Look for jackets made from waterproof materials, such as Gore-Tex or specialized waterproof fabrics. Sealed seams and waterproof zippers further enhance protection. Make sure the jacket provides a snug fit and has adjustable cuffs and collar to prevent water from entering.
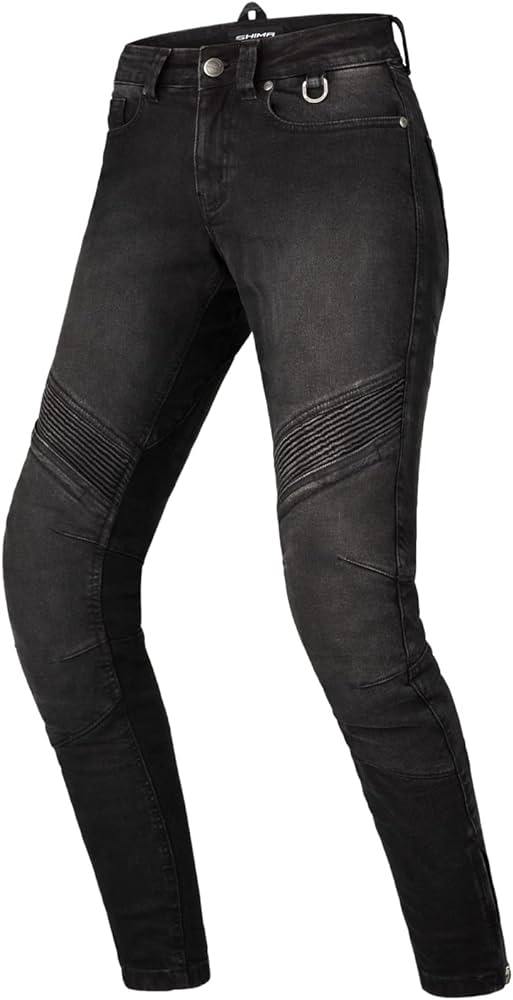
  1. Waterproof Pants:

  • Pair your waterproof jacket with matching waterproof pants to ensure complete coverage. Look for pants designed specifically for motorcycle riding that offer waterproof protection and have features such as sealed seams and adjustable waistbands.
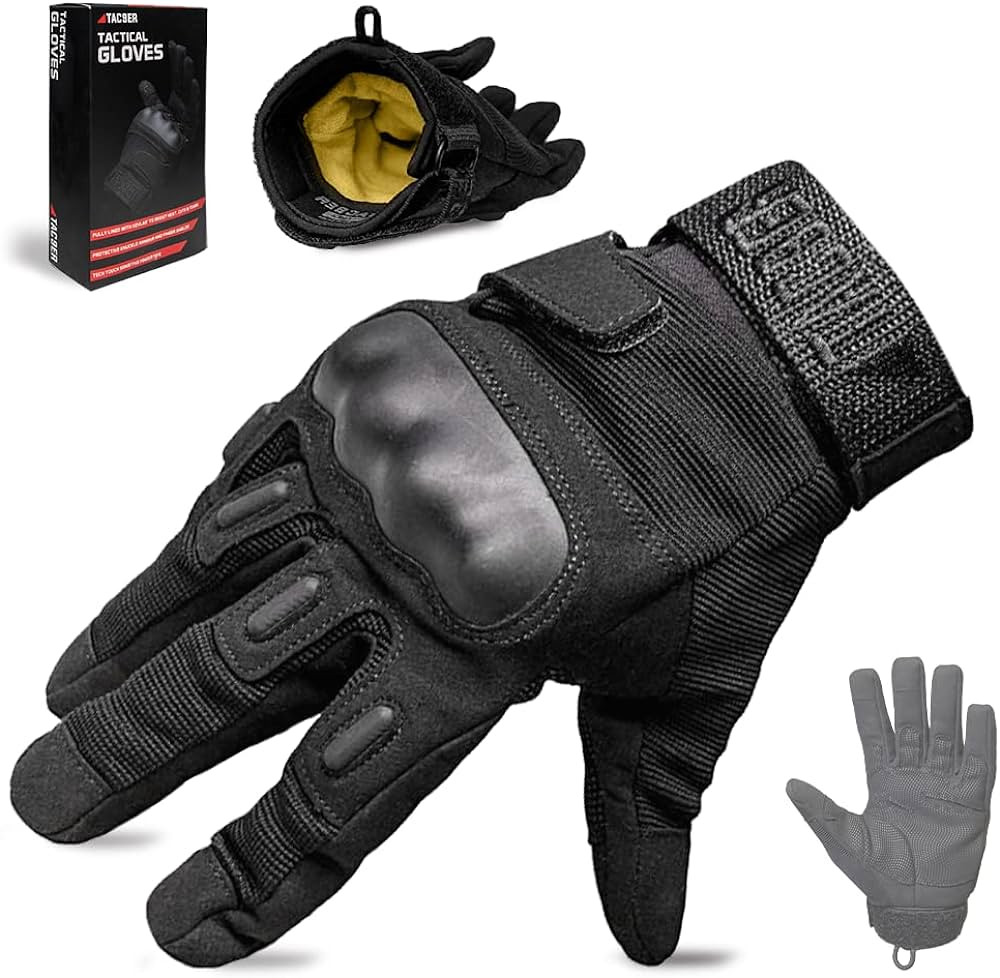
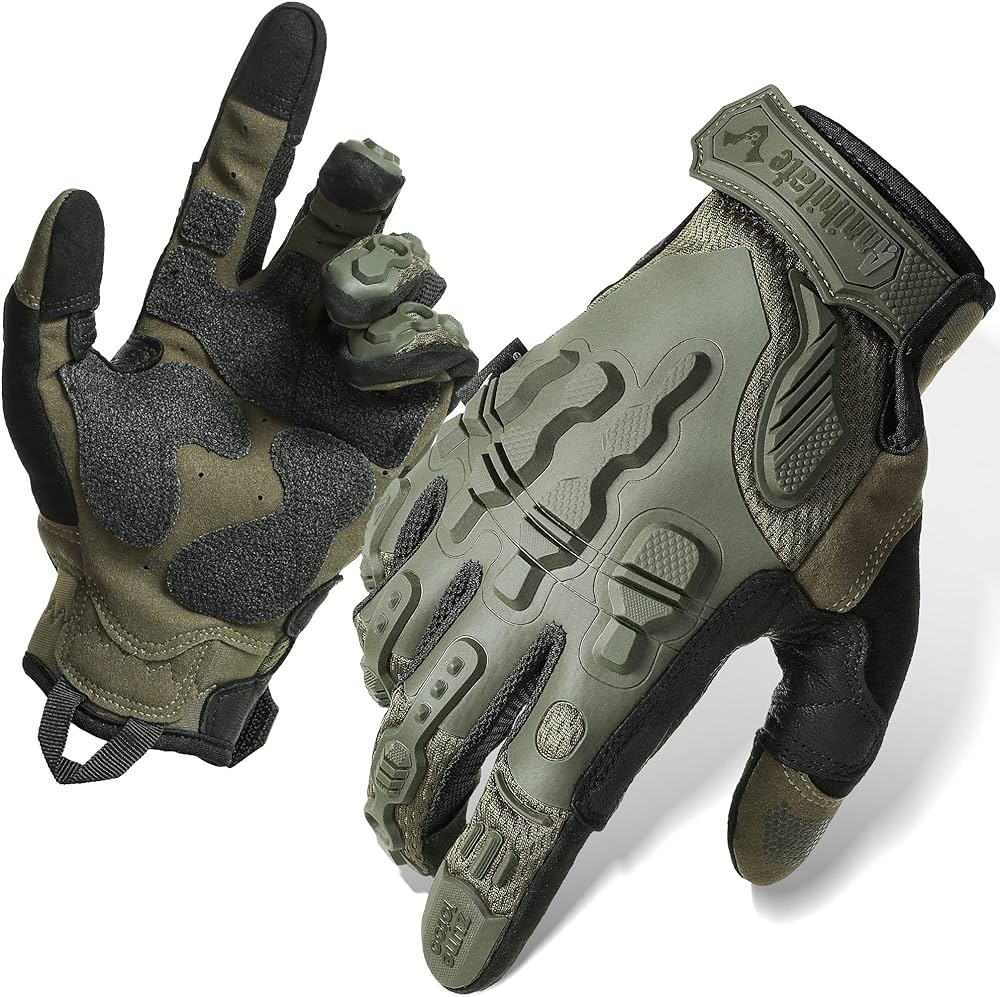
  1. Waterproof Gloves:

  • Keep your hands dry and protected with waterproof gloves. Look for gloves made from waterproof materials with reinforced palms and fingers for enhanced grip. Adjustable wrist closures help keep water out, and touchscreen-compatible fingertips allow you to use your smartphone without removing the gloves.
  1. Waterproof Boots:

  • Invest in a pair of waterproof motorcycle boots to keep your feet dry and comfortable. Look for boots made from waterproof materials, with sealed seams and slip-resistant soles for added safety. Adjustable closures, such as buckles or Velcro straps, help ensure a snug fit and prevent water from entering.

motorcycle

II. Use Rain Covers for Additional Protection

  1. Helmet Rain Cover:

  • A helmet rain cover is an invaluable accessory for keeping your head and face dry. It fits over your existing helmet and shields it from rain and wind. Look for covers made from waterproof materials with elastic bands or drawstrings to ensure a secure fit.
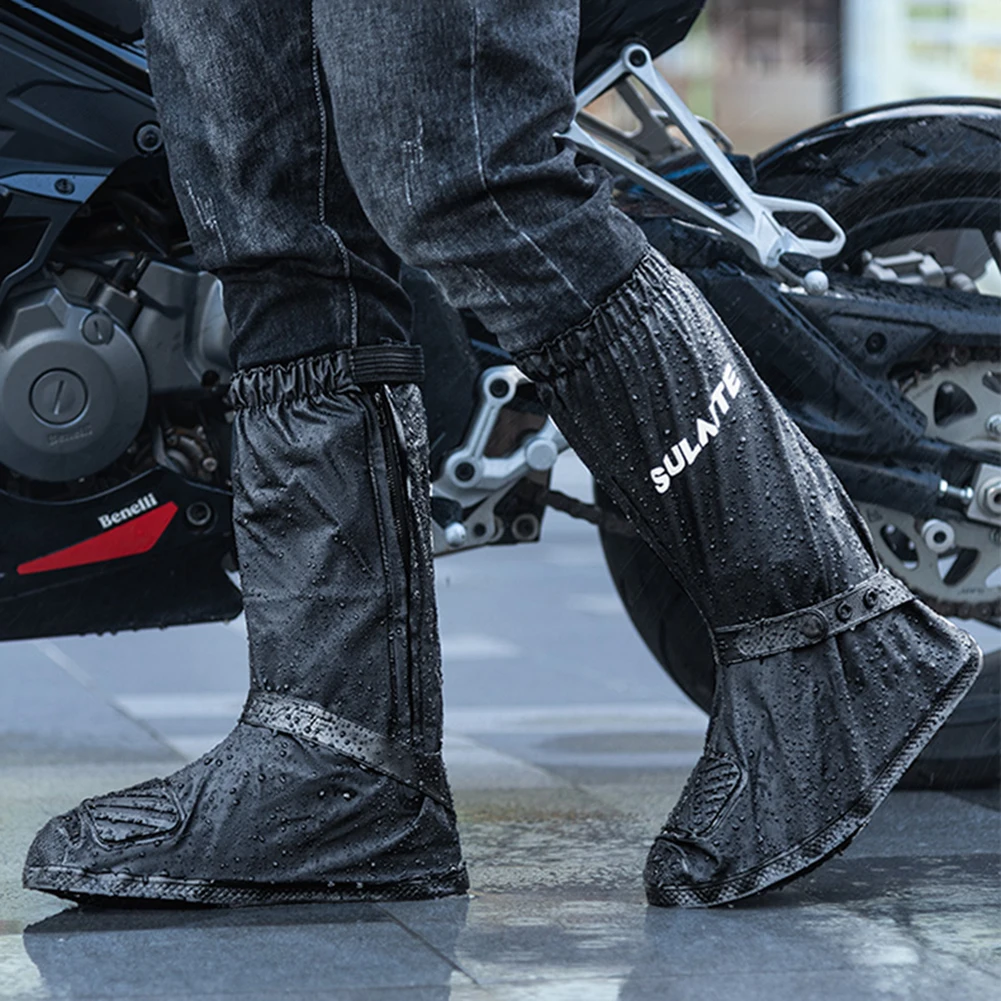
  1. Waterproof Boot Covers:

  • To further protect your feet and boots, consider using waterproof boot covers. These covers fit over your boots and provide an extra layer of waterproofing. Look for covers with sturdy closures that can be easily opened and closed while wearing gloves.

III. Implement Additional Measures for Full Protection

  1. Neck Gaiter or Balaclava:

  • Wear a neck gaiter or balaclava to keep your neck and lower face shielded from rain and wind. Look for options made from quick-drying and moisture-wicking materials to keep you comfortable throughout your ride.
  1. Rainproof Backpack or Luggage:

  • If you are carrying any belongings with you, make sure they are protected from the rain. Use a rainproof backpack or cover your luggage with waterproof covers to keep your items dry.
  1. Rainproof Navigation:

  • If you rely on GPS or smartphone navigation while riding, invest in a rainproof mount or cover for your device. This will protect your navigation equipment from water damage and ensure visibility of your route.

motorcycle

IV. Prepare Your Motorcycle for Wet Riding

  1. Windscreen:

  • Ensure your motorcycle’s windscreen is clean and has proper water-repellent treatment. This helps maintain visibility during rain, as water droplets are less likely to obstruct your view.
  1. Install Handguards:

  • Handguards provide additional protection from rain, reducing the amount of water that reaches your hands. They also act as wind deflectors, helping to keep you warmer and more comfortable in wet and cold conditions.
  1. Check and Adjust Tire Pressure:

  • Properly inflated tires have better traction on wet roads. Regularly check and adjust your tire pressure to ensure optimal grip and handling while riding in the rain.

V. Ride with Caution and Adapted Techniques

  1. Increase Following Distance:

  • Wet roads require longer stopping distances. Increase your following distance between vehicles to allow for additional braking time and to avoid hydroplaning.
  1. Smooth and Gentle Inputs:

  • Make smooth and gradual inputs on the throttle, brakes, and steering. Avoid sudden acceleration, hard braking, and aggressive maneuvers that can cause loss of traction or skidding.
  1. Slow Down and Adjust Speed:

  • Reduce your speed to match the road conditions. Remember, it takes longer to stop on wet surfaces, and visibility may be reduced. Adjust your riding speed accordingly to maintain control and safety.
  1. Avoid Sudden Lane Changes or Sharp Turns:

  • Wet roads significantly affect traction, making sharp turns and sudden lane changes riskier. Plan your moves carefully and execute them smoothly and gradually.

motorcycle

VII. Additional Tips for Riding in the Rain

  1. Stay Visible:

  • Riding in the rain can decrease visibility for both you and other motorists. Enhance your visibility by wearing brightly colored or reflective gear. Utilize your motorcycle’s lights, including headlights and taillights, to ensure that other drivers can see you, especially in low-light or rainy conditions.
  1. Plan Your Route:

  • Before heading out in wet weather, plan your route carefully. Avoid areas prone to flooding or known for poor drainage. Consider using main roads or highways instead of smaller, potentially hazardous routes. Be aware of any construction zones or road hazards that may be worsened by rain.
  1. Watch for Puddles and Standing Water:

  • Wet conditions can create puddles and standing water on roadways. These can lead to hydroplaning, loss of control, or unexpected road hazards. Keep an eye out for large puddles and try to avoid them by riding around or slowly passing through if necessary.
  1. Be Mindful of Oil and Other Road Hazards:

  • Rain can mix with oil, grease, and other residues on the road surface, creating slippery conditions. Be cautious when riding over painted road markings, manhole covers, or metal surfaces as they can become extremely slippery when wet. Reduce your speed and maintain a steady pace when encountering potentially slick areas.
  1. Beware of Reduced Grip at the Start of Rainfall:

  • When it first begins to rain, the moisture mixes with oil and dust on the road surface, making it particularly slippery. Exercise extra caution during the initial stages of rainfall until the road surface is adequately washed clean.
  1. Stay Focused and Concentrated:

  • Riding in wet weather requires additional attention and concentration. Reduce distractions and avoid activities that may divert your focus, such as adjusting music or checking your phone. Keep your eyes on the road, be vigilant of your surroundings, and maintain situational awareness.

motorcycle

VI. Conclusion

Riding your motorcycle in the rain doesn’t have to result in a soaking wet and uncomfortable experience. By investing in quality waterproof riding gear, utilizing rain covers and additional protection, and adapting your riding techniques, you can stay dry and comfortable throughout your rainy rides.

Remember to prioritize safety by maintaining visual clarity with a clean and treated windscreen, ensuring properly inflated tires, and increasing following distances. Be extra cautious with smooth and gentle inputs and adjust your speed to match the road conditions.

Embrace the freedom and adventure of riding your motorcycle, even when the weather is less than ideal. With the right gear, precautions, and riding techniques, you can confidently ride in the rain while staying dry and enjoying the exhilaration of two-wheel travel.

Posted in Motorcycle Maintenance, Motorcycles | Tagged , | Leave a comment