What is a Stator on a Motorcycle?

Motorcycles are fascinating machines, combining engineering precision with thrilling performance. At the heart of these mechanical marvels lies a complex electrical system that powers everything from the headlights to the ignition. One key component in this system that often gets overlooked is the stator. But what exactly is a stator on a motorcycle? Understanding the role and function of this critical component can provide valuable insights into how your motorcycle operates and what to do if you encounter electrical issues.

The Basics of Motorcycle Electrical Systems

Understanding the Electrical Circuit

To grasp the importance of the stator, it’s crucial first to understand the basic electrical circuit of a motorcycle. The electrical system includes a battery, alternator, rectifier, and of course, the stator. Together, these components generate, convert, and store electrical energy required for various functions. An electrical circuit in a motorcycle powers essential systems such as ignition, lighting, and electronic controls. The stator plays an integral role by generating the alternating current (AC) necessary for these functions.

Role of the Battery

The battery in a motorcycle primarily serves as a storage unit for electrical energy. It supplies power during startup and when the engine is off. However, once the engine starts, the battery’s role diminishes as the stator and other components take over power generation. Understanding how the battery interacts with the stator can help identify potential issues and maintain optimal performance. Regular battery maintenance and checks can prevent unexpected electrical failures and ensure efficient operation.

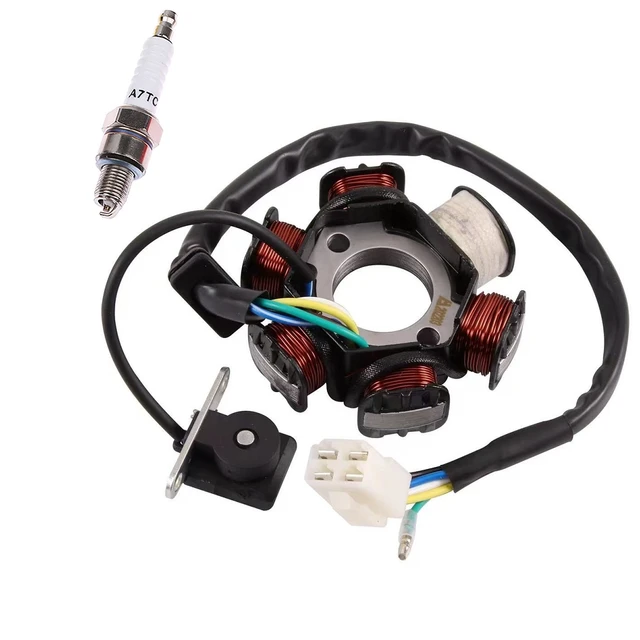
stater on a motorcycle

Functions of a Stator in a Motorcycle

Power Generation

The primary function of the stator in a motorcycle is to generate electrical power. When the engine operates, the stator produces alternating current (AC). This AC power is crucial for running the motorcycle’s electrical systems and recharging the battery. The stator contains coils of wire through which a magnetic field rotates, inducing an electrical current. This process is fundamental to maintaining the motorcycle’s power supply and ensuring all systems function properly. Properly working stators ensure that your motorcycle runs efficiently, with all electrical components receiving the needed power.

Conversion to Direct Current

Most modern motorcycles use a combination of AC and direct current (DC) electrical systems. The stator generates AC power, but many of the motorcycle’s systems require DC power. A rectifier, often combined with a voltage regulator, converts AC to DC. This conversion ensures that the electrical requirements of different components are met, providing a stable and reliable power supply. Understanding the conversion process between AC and DC helps in diagnosing electrical issues and maintaining system integrity.

Battery Charging

One of the most critical functions of the stator is to recharge the motorcycle’s battery. As the stator generates AC power, this power is converted to DC to keep the battery charged. A well-functioning stator ensures that the battery stays adequately charged, preventing unexpected stalls or electrical failures. Regularly monitoring battery charge levels and stator output can help avoid disruptions and maintain efficient performance. Ensuring that the battery receives a steady charge extends its lifespan and enhances overall reliability.

stater on a motorcycle

Anatomy of a Stator

Coils and Windings

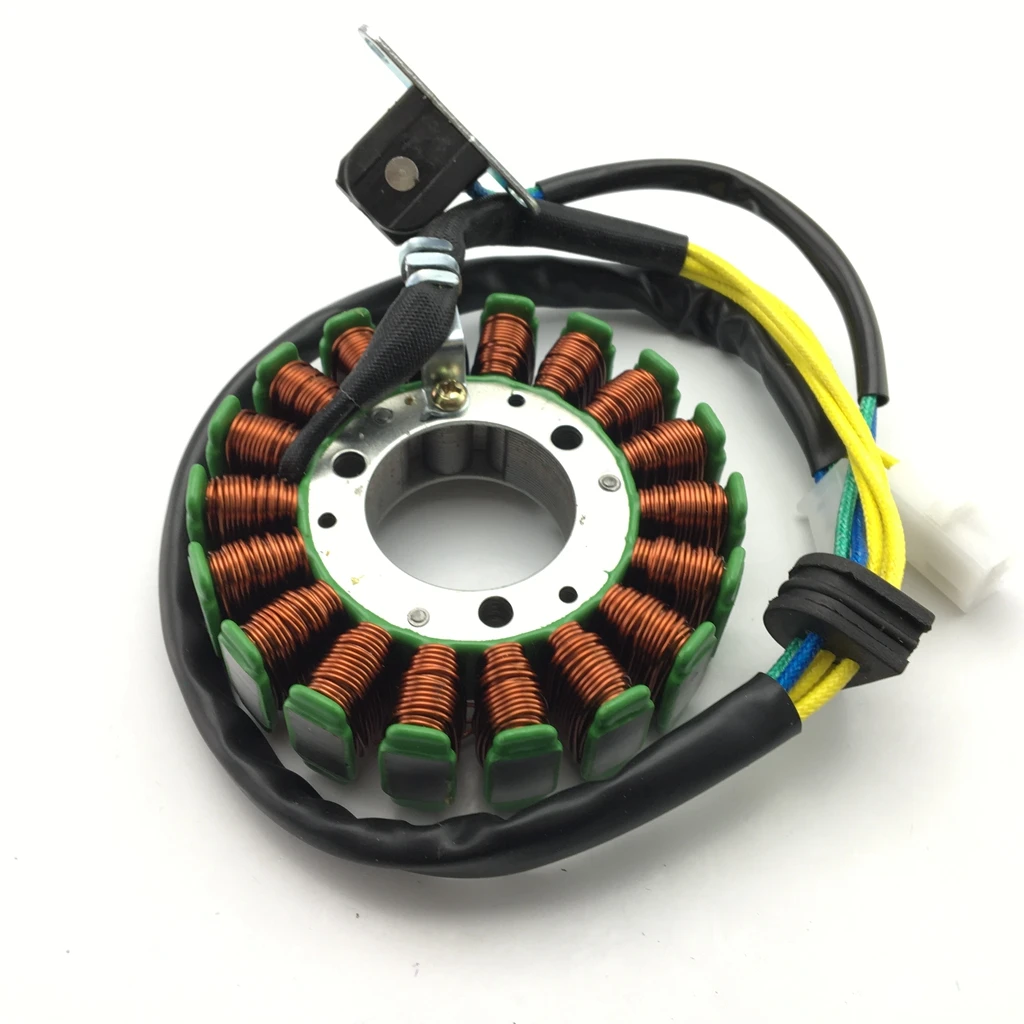
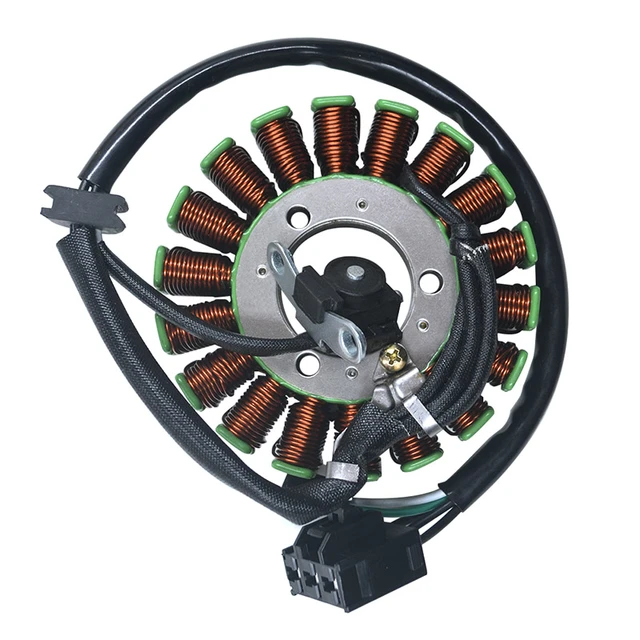
The stator consists of coils and windings made of copper wire. These coils are strategically arranged to create a magnetic field in the presence of a rotating magnet (rotor). This magnetic interaction induces an electrical current, which is harnessed to power the motorcycle’s electrical systems. The quality and condition of these coils and windings directly impact the stator’s efficiency. Ensuring that these components are in good condition is crucial for optimal performance.

Permanent Magnets

Alongside the stator, the rotor typically contains permanent magnets. As the rotor spins, its magnetic field interacts with the stator’s coils, generating electrical current. This interaction is fundamental to the stator’s power generation capabilities. Understanding the role of these magnets helps in diagnosing and troubleshooting power generation issues. Regular inspection of the rotor and magnets ensures consistent and reliable power output.

Mounting and Placement

The stator is usually mounted within the engine case, positioned around the rotor. This placement ensures a consistent and effective magnetic interaction, facilitating efficient power generation. Proper mounting and alignment are crucial for optimal performance. Ensuring correct positioning during installation and maintenance can prevent operational issues and enhance performance.

Common Stator Problems

Overheating

One of the most common issues with stators is overheating. Excessive heat can damage the coils and windings, reducing efficiency and potentially causing failure. Overheating can result from prolonged usage, poor ventilation, or an overloaded electrical system. Monitoring temperature and ensuring adequate cooling can prevent overheating and extend the stator’s lifespan.

Wear and Tear

Regular usage naturally leads to wear and tear on the stator. Over time, vibrations, heat, and mechanical stress can degrade the coils and other components. Regular maintenance and inspection help identify wear and tear early, allowing for timely repairs or replacements. Proactive maintenance ensures continuous and reliable performance, minimizing the risk of unexpected failures.

Electrical Shorts

Electrical shorts within the stator can cause significant issues. Damaged wires or insulation can lead to short circuits, disrupting power generation and potentially causing further damage. Identifying and repairing shorts promptly is crucial to maintaining electrical system integrity. Regular inspection of wiring and connections helps prevent shorts and ensures efficient operation.

Diagnosing Stator Issues

Symptoms of a Failing Stator

Recognizing the symptoms of a failing stator can prevent more severe problems later. Common signs include dimming lights, difficulty starting the motorcycle, or erratic behavior of electrical systems. These symptoms indicate that the stator may not be generating adequate power. Early diagnosis and intervention can prevent further damage and ensure continuous operation.

Testing the Stator

Using a multimeter to test the stator provides valuable insights into its condition. Measure the resistance between the stator’s coils and check for continuity. Inconsistent readings or lack of continuity indicate potential issues. Regular testing of the stator helps in early detection of problems, allowing for timely repairs. Understanding how to use a multimeter effectively ensures accurate diagnostics and informed decision-making.

Visual Inspection

A visual inspection of the stator can also help identify issues. Look for signs of physical damage, such as burnt coils or discolored windings. Inspect the connectors and wiring for any visible damage. Visual inspections complement other diagnostic methods, providing a comprehensive overview of the stator’s condition. Regular visual inspections enhance proactive maintenance and ensure optimal performance.
  what is a stater on a motorcycleMaintaining a Stator

Regular Cleaning

Keeping the stator clean is essential for its efficiency. Dust, dirt, and debris can accumulate on the coils and interfere with power generation. Regularly clean the stator using a soft brush and compressed air to remove any build-up. Cleanliness ensures optimal performance and extends the constancy of power output.

Ensuring Proper Cooling

Stators thrive in a well-ventilated environment. Ensuring adequate cooling involves maintaining clean air pathways and avoiding overloading the electrical system. Proper cooling prevents overheating, extending the stator’s lifespan and ensuring reliable performance. Implementing effective cooling strategies ensures that the stator operates within safe temperature ranges.

Scheduled Maintenance Checks

Incorporate the stator into your motorcycle’s regular maintenance schedule. Frequent checks and proactive maintenance prevent unexpected issues and ensures the stator operates efficiently. Adhering to scheduled maintenance checks enhances reliability and performance. A comprehensive maintenance routine helps identify and address potential problems early.

Replacing a Stator

Identifying the Right Replacement

When a stator fails, identifying the correct replacement is crucial. Refer to your motorcycle’s manual for specifications or consult with a professional. Using the correct replacement ensures compatibility and optimal performance. Researching and selecting high-quality stator replacements enhances reliability and longevity.

Installation Process

Replacing the stator requires some mechanical skill. Follow the manufacturer’s guidelines and take care during the installation process. Ensure all connections are secure and correctly aligned. Proper installation is crucial to the stator’s function and overall electrical system stability. Adhering to installation best practices ensures a successful replacement and efficient operation.

Post-Installation Testing

After replacing the stator, perform thorough testing to ensure everything is working correctly. Check for proper power generation, battery charging, and overall electrical system functionality. Post-installation testing validates the replacement and ensures system integrity. Comprehensive testing ensures that the replacement stator functions correctly and efficiently.

Conclusion: what is a stator on a motorcycle

Understanding what a stator is on a motorcycle and its crucial role in the electrical system can help you maintain and troubleshoot your bike more effectively. From power generation to battery charging, the stator is an essential component that ensures smooth and reliable operation. Regular maintenance, timely diagnosis of issues, and proper handling can extend the lifetime and effectiveness of this vital part, ensuring your motorcycle remains a reliable and thrilling ride.

Posted in Motorcycle Accessories, Motorcycles | Tagged , , | Leave a comment

How to Remove Rust from Motorcycle Gas Tank?

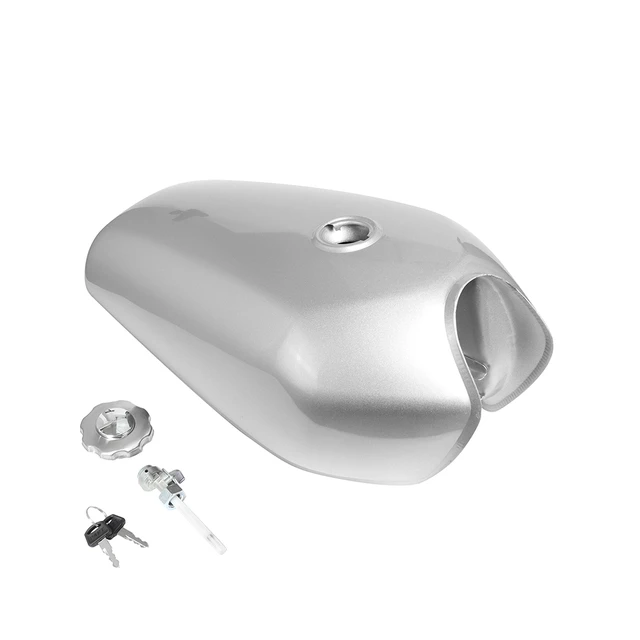
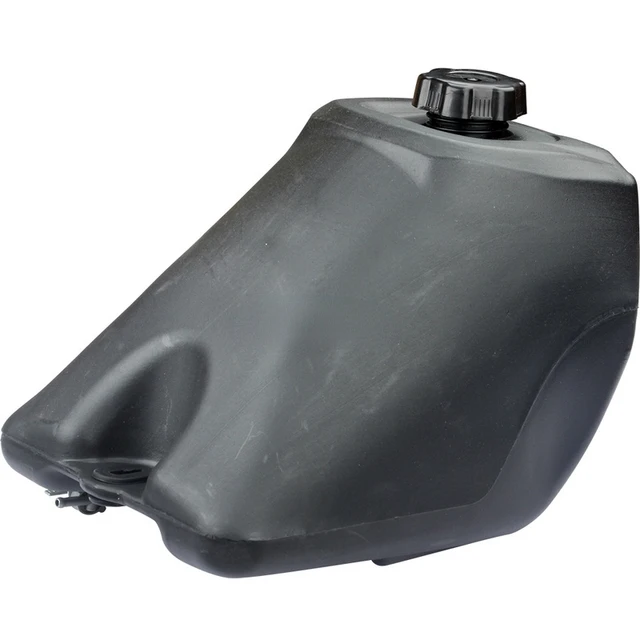
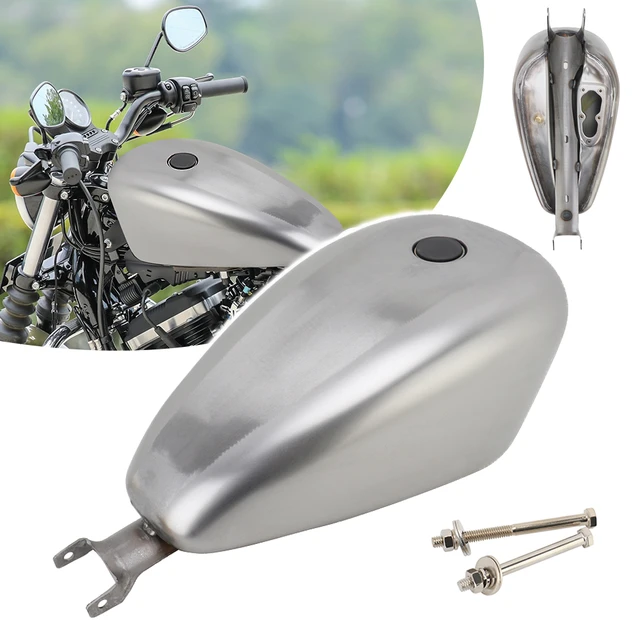
Rust in a motorcycle gas tank can cause a multitude of issues, from clogged fuel lines to poor engine performance. For motorcycle enthusiasts, knowing how to remove rust from a motorcycle gas tank is crucial for maintaining the bike’s performance and longevity. This article will provide a comprehensive guide on removing rust from a motorcycle gas tank, including essential tools, step-by-step instructions, and tips to prevent future rust formation.

Assessing the Rust Damage

Before diving into the rust removal process, it’s essential to assess the extent of the damage to determine the best course of action.

Visual Inspection

Start by removing the gas cap and using a flashlight to inspect the inside of the tank. Look for rust spots, corrosion, and any other signs of damage. This initial inspection helps you gauge how severe the rust issue is and plan your approach accordingly.

Evaluating the Severity

Determine if the rust is surface-level or if it has penetrated deeper into the metal. Surface rust can be treated easily, but severe rust may require more intensive methods or even professional intervention. Understanding the severity allows for a more targeted and effective rust removal approach.

Planning the Procedure

Based on your assessment, decide whether to proceed with a DIY rust removal method or seek professional help. This decision is crucial for effectively addressing the rust problem without causing further damage to the tank.

motorcycle gas tank

Gathering Necessary Tools and Materials

Having the right tools and materials on hand can make the rust removal process smoother and more efficient.

Required Tools

You’ll need tools such as wrenches, pliers, and screwdrivers to remove the gas tank from the motorcycle. Additionally, a flashlight and inspection mirror will aid in your initial assessment. Proper tools ensure that the disassembly and reassembly processes are safe and efficient.

Cleaning Agents

Various cleaning agents can help remove rust. Common options include vinegar, baking soda, and commercial rust removers. Choosing the right cleaning agents based on the severity of rust ensures effective removal and minimal damage.

Safety Gear

To protect yourself during the rust removal process, wear safety gear such as gloves, safety goggles, and a mask. These precautions are essential to avoid any injuries or exposure to harmful chemicals.

Draining the Gas Tank

Removing all fuel from the tank is the first practical step in the rust removal process.

Safety Precautions

Ensure you’re working in a well-ventilated area away from any open flames or sparks. Gasoline is highly flammable, and proper safety measures are crucial to prevent accidents.

Draining Process

Use a siphon pump to remove the gasoline from the tank, or tilt the tank and let the fuel drain into a suitable container. Make sure to dispose of the old gasoline properly, following local regulations. Effective fuel removal ensures a safer and more thorough cleaning process.

Removing the Gas Tank

Detaching the gas tank from the motorcycle allows for more effective rust removal.

Disconnecting Fuel Lines

Carefully disconnect the fuel lines, making note of where each line connects for easier reassembly. Use wrenches or pliers as needed, and be gentle to avoid damaging any components.

Unbolting the Tank

Use the appropriate tools to remove bolts or screws securing the gas tank to the motorcycle frame. Keep track of all fasteners and components to ensure a smooth reinstallation process. Proper removal of the tank enables a more controlled and thorough cleaning.

Lifting the Tank

Once all connections and fasteners are removed, carefully lift the gas tank from the frame. Pay attention to its weight and balance to prevent spills or accidents. Proper handling minimizes the risk of damage during the cleaning process.

motorcycle gas tank

Interior Cleaning Process

Various methods can effectively remove rust from the interior of the gas tank.

Using Vinegar and Baking Soda

One of the most popular methods involves filling the tank with white vinegar and letting it sit for several hours or overnight. The acidity of the vinegar helps dissolve the rust. After soaking, add a handful of baking soda to neutralize the acid and create a foaming action that loosens the rust further.

Shaking with Abrasive Materials

For stubborn rust, add a mixture of gravel, nuts, or bolts into the tank along with the vinegar solution. Seal the tank and shake it vigorously. The abrasive materials will help scrub away the rust from the interior surfaces. This method is particularly effective for removing heavy rust deposits.

Commercial Rust Removers

Commercial rust removers, available at auto parts stores, can be highly effective. Follow the manufacturer’s instructions for the best results. These products are formulated to target rust and often provide quicker results compared to homemade solutions.

Flushing and Rinsing

After the rust has been loosened and dissolved, thorough flushing and rinsing are essential.

Rinsing with Water

Flush the tank with warm water to remove all cleaning agents, rust particles, and debris. Repeat this process several times until the water runs clear, ensuring that no contaminants remain inside the tank.

Using a Degreaser

For an extra level of cleanliness, rinse the tank with a degreaser solution. This step helps remove any lingering residue and prepares the tank for reinstallation. Proper rinsing ensures that no cleaning agents remain that could harm the motorcycle’s performance.

Drying the Tank

Thoroughly dry the inside of the gas tank to prevent new rust from forming. You can speed up the drying process by using a hairdryer or heat gun set to a low temperature. Ensure the tank is completely dry before proceeding to the next steps.

Inspecting for Remaining Rust

A final inspection helps ensure that all rust has been removed from the tank.

Using a Flashlight

Shine a flashlight into the tank to check for any remaining rust spots or debris. This detailed inspection allows you to identify any areas that may require additional cleaning.

Repeat Cleaning if Necessary

If rust remains, repeat the cleaning process using the same or a different method for the remaining spots. Persistence in cleaning ensures a completely rust-free tank.

  motorcycle gas tankPreventing Future Rust

Taking steps to prevent rust can extend the life of your gas tank and improve your motorcycle’s performance.

Fuel Stabilizers

Add a fuel stabilizer to your gas tank, especially if you plan to store your motorcycle for an extended period. Fuel stabilizers help prevent rust and corrosion by minimizing moisture buildup inside the tank.

Keeping the Tank Full

A full gas tank leaves less room for moisture to accumulate, which can lead to rust formation. Try to keep your tank full, especially during storage periods, to minimize the risk of rust.

Regular Inspections

Periodically inspect the inside of your gas tank for any signs of rust or corrosion. Early detection allows you to address the issue before it becomes severe, ensuring the longevity of your gas tank.

Reinstalling the Gas Tank

Reinstallation must be done carefully to ensure the motorcycle operates correctly.

Reconnecting Fuel Lines

Reconnect the fuel lines to their appropriate positions, making sure each connection is secure and free from leaks. Proper reconnection ensures efficient fuel flow and prevents operational issues.

Securing the Tank

Use the screws or bolts you removed earlier to secure the tank back onto the motorcycle frame. Ensure all fasteners are tightened appropriately to avoid any movement or vibrations during riding.

Testing for Leaks

After reinstalling the tank, fill it partially with gasoline and check for any leaks. Tighten connections as necessary to ensure a secure and leak-free tank. A thorough leak test ensures safe operation before hitting the road.

Professional Help

Although this guide provides detailed steps, sometimes professional help is necessary.

When to Seek Professional Assistance

If the rust is severe or if you’re not comfortable performing the cleaning process yourself, it’s best to seek professional help. Professionals have specialized tools and expertise to address significant rust issues effectively.

Professional Services

Professional services can provide thorough cleaning, coating, and rust prevention treatments that may not be achievable with DIY methods. Engaging professional services ensures comprehensive maintenance and peace of mind.

Conclusion

Knowing how to remove rust from a motorcycle gas tank is an invaluable skill for maintaining your bike’s performance and longevity. By following the detailed steps provided and taking preventive measures, you can keep your gas tank clean and rust-free, ensuring a smoother and safer ride. This knowledge empowers you to take proactive care of your motorcycle, enhancing both its lifespan and your riding experience.

Posted in Motorcycle Maintenance, Motorcycles | Tagged , , | Leave a comment

How to Downshift a Motorcycle: Master This Essential Skill

Learning how to downshift a motorcycle might seem daunting for new riders, but mastering this essential skill can significantly improve your riding experience and enhance your safety. Proper downshifting not only helps you maintain control over your motorcycle in various riding conditions but also extends the life of your bike’s transmission. This article will delve into the specifics of how to downshift a motorcycle smoothly and effectively, step-by-step instructions, helpful tips, and ways to avoid common mistakes.

Understanding the Basics

Getting a grasp of the fundamental concepts is crucial before diving into the actual downshifting process.

What is Downshifting?

Downshifting refers to shifting from a higher gear to a lower gear. This action increases engine speed (RPM) relative to the motorcycle’s road speed, providing more power and control, especially during deceleration or when approaching a stop.

Why Downshift?

Downshifting allows you to take better control of your motorcycle’s speed and handling, especially when decelerating, cornering, or coming to a stop. It also helps in utilizing engine braking, reducing wear on your bike’s brakes.

When to Downshift?

Determining the right time to downshift can depend on various factors like road conditions, speed, and the need for power. Typically, you should downshift when you feel the bike struggling in a higher gear or when approaching a turn, stop, or an obstacle.

Preparing to Downshift

To downshift smoothly, preparation is key, including understanding your bike’s gear system and familiarizing yourself with proper hand and foot positions.

Familiarize with Gear Shifter

Ensure you are well-acquainted with the gear shifter’s position and operation. The shifter is usually located on the left side of the motorcycle and operated with your left foot. Knowing the exact position helps in quick and seamless gear changes.

Clutch Control

Proper clutch control is essential for smooth downshifting. Practice pulling the clutch lever in and releasing it slowly to get a feel for its engagement point. Clutch control directly impacts the smoothness of your gear transitions.

Throttle Management

Understanding how to manage the throttle during downshifting is crucial. Blipping the throttle (rev-matching) while downshifting can help in smooth gear transitions, especially on bikes with high-performance engines. Effective throttle management aids in reducing mechanical stress on the gearbox.

Steps to Downshift a Motorcycle

Carefully follow these steps to effectively master how to downshift a motorcycle.

Step 1: Decelerate

Before downshifting, begin by rolling off the throttle to decrease your speed gradually. This initial deceleration helps in preparing the engine and transmission for the gear change. Gradual deceleration minimizes abrupt forces on the gear mechanism.

Step 2: Pull in the Clutch

Pull in the clutch lever fully with your left hand to disengage the engine from the transmission. This action allows you to change gears without damaging the gearbox. Complete disengagement of the clutch is crucial for a smooth gear shift.

Step 3: Shift Down

Use your left foot to press down on the gear shifter. Each press down shifts the transmission to a lower gear. Ensure your foot placement is accurate to avoid missed shifts. Precise foot movement ensures successful gear engagement.

Step 4: Blip the Throttle (Optional but Recommended)

While the clutch is still engaged, quickly and briefly twist the throttle to rev-match the engine speed with the lower gear. This technique reduces strain on the gearbox and ensures smoother downshifts. Rev-matching significantly enhances the downshifting experience.

Step 5: Release the Clutch Slowly

Gradually release the clutch lever to re-engage the transmission with the engine. Doing this slowly helps prevent sudden jerks and maintains bike stability. Controlled clutch release is key to smooth gear transition and overall ride quality.

downshift a motorcycle

Techniques for Smooth Downshifting

Applying specific techniques can help in achieving smoother downshifts and improving the overall riding experience.

Rev-Matching

As mentioned earlier, rev-matching involves blipping the throttle to harmonize the engine speed with the lower gear. This technique reduces the risk of rear wheel slippage and enhances gear engagement. Regular practice helps in mastering this technique efficiently.

Double-Clutching

Double-clutching involves disengaging the clutch, shifting into neutral, releasing the clutch momentarily, and then disengaging it again to shift into the lower gear. This technique is more common in older motorcycles and can provide smoother shifts if done correctly. While less common in modern bikes, double-clutching is a valuable skill for riders of vintage motorcycles.

Engine Braking

Utilize engine braking by downshifting and allowing the engine’s resistance to slow down the motorcycle. This technique reduces wear on the brake pads and provides more control during deceleration. Mastering engine braking enhances overall riding control and safety.

Avoid Common Mistakes

New riders often make mistakes while downshifting. Knowing these common errors can help you avoid them and improve your technique.

Abrupt Clutch Release

Releasing the clutch too quickly can cause the rear wheel to lock up, leading to loss of control. Always release the clutch gradually to ensure a smooth transition. Controlled clutch release is crucial for maintaining balance and control.

Ignoring Engine RPM

Downshifting at high RPMs can damage the engine and transmission. Ensure the engine speed is appropriate for the lower gear before downshifting. Monitoring and managing RPM is vital for the longevity of your motorcycle.

Skipping Gears

While some advanced riders can skip gears confidently, it’s generally advisable to downshift one gear at a time to maintain control, especially for beginners. Sequential downshifting enhances control and prevents mechanical issues.

downshift a motorcycle

Maintaining Your Motorcycle

Proper maintenance of your motorcycle’s transmission and clutch system is essential for smooth downshifting and overall performance.

Regular Oil Changes

Ensure regular oil changes to keep the transmission lubricated and in good condition. Fresh oil reduces friction and wear, making gear shifts smoother. Regular oil maintenance extends the lifespan of your motorcycle components.

Clutch Adjustment

Periodically check and adjust the clutch cable tension to ensure it engages and disengages correctly. Proper clutch adjustment is critical for smooth gear changes and overall performance.

Inspecting the Gearbox

Regularly inspect the gearbox for any signs of wear or damage. Address any issues promptly to prevent further damage and ensure a smooth shifting experience. Proactive maintenance prevents costly repairs and downtime.

Advanced Downshifting Techniques

Once you’ve mastered basic downshifting, you can explore more advanced techniques for enhanced control and performance.

Heel-Toe Shifting

Heel-toe shifting involves using the heel to downshift while simultaneously braking with the toe. This technique is commonly used in high-performance riding to maintain speed and control during aggressive deceleration. Mastering heel-toe shifting enhances your riding skills in performance scenarios.

Trail Braking

Trail braking combines gentle braking with smooth downshifting while entering a turn. This technique helps in maintaining stability and control during cornering, improving your riding dynamics. Incorporating trail braking into your skillset allows for smoother and more controlled turns.

Clutchless Downshifting

Experienced riders sometimes perform clutchless downshifting, which involves timing the gear shift perfectly to match engine speed without using the clutch. This technique requires precise throttle control and should only be attempted by seasoned riders. Clutchless downshifting enhances riding fluidity but requires significant practice.

  downshift a motorcyclePracticing Downshifting

Consistent practice in a controlled environment is key to mastering downshifting techniques.

Choosing a Safe Practice Area

Select a quiet, open area free from traffic and obstacles to practice downshifting. This allows you to focus on refining your technique without distractions. A safe practice environment is essential for skill development.

Gradual Progression

Start with slower speeds and gradually increase as you become more comfortable with the downshifting process. Incremental progression helps in building confidence and refining skills methodically.

Regular Feedback

Seek feedback from experienced riders or instructors to identify areas for improvement and refine your technique. Constructive feedback accelerates learning and helps in achieving proficiency.

Real-World Applications

Understanding how to apply downshifting techniques in various real-world scenarios enhances your riding experience.

Urban Riding

In city traffic, downshifting helps in maintaining control and adjusting speed quickly. It’s useful for navigating stop-and-go traffic and making precise speed adjustments. Downshifting in urban settings enhances maneuverability and control.

Highway Riding

Downshifting on highways allows for smooth deceleration and preparation for exits or sudden stops. It provides better control when reducing speed from high velocities. Effective downshifting ensures safety and control during high-speed transitions.

Off-Road Riding

For off-road riders, downshifting aids in managing uneven terrain and steep descents by providing better traction and control. Mastering downshifting techniques is crucial for off-road safety and performance.

Conclusion: How to downshift a motorcycle

Mastering how to downshift a motorcycle is a fundamental skill that enhances your riding safety, control, and enjoyment. By understanding the basic principles, practicing consistently, and avoiding common mistakes, you can smoothly and effectively downshift in various riding conditions. Whether you are navigating city streets, highways, or off-road trails, mastering the art of downshifting will significantly improve your overall riding experience and ensure a safer, more enjoyable journey on your motorcycle.

Posted in Motorcycles | Tagged , , | Leave a comment

How Do You Tighten a Motorcycle Chain: Chain Maintenance

Preparing for Chain Adjustment

Before diving into how to tighten a motorcycle chain, it’s essential to prepare adequately and grasp the importance of correct chain tension. Inadequate preparation can lead to improper adjustment, potentially resulting in motorcycle damage or unsafe riding conditions.

Understanding the Importance of Chain Tension

Appropriate chain tension is vital for the smooth operation of your motorcycle. A tension that is too tight can put excessive stress on the engine’s driveshaft, sprockets, and the chain itself, leading to premature wear and potentially costly damage. Conversely, a chain that is too loose can lead to instability, an increased risk of the chain coming off the sprockets, and cause damage to the motorcycle’s swing arm. Correct chain tension ensures that power is efficiently transferred from the engine to the rear wheel, providing a smooth and safe riding experience.

Tools and Materials Needed for the Job

To properly adjust your motorcycle’s chain, you’re going to need a few tools and materials:

  • A wrench set or socket set for loosening and tightening bolts
  • A paddock stand or center stand to lift the rear wheel
  • A tape measure for checking chain slack
  • Lubricant for the chain if necessary
  • A manual or guide with the specifications for your motorcycle’s chain slack

It’s best to have these items on hand before you start, as stopping halfway through to find a missing tool can throw off your progress and affect the precision of your adjustments.

tighten motorcycle chain

Loosening the Axle and Adjuster Nuts

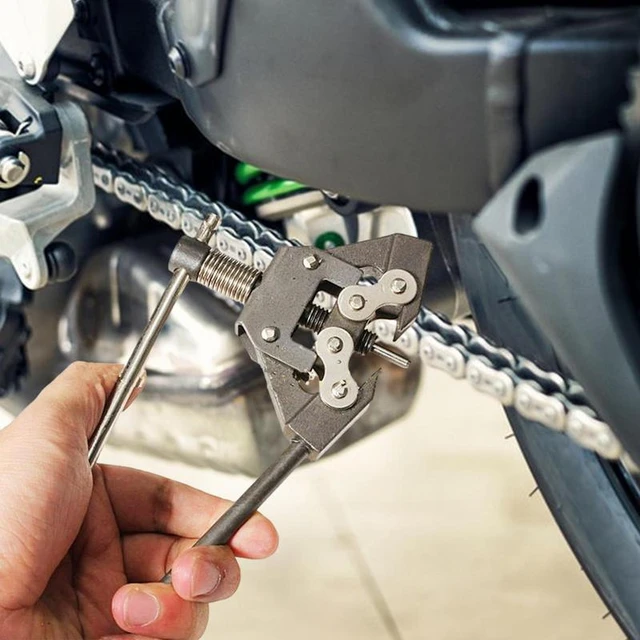
With the right tools ready, the first step in the adjustment process is to loosen the axle nut and adjuster nuts. Perform these actions while the motorcycle is on solid ground to maintain stability. Take care not to remove the nuts entirely, as they should remain attached to the motorcycle throughout the process. Use your wrench or socket set to loosen these components until they can be adjusted without resistance. This will allow the rear axle to move back and forth freely, which is essential in setting the correct chain tension.

Adjusting the Chain Tension

Now that we’ve discussed the necessary preparations, including the importance of chain tension and gathering the right tools, let’s move on to the actual chain tension adjustment process. Proper tensile adjustment is not just a matter of ride quality; it is also about the safety and longevity of your motorcycle’s components. Follow this step-by-step approach to ensure your bike’s performance remains optimal.

Lifting the Rear Tire

The first action in the actual adjustment phase is to lift the rear tire off the ground. This is imperative as it allows the rear wheel—and subsequently the chain—to move freely, which is necessary to accurately adjust the chain tension. Use a paddock stand or center stand if available. If your motorcycle isn’t equipped with these, a third-party lifting device can be used. Once the rear wheel is adequately lifted, ensuring it can rotate without touching the ground, you’re ready for the next step.

tighten motorcycle chain

Adjusting and Measuring Chain Slack

The goal here is to find that sweet spot of chain slack – too tight and you risk damaging the chain and associated components, too loose and the chain might derail or slap against the swing arm. Begin by adjusting the chain by manipulating the rear axle. Moving the axle backwards will increase tension, while moving it forwards will decrease it. Use your wrench to make small adjustments to the chain via the swingarm adjusters, checking the chain slack as you do so.

Most motorcycles recommend a slack of 25 mm to 35 mm. Measure this using a tape measure on the section of the chain that hangs below the swingarm. Press up on the chain to check the distance from the resting position to the highest point of movement. Refer to your motorcycle’s manual to find the exact specifications for your model.

Ensuring Proper Wheel Alignment

Accurate alignment of the rear wheel is as crucial as the proper chain tension. Misalignment can lead to uneven tire wear, poor handling, and potentially hazardous riding conditions. As you adjust the chain slack, pay close attention to the alignment marks on the swingarm. It’s essential to adjust both sides equally to maintain wheel alignment. After the adjustments, doing a visual check and using alignment tools—if available—will ensure that your rear wheel remains straight in relation to the frame of the motorcycle.

Every step of this process not only contributes to a safer ride but also extends the life of the motorcycle chain and sprockets. In the next section, we’ll discuss the final steps to secure and recheck the adjustments you’ve made, and then how to perform a test ride to ensure everything is in perfect working order.

tighten motorcycle chain

Finalizing the Adjustment

Once you have correctly adjusted the chain tension and ensured the rear wheel is properly aligned, it’s time to wrap up the adjustment process. This involves a series of tightening and rechecking steps to make sure everything is set correctly before taking the motorcycle back on the road.

Tightening the Adjusters and Axle Nut

Begin by lightly tightening the swingarm adjusters. You want them snug enough to hold the wheel in place but not so tight that you cannot perform any additional minor adjustments if needed. Then, move on to the axle nut. Use a torque wrench to tighten the axle nut to the manufacturer’s specified torque setting, which you can find in your motorcycle’s manual. Over-tightening can lead to excessive pressure on the bearings and other components, while under-tightening can result in the wheel coming loose during operation.

Once the axle nut is tightened to the correct specification, give the swingarm adjusters a final tighten. Ensure you use even pressure on both sides to maintain the rear wheel’s alignment. Lastly, secure the adjuster lock nuts to prevent them from loosening over time due to vibration or movement of the motorcycle.

Rechecking the Chain Tension and Alignment

After everything has been tightened, it’s crucial to recheck the chain tension and wheel alignment. Verify that the chain slack still falls within the specified range for your motorcycle model. In addition, ensure that the rear wheel remains properly aligned. If any adjustments are off, you may need to repeat the previous steps to correct them. Proper chain tension and wheel alignment are imperative for safe motorcycle operation.

tighten motorcycle chain

Test Riding and Post-Adjustment Checks

With the chain adjusted and everything tightened up, it’s time for a test ride. Start with a controlled environment, such as an empty parking lot or a quiet street, to evaluate the motorcycle’s handling and performance. Pay attention to any unusual noises or vibrations that might suggest that further adjustment is necessary.

After the test ride, perform a final set of checks. Look over the chain and rear wheel assembly to confirm that all adjustments have held and that there’s no sign of loosening. Double-check the chain tension one more time as the test ride may cause it to settle into position somewhat differently. If all looks good, you can be confident that your motorcycle is road-ready with a properly adjusted chain. Regular maintenance, including chain adjustments, will enhance your motorcycle’s performance and extend the life of its components.

Checks and Maintenance Tips

Perform a few final checks and follow some maintenance tips to ensure your chain remains in good condition.

Double-checking Slack

After tightening the rear axle nut, double-check the chain slack to ensure it hasn’t changed during the process. Proper slack is crucial for smooth, safe riding.

Lubrication

Lubricating your chain after adjustment ensures smooth operation and prolongs its lifespan. Use a high-quality motorcycle chain lubricant and apply it evenly across the length of the chain. Wipe off any excess to prevent grime buildup.

Regular Inspection

Make it a habit to inspect your motorcycle chain regularly. Check the slack, alignment, and overall condition every few hundred miles or after long rides. Regular maintenance prevents unexpected issues and keeps your chain functioning optimally.

    tighten motorcycle chainCommon Mistakes to Avoid

Being aware of common mistakes can help you maintain your chain correctly.

Over-tightening

Over-tightening the chain can cause severe damage to the sprockets, bearings, and the chain itself. Always follow the manufacturer’s recommended slack specifications.

Ignoring Wear and Tear

Ignoring signs of wear and tear can lead to chain failure and accidents. Regular inspection and timely replacement of worn-out components are crucial for your safety.

Neglecting Lubrication

Neglecting chain lubrication can cause excessive friction, leading to premature wear and potential chain failure. Maintain a regular lubrication schedule for optimal performance.

Conclusion: How to tighten motorcycle chain

Learning how to tighten motorcycle chain might seem daunting at first, but with the right knowledge and tools, it becomes a manageable task. Proper maintenance of your motorcycle chain leads to improved performance, enhanced safety, and a smoother riding experience. By understanding the importance of chain tension, following the outlined steps, and avoiding common mistakes, you can master how to tighten a motorcycle chain effectively.

Remember, understanding how to tighten a motorcycle chain is crucial, as it is a critical component requiring regular attention. Incorporate chain inspection and adjustment into your routine maintenance schedule, and always refer to your owner’s manual for specific guidelines. Keep your chain in optimal condition, and you’ll enjoy many miles of safe, exhilarating rides. Happy riding!

Posted in Motorcycles | Tagged , , | Leave a comment

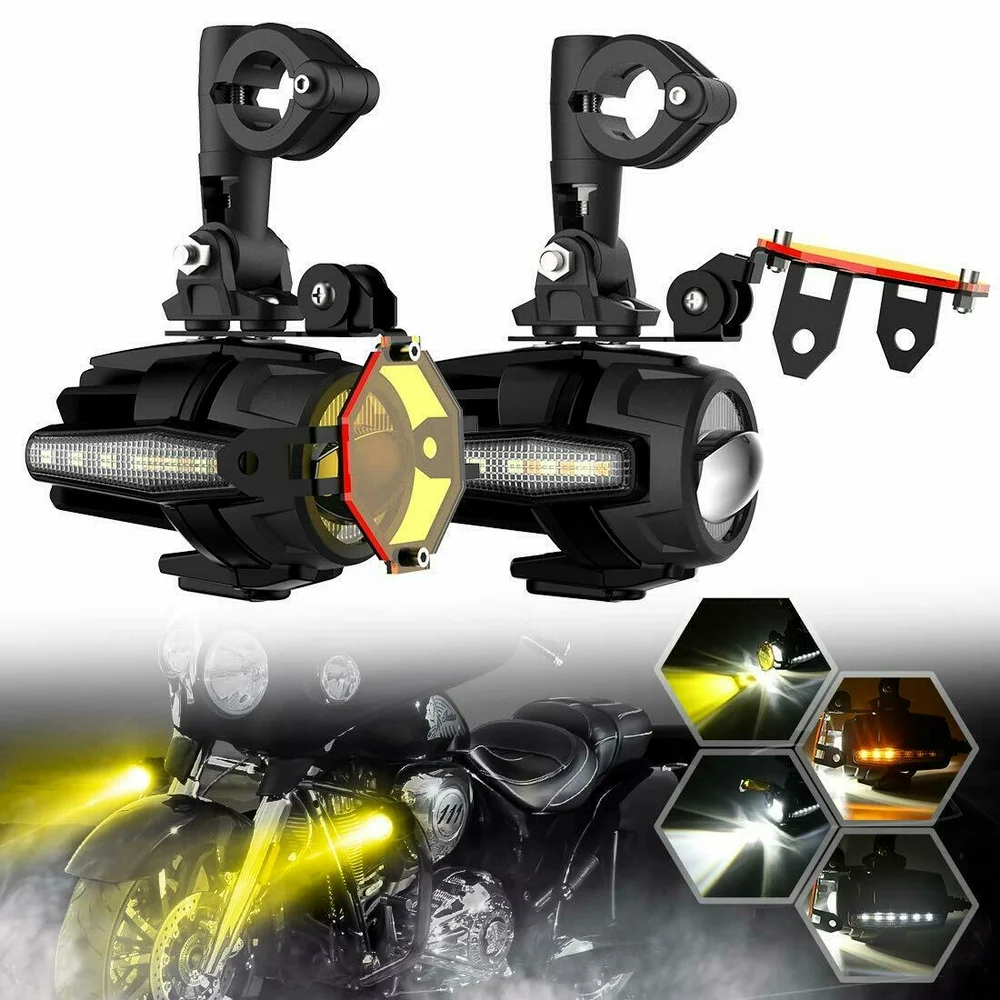
Customizing Your Ride: LED Lights for Motorcycle

This article will delve into the advantages, installation process, and types of LED lights available for motorcycles. Discover how led lights for motorcycle can enhance your riding experience and why they might be the perfect upgrade for your two-wheeled companion.

The Benefits of Installing LED Lights on Your Motorcycle

Installing LED lights on your motorcycle isn’t just about making a statement or looking cool. While aesthetics play a role, there are a plethora of advantages to making the switch to LEDs. From improved safety measures to financial savings in the long run, let’s delve into the benefits of installing LED lights on your motorcycle.

Increased Visibility for Safety

The primary concern for any biker should be safety, and LED lights significantly enhance that. LED motorcycle lights are brighter and more noticeable than traditional bulbs, which means other drivers are more likely to see you, especially at night or during adverse weather conditions. This increased visibility can be the difference between a safe ride and an unfortunate accident. LED lights also light up faster than incandescent bulbs when you brake, offering a split-second extra warning for drivers behind you, possibly preventing rear-end collisions.

Energy Efficiency and Longevity

LED lights are renowned for their energy efficiency. They require less power to operate than traditional bulbs, which reduces the strain on your motorcycle’s battery and alternator. This translates into less fuel consumption and, consequently, savings on gas over time. Moreover, LED bulbs have an impressively long lifespan. Unlike traditional bulbs that may require frequent changes, LEDs can last for tens of thousands of hours, which means less maintenance, fewer replacements, and more cost-efficiency in the long run.

Aesthetics and Personalization

LED lights also offer a wide array of customization options that cater to personal taste. You can choose from different colors, patterns, and intensities to personalize your motorcycle and stand out. Whether you’re cruising down the highway or parked at a local meet-up, LED lights can make your bike not just more visible but also more ‘you.’ Additionally, with the sleek designs and modern look that LEDs offer, your motorcycle can take on a whole new level of contemporary style that reflects your personal brand and the care you put into your ride.

led lights for motorcycle

Types of LED Lights for Motorcycles

When it comes to enhancing your motorcycle with LED lighting, the options are diverse, allowing riders to customize their presence on the road while also improving functionality and safety. Let’s explore the various types of LED lights that can be installed on your motorcycle.

Accent Lights

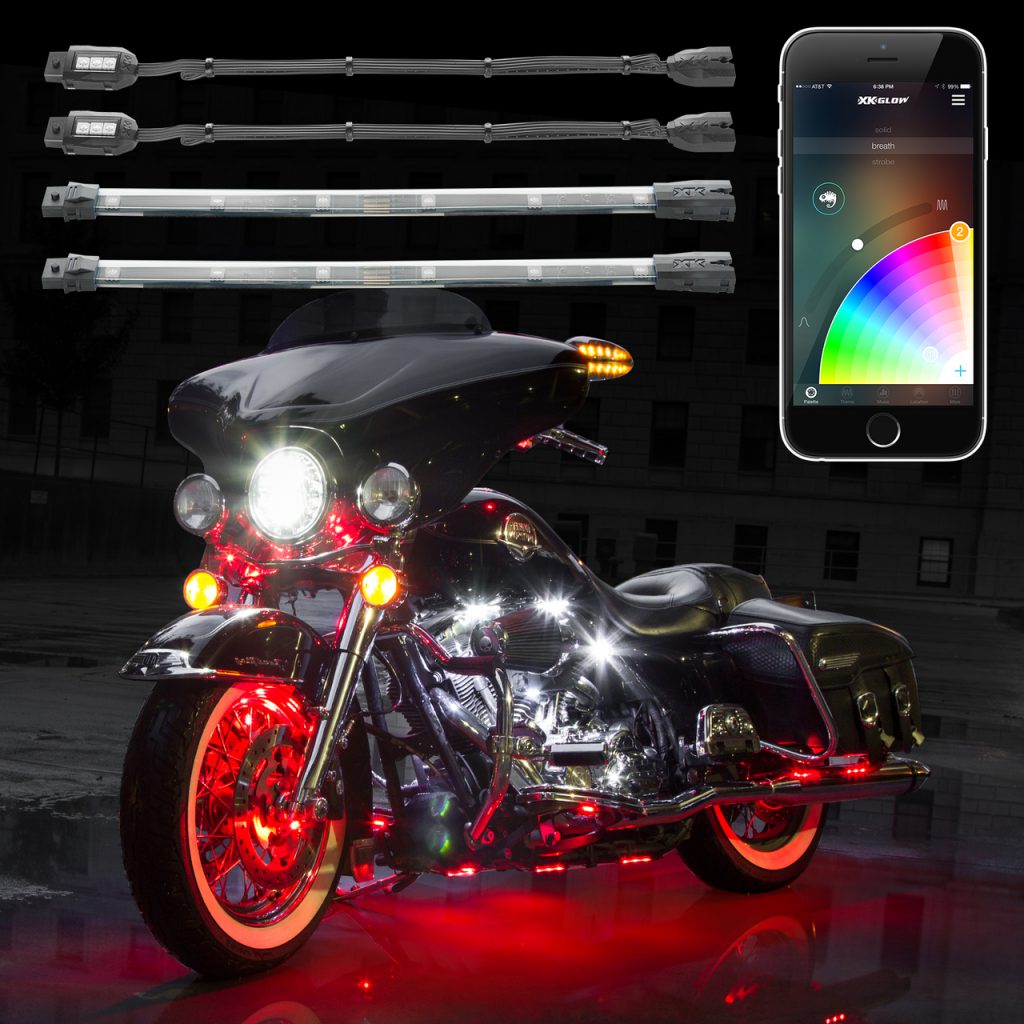
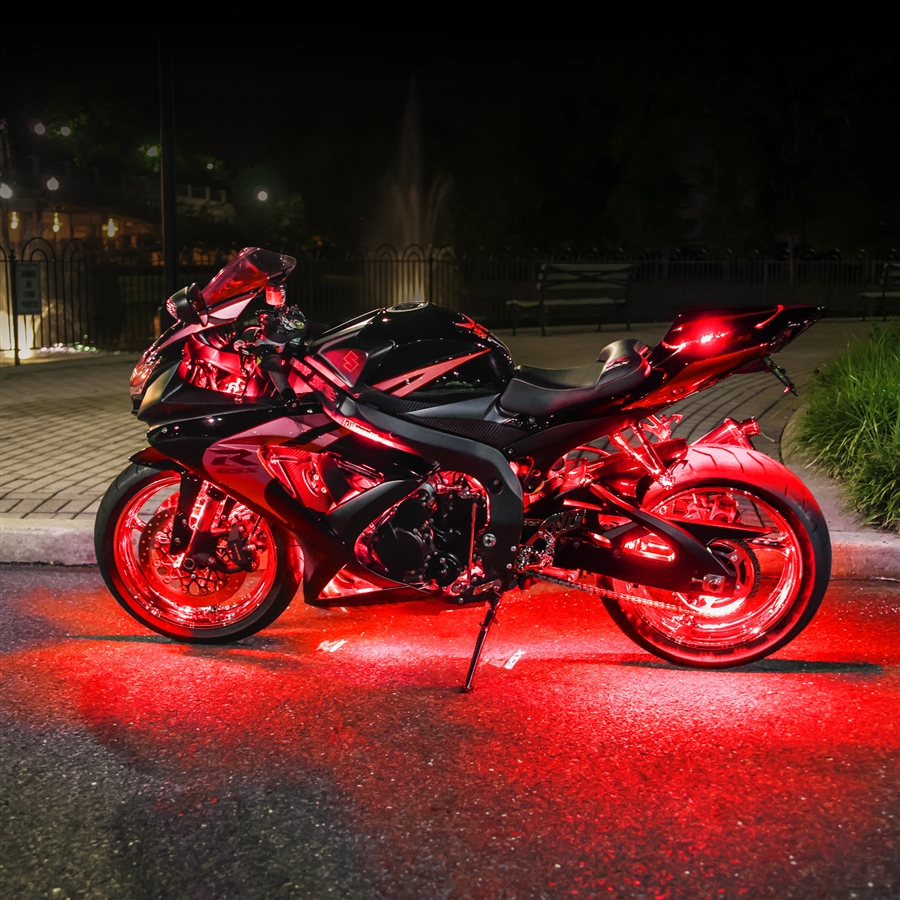
Accent lights are all about adding flair and personal style to your motorcycle. They come in many forms, including strips, pods, and flexible tubes, and can be placed in various spots on your bike, such as under the chassis, along the frame, or around the engine. These lights can be single-colored or feature a range of colors and patterns, even controllable via remote for dynamic effects. Accent lights not only look great but can also make you more visible to others at night.

Headlights

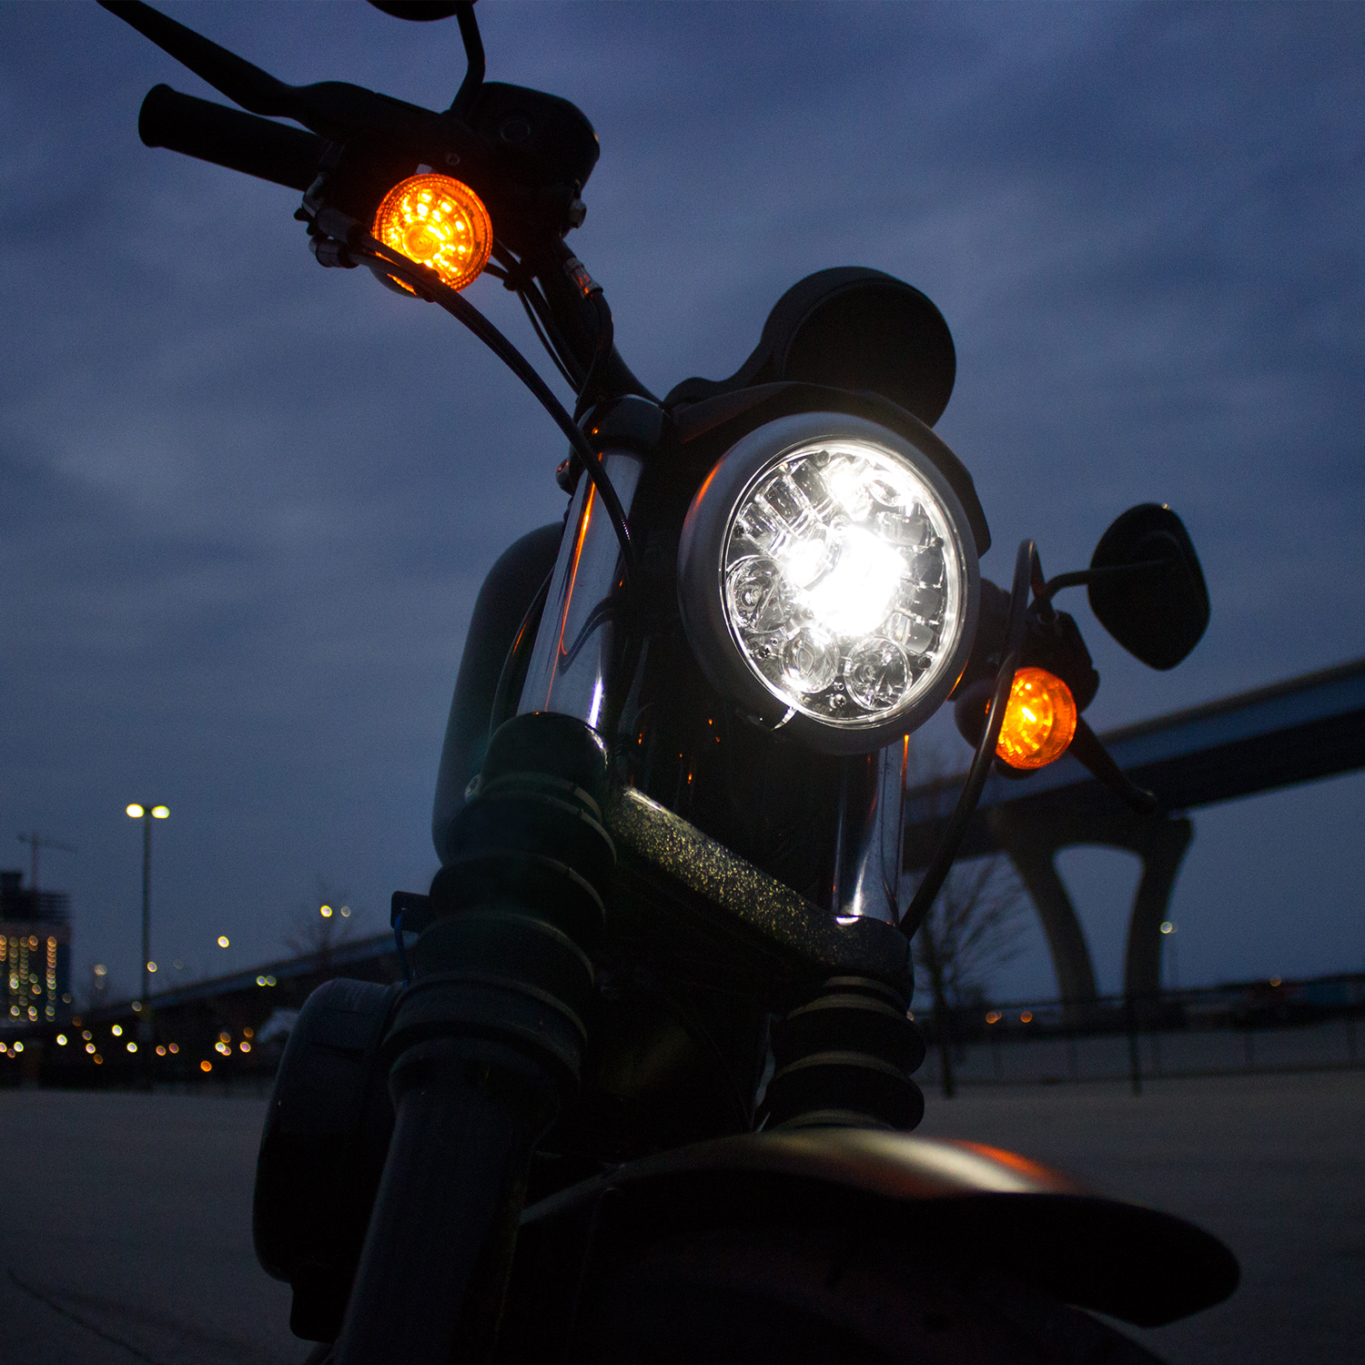
Upgrading to LED headlights offers a substantial improvement in visibility compared to traditional halogen bulbs. LED motorcycle headlights provide brighter, whiter light and improve your ability to see the road ahead, as well as ensuring you’re seen by oncoming traffic. They are available as direct replacements for your existing headlights or as fully integrated assemblies, depending on your motorcycle model and preferences.

Signal and Brake Lights

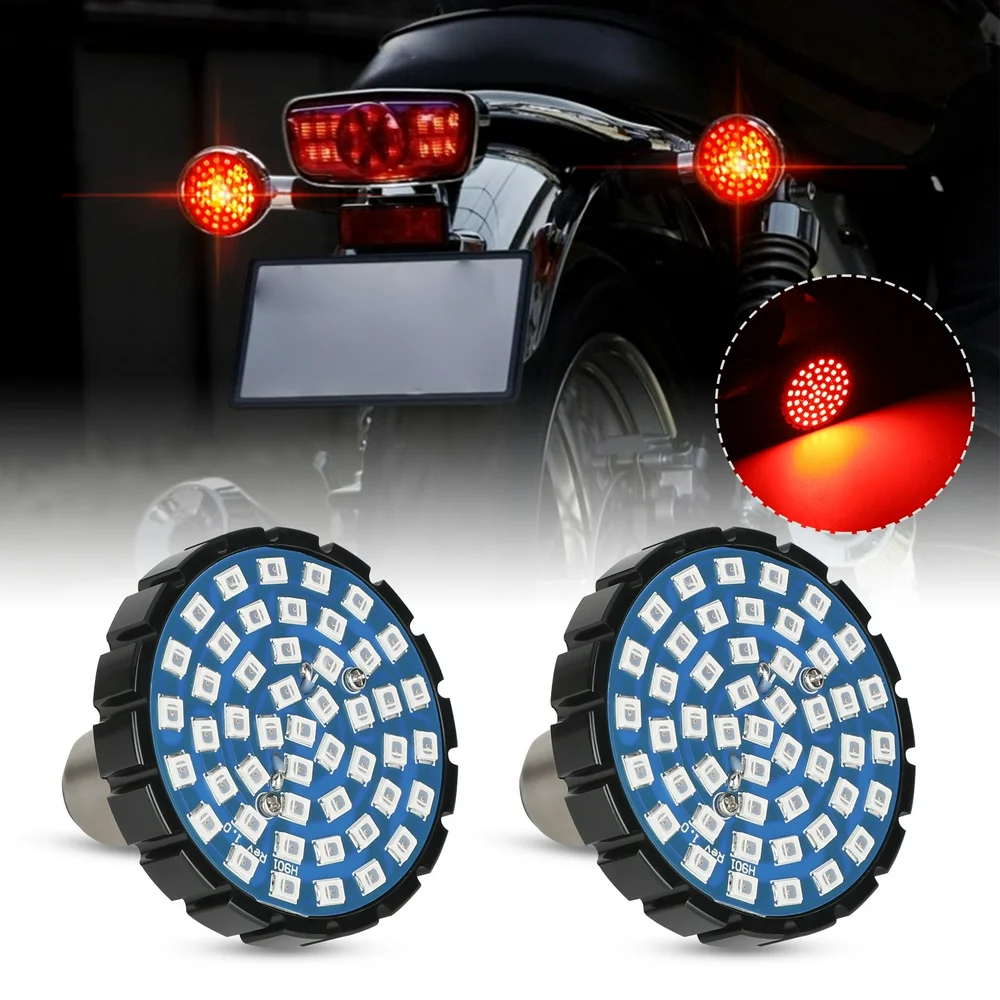
Safety should always be a top priority, and LED signal and brake lights are a critical upgrade for any rider. These LEDs act faster, shining instantly when you signal a turn or apply the brakes, giving other drivers more time to react. Available in a variety of shapes and sizes to match your motorcycle’s design, they can be a simple plug-and-play installation, significantly enhancing your bike’s visibility and safety on the road.

led lights for motorcycle

Installation and Maintenance Tips

Once you’ve decided to upgrade your motorcycle with LED lights, it’s important to consider the installation and maintenance aspects to ensure you get the most out of your investment. Below, I’ll provide some insightful tips on selecting the right LED lights for your bike, offer a step-by-step guide to installing them, and outline the best practices for maintaining your LED lights to ensure they offer optimal performance for years to come.

Choosing the Right LED Lights for Your Motorcycle

When selecting LED lights for your motorcycle, it’s essential to consider the quality, compatibility, and the type of riding you do. Look for LEDs with a high IP rating to ensure they are dust and water-resistant, suitable for all-weather riding. Compatibility with your motorcycle model is crucial; check that the lights you choose fit the make and model of your bike. Also, consider if you need a brighter light for nighttime riding or a more subtle glow for city cruising.

Step-by-Step Installation Guide

Installing LED lights on your motorcycle can be a fun and rewarding DIY project. To ensure a safe and proper installation, start by reading the manufacturer’s instructions. Disconnect the motorcycle’s battery before beginning to avoid any electrical issues. Install accent lights by cleaning the areas for the lights, applying the adhesive, and securing them with zip-ties. For headlights and signal lights, remove the stock bulbs and replace them with the LED units, making sure they are securely fitted. Always test the lights before taking your bike out to ensure they function correctly.

Maintaining Your LED Lights for Optimal Performance

Proper maintenance of your LED lights is necessary to maintain their performance and longevity. Regularly clean the lights with a soft cloth to prevent dirt and grime build-up, which can diminish their brightness. Check the connections and wiring periodically for signs of wear or damage, and make sure the lights are securely attached to your bike to prevent them from loosening due to vibrations. It’s also wise to keep an eye on the battery and alternator health, as they play a key role in powering your LEDs.

led lights for motorcycle

Customization Options

LED lights offer numerous customization options, allowing you to personalize your motorcycle’s appearance.

Color Changing Lights

Some LED kits come with color-changing capabilities, allowing you to switch between different colors using a remote control or smartphone app. This can add a unique and stylish element to your motorcycle. However, be mindful of local laws regarding colored lights, as certain colors may be restricted for specific uses.

Accent Lights

LED accent lights, also known as accent strips or underglow lights, can enhance the aesthetic appeal of your motorcycle. These lights can be installed along the bike’s frame, wheels, or other areas to create a vibrant glow. While they primarily serve an aesthetic purpose, they also improve your motorcycle’s visibility, especially at night.

Sequential Turn Signals

Sequential turn signals are a popular customization option that adds a modern touch to your motorcycle. These signals light up in a sequential pattern, creating a “moving” effect that draws attention to your turn signals. They not only look stylish but also enhance safety by improving signal visibility.

    led lights for motorcycleLegal Considerations

When upgrading to LED lights, it’s important to consider the legal regulations and requirements in your area.

Compliance with Regulations

Different regions have varying regulations regarding LED lights on motorcycles. These regulations can cover aspects like color, brightness, and beam pattern. Ensure your LED lights comply with these local laws to avoid fines or issues during vehicle inspections. Using DOT-approved LED lights can simplify this process, as they meet the standards set by the Department of Transportation.

Proper Installation and Usage

Improper installation or usage of LED lights can lead to legal issues and safety hazards. Avoid using excessively bright lights that can blind other drivers, and ensure your LED lights are properly aligned and secured. Regularly inspect your lights to ensure they remain in good working condition and are free from damage.

led lights for motorcycle

Conclusion: Enhancing Your Motorcycle Experience

Upgrading to LED lights for your motorcycle offers numerous benefits, including improved visibility, energy efficiency, and durability. By understanding the advantages, types, installation process, and legal considerations, you can make an informed decision about incorporating LED lights into your riding experience. Customization options allow you to personalize your motorcycle’s appearance, while proper maintenance ensures long-lasting performance.

Enhance your motorcycle experience with LED lights and enjoy the ride with improved safety, style, and efficiency. The initial investment in quality LED lighting pays off in the long run, providing you with reliable illumination and a unique look for your motorcycle. Embrace the advancements in lighting technology and take your motorcycle adventures to new heights with LED lights.

Posted in Motorcycles | Tagged , , | Leave a comment

Securing Your Nevada Motorcycle License: A Learner’s Guide

Introduction to Motorcycle Safety and Licensing in Nevada

Nevada’s picturesque roads and scenic landscapes make it an attractive state for motorcycle enthusiasts. However, the freedom of riding on two wheels comes with significant responsibility. Safety and proper licensing are critical aspects of motorcycle riding that cannot be taken for granted. In Nevada, adhering to safety protocols and having the appropriate license ensure that riders are not only legal but also equipped to handle the inherent risks of motorcycling.

Importance of Motorcycle Safety Training

Motorcycle safety training is paramount for all riders, whether they’re just starting out or have been riding for years. Training courses provide valuable knowledge on handling a motorcycle, traffic laws, and emergency maneuvers that could save lives. The importance of these courses cannot be overstressed, as they significantly reduce the likelihood of accidents by promoting responsible riding behaviors.

Nevada offers various motorcycle safety training programs, which are instrumental in developing a foundational understanding of motorcycle operation. Moreover, completing safety training can ease the process of obtaining a Nevada motorcycle license, as some programs are designed to be recognized by the state’s Department of Motor Vehicles (DMV). The Motorcycle Safety Foundation (MSF) curriculum, for instance, is a respected and widely-taught standard. Completion certificates from certified MSF courses might even waive certain DMV testing requirements, setting you on a smoother path toward getting licensed.

Motorcycle

Requirements for Nevada Motorcycle Licensing

To legally ride a motorcycle in Nevada, one must secure a motorcycle endorsement on their driver’s license. This involves meeting specific requirements that ensure the rider’s capability and understanding of safe riding practices. Applicants are typically required to pass written and on-cycle skills tests; however, these can often be waived if the applicant has successfully completed an approved safety course.

In addition to passing tests, riders must possess the necessary safety gear mandated by the state for all classes. This includes a full helmet or full-face helmet, eye protection, full-fingered gloves, a long-sleeved shirt, sturdy pants, and over-the-ankle boots with a good grip. Ensuring you have the appropriate gear is not just about legality; it’s essential for your protection on the road.

By understanding and adhering to the safety training and licensing requirements in Nevada, riders contribute to a safer environment for everyone on the road. They set themselves up for an enjoyable and responsible motorcycling experience that respects the laws and values of the riding community.

Motorcycle Training Courses Offered in Nevada

Nevada takes motorcycle safety seriously, offering a variety of training courses tailored to the different experience levels of riders. Whether you are new to motorcycles or looking to enhance your skills, Nevada has a program to fit your needs. By immersing yourself in these courses, you can gain confidence, improve your skill set, and become more acquainted with your motorcycle, all while being guided by certified professionals.

Motorcycle

Introduction to Motorcycling: A Primer for Beginners

Designed for those who are completely new to motorcycling, Nevada offers an introductory class called ‘Introduction to Motorcycling.’ This initial foray into the world of bikes covers basic motorcycle controls, engine start-stop procedures, the utilization of a foot shifter, and how to manage the hand-operated clutch and throttle. In just two hours, beginners get familiarized with the motorcycle lingo and receive a preliminary understanding of what it takes to operate a bike. Although not a standalone course for riding or license waiver, it serves as the perfect precursor to the more comprehensive Basic Rider Course.

Basic Rider Course I: From Novice to Licensed Rider

The Basic Rider Course I (BRC I) is the next step for new riders or those returning to the craft. It’s a comprehensive learning experience that combines an online e-course with hands-on riding practice. The theoretical part of the class introduces riders to risk management teachings and cultivates the rider’s character. The on-cycle training then sharpens essential physical skills like braking, swerving, and cornering. Success in this course not only boosts the rider’s confidence but also provides a completion card that the Nevada DMV recognizes as a license testing waiver—a significant step toward becoming a fully licensed motorcyclist.

Basic Rider Course II: Taking Experienced Riders Further

For riders who own a bike and have a firmer handle on riding, the Basic Rider Course II (BRC II) is ideal. A challenging one-day class with both an e-course and a preliminary skill evaluation sets the stage for this advanced training. It delves into both the physical and mental enhancement of riding skills, with successful completion leading to another Nevada DMV-recognized completion card.

Motorcycle

Enhancing Your Riding Skills with Advanced Training

After covering the basics of riding and securing a Nevada motorcycle license, the journey towards motorcycle proficiency continues. The state offers advanced training options for riders looking to take their skills to the next level. These courses are designed to not only improve riding techniques but also to enhance riders’ situational awareness and overall safety on the road. Engaging in advanced training is beneficial for every rider, regardless of how experienced they may be, as there’s always room for improvement when it comes to mastering control and safety.

Advanced Riders Course: Mastering Control and Safety

The Advanced Riders Course (ARC) in Nevada is for those who wish to further enhance their skills and face new challenges on two wheels. The ARC focuses on building a rider’s control over their motorcycle, refining their mental and physical capabilities. Unlike basic courses, the ARC adopts a more holistic approach to riding, bringing in elements of self-assessment and self-control.

In this intensive one-day class, participants engage in range exercises mixed with critical discussions. They work on advanced techniques for better braking and cornering, all the while receiving guidance on smooth operation and control, regardless of road conditions. Coaches push riders to try out new maneuvers, empowering them with skills that are invaluable during unexpected situations on the road.

The Role of Self-Awareness and Techniques in Motorcycle Riding

Self-awareness is a crucial component of the ARC. Riders are encouraged to reflect on their values, behaviors, and attitudes, and how these align with safe riding practices. The ARC places a strong emphasis on the mental aspects of riding, such as controlling emotions and maintaining a clear focus while navigating dynamic environments.

Technique-wise, the course exposes riders to steering inputs and control methods that may not be commonly used in everyday riding but are essential in critical situations. By promoting self-awareness and precision in technique, the ARC goes beyond the basics, preparing riders to be more adaptable and proficient in their riding.

Motorcycle

How Advanced Training Benefits Rider Competence and Confidence

Through advanced training, riders better understand their machine. They learn swift, effective reactions to road challenges. Interaction with experienced coaches helps significantly.

Practicing advanced techniques in a controlled environment builds competence and confidence. Riders completing the ARC feel more connected to their motorcycle.

They report feeling more competent in complex riding scenarios. Such training instills confidence and a renewed sense of responsibility. It empowers riders to enjoy motorcycling more safely.

Ultimately, advanced training fosters a skilled, aware riding community. This contributes to safer roadways for everyone.

Enhancing Your Riding Skills

Continuous improvement and education are vital for all motorcycle riders, regardless of experience level.

Advanced Riding Courses

Consider taking advanced riding courses offered by the Motorcycle Safety Foundation or other accredited institutions. These courses cover advanced techniques, defensive riding strategies, and emergency maneuvers. Continuous education enhances your riding skills and safety on the road.

Riding Organizations and Clubs

Joining a motorcycle riding organization or club can provide valuable resources, support, and camaraderie. These groups often organize rides, events, and training sessions.

    MotorcycleSpecial Situations

Certain situations may require additional steps or considerations when obtaining a Nevada motorcycle license.

Out-of-State Transfers

If you already hold a motorcycle license from another state, you may be able to transfer it to Nevada without retaking the tests. Check with the Nevada DMV for specific requirements and procedures. Usually, providing proof of your out-of-state license and passing a vision test are required steps.

Military Personnel

Nevada offers specific provisions for active-duty military personnel and their families. If you’re stationed in Nevada, you might qualify for certain exemptions or expedited processes. Contact the Nevada DMV or your base’s legal office for detailed information.

Additional Requirements and Considerations

There are several other factors to keep in mind as you work toward your Nevada motorcycle license.

Safety Equipment

Nevada law mandates that all motorcycle riders wear a helmet. Investing in a quality helmet, along with other protective gear like gloves, jackets, and boots, enhances your safety on the road. Always prioritize safety and choose gear that meets recognized safety standards.

Conclusion: Hitting the Open Road

Obtaining a Nevada motorcycle license is a rewarding journey that opens up a world of adventure and freedom. By following the outlined steps, you can enjoy the thrill of motorcycle riding. Meet initial requirements and pass tests. Practice with an instruction permit. Complete the road test to finalize the process. Remember, safety is paramount; always wear proper gear, ride responsibly, and continue to enhance your skills through education and practice. Embrace the spirit of the open road and explore the diverse landscapes Nevada has to offer on your motorcycle. Happy riding!

Posted in Motorcycles | Tagged , , | Leave a comment

What Is the Best Long Distance Motorcycle?

Ever dreamt of hitting the open road for a long-distance motorcycle adventure but unsure which bike suits your needs best? Choosing the best long distance motorcycle can elevate your journey, turning hours of riding into an exhilarating experience. From comfort and performance to fuel efficiency and storage capabilities, various factors contribute to making a long-distance motorcycle ideal. Curious about which motorcycles top the list for long hauls? Let’s dive into the specifics and explore the best options for your next epic ride.

Comfort and Ergonomics

When it comes to long-distance riding, comfort is paramount. An uncomfortable seat or an awkward riding position can turn an exciting journey into an endurance test.

Seat Comfort

A comfortable seat is crucial for long-distance rides. Look for motorcycles that offer well-padded, ergonomically designed seats that provide ample support. The seat should be wide enough to distribute your weight evenly and reduce pressure points. Additionally, consider models with adjustable seats, allowing you to fine-tune the height and angle to your preference.

Riding Position

The riding position significantly impacts comfort on long trips. Motorcycles with an upright or slightly forward-leaning position tend to be more comfortable over long distances. This position reduces strain on your back, neck, and wrists. Handlebars and foot pegs should be positioned to allow a natural, relaxed posture. Test rides are essential to find a bike that suits your body frame and riding style.

Performance and Reliability

A long-distance motorcycle must offer reliable performance and handle various road conditions with ease.

Engine Power

Engine power and performance are vital for sustained highway riding. Look for motorcycles with engines that offer a balance between power and fuel efficiency. Models with torque-rich engines provide smooth, effortless acceleration, making them ideal for long-distance cruising. Avoid bikes that require frequent gear changes or struggle at higher speeds.

Reliability and Maintenance

Reliability is key for long-distance travel. Choose motorcycles from reputable brands known for their durability and low maintenance. Research user reviews and forums for insights into the bike’s performance over time. Regular maintenance is inevitable, but selecting a motorcycle with a solid track record reduces the risk of unexpected breakdowns.

best long distance motorcycle

Fuel Efficiency and Range

Long-distance rides often mean covering hundreds of miles without many fuel stops. Fuel efficiency and range are critical considerations.

Fuel Tank Capacity

A larger fuel tank allows you to cover more miles between refueling stops. Touring and adventure motorcycles typically offer larger tanks, providing extended range. For example, the BMW R1250GS and Honda Gold Wing are known for their generous fuel capacities, making them popular choices for long hauls.

Fuel Economy

Fuel economy affects not only the range but also your travel budget. Look for motorcycles with efficient engines that offer impressive miles per gallon (MPG). Some modern bikes come with fuel-saving technologies, such as variable valve timing or eco modes, which optimize fuel consumption during extended rides.

Storage Options

Long-distance rides often require carrying luggage, and having adequate storage is essential.

Built-in Storage

Touring motorcycles usually come equipped with built-in storage options like saddlebags, panniers, and top boxes. These integrated storage solutions are designed to be secure and weatherproof, protecting your belongings from the elements. Models like the Yamaha Star Venture and Indian Roadmaster offer ample storage, catering to long-distance travelers.

Customizable Storage

If you’re considering a bike without built-in storage, ensure it has options for adding luggage systems. Aftermarket solutions, such as tank bags, tail bags, and luggage racks, can expand your carrying capacity. Look for models that easily accommodate these additions without compromising the bike’s balance and handling.

Wind Protection

Wind protection is crucial for reducing fatigue and enhancing comfort on long-distance rides.

Windshields and Fairings

A good windshield or fairing can make a significant difference on long rides. It reduces wind blast, lessens rider fatigue, and offers protection from the elements. Touring motorcycles often feature adjustable windshields and extensive fairings that provide excellent wind protection. Sport-touring bikes like the Kawasaki Concours 14 also offer effective windshields, combining sporty performance with touring comfort.

Aerodynamics

Aerodynamics play a role in wind protection and overall comfort. Motorcycles with well-designed fairings and streamlined bodies help to deflect wind and reduce turbulence. This means less rider fatigue and a more enjoyable ride, even at high speeds.

best long distance motorcycle

Suspension and Handling

A smooth ride is essential for long-distance comfort, making suspension quality a critical factor.

Adjustable Suspension

Look for motorcycles with adjustable suspension systems. These allow you to tailor the ride to different conditions, whether you’re cruising on the highway or navigating rougher roads. Examples include the Honda Africa Twin and BMW R1250GS, which offer advanced suspension systems for optimal comfort and control.

Stability and Handling

Stability and responsive handling are vital for long-distance rides. Motorcycles with a lower center of gravity and balanced weight distribution provide better stability. Test rides can help you gauge the bike’s handling, ensuring it feels stable and comfortable over long distances.

Technology and Features

Modern motorcycles come equipped with various technologies that enhance long-distance riding.

Cruise Control

Cruise control is a game-changer for long-distance travel. It allows you to maintain a steady speed without constantly using the throttle, reducing fatigue and making highway riding more relaxed. Many touring and sport-touring motorcycles now include this feature as standard or optional.

Navigation Systems

Integrated GPS navigation systems are incredibly useful for long rides. They provide turn-by-turn directions, help you find fuel stops, and plan routes efficiently. Motorcycles like the Harley-Davidson Electra Glide and Kawasaki Versys offer advanced navigation features, making long-distance travel more convenient.

Popular Long-Distance Motorcycles

Several motorcycles are renowned for their suitability for long-distance travel, each offering unique advantages.

Honda Gold Wing

The Honda Gold Wing is a legendary touring motorcycle known for its comfort, performance, and features. It boasts a powerful engine, extensive storage options, and advanced technologies like Apple CarPlay and a navigation system. The Gold Wing’s plush seats and superior wind protection make it a favorite among long-distance riders.

BMW R1250GS

The BMW R1250GS is an adventure-touring motorcycle celebrated for its versatility and performance. With an adjustable suspension, large fuel tank, and robust engine, it handles both highways and off-road conditions with ease. Its rider aids and navigation system further enhance long-distance capabilities.

Yamaha FJR1300

The Yamaha FJR1300 is a sport-touring motorcycle that blends performance with comfort. It features a powerful, fuel-efficient engine, electronic suspension, and cruise control. The FJR1300’s aerodynamic design and adjustable windshield provide excellent wind protection, making it a solid choice for extended rides.

Harley-Davidson Electra Glide

The Harley-Davidson Electra Glide is a classic touring motorcycle known for its iconic design and comfort. It offers ample storage, a comfortable riding position, and modern technologies such as cruise control and an infotainment system. Its smooth ride quality and robust performance make it a popular option for long-distance touring.

best long distance motorcycle  Customizing Your Motorcycle for Long-Distance Travel
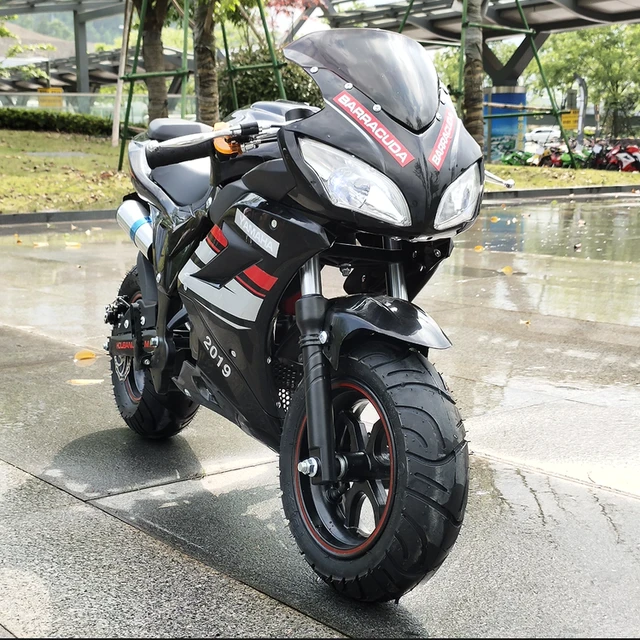
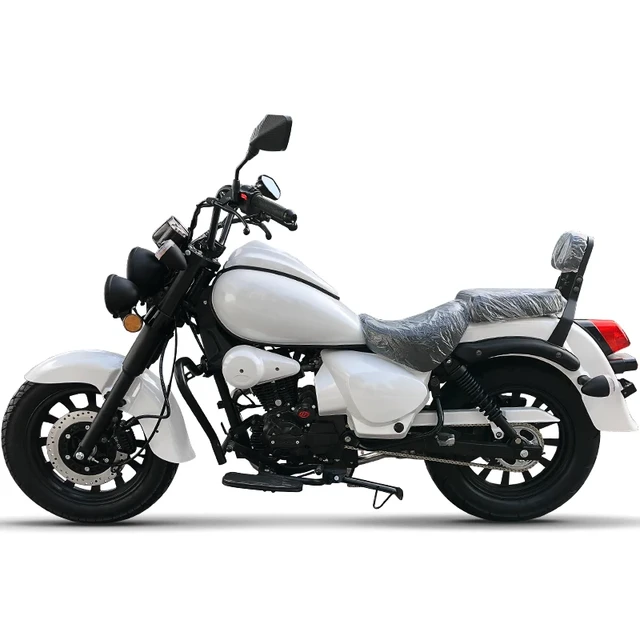
Even if you don’t own a dedicated touring bike, you can customize your motorcycle to better suit long-distance travel.

Upgraded Seats

Aftermarket seats can significantly enhance comfort. Options like gel seats or memory foam cushions provide better support and reduce fatigue. Companies like Corbin and Saddlemen offer a variety of seat upgrades tailored to different motorcycles.

Enhanced Lighting

Improving your motorcycle’s lighting can increase safety during long rides, especially at night. Upgrading to brighter LED headlights or adding auxiliary lights can improve visibility and illuminate the road ahead more effectively.

Additional Accessories

Consider adding accessories that enhance comfort and convenience, such as heated grips, adjustable handlebars, and throttle locks. These upgrades can make a substantial difference on long rides, keeping you more comfortable and reducing fatigue.

Maintenance Tips for Long-Distance Riding

Proper maintenance is crucial for ensuring your motorcycle performs well over long distances.

Pre-Ride Inspection

Before embarking on a long-distance ride, conduct a thorough pre-ride inspection. Check tire pressure, fluid levels, brakes, and lights. Ensuring your bike is in top condition reduces the risk of mechanical issues during your journey.

Regular Servicing

Regular servicing is vital for maintaining your motorcycle’s reliability. Stick to the manufacturer’s recommended service intervals and address any potential issues promptly. Carry essential tools and a basic repair kit on long rides to handle minor repairs or adjustments.

Conclusion: Choosing Your Perfect Long-Distance Motorcycle

Selecting the best long-distance motorcycle involves balancing comfort, performance, fuel efficiency, and storage. By considering factors such as seat comfort, riding position, and advanced features, you can find a motorcycle that fits your needs and maximizes your riding pleasure. Whether you’re drawn to the luxurious Honda Gold Wing or the versatile BMW R1250GS, the right bike can transform your long-distance journeys into unforgettable adventures. Embrace the open road with confidence, knowing you’ve chosen the best motorcycle for your travels.

Final Thoughts and Recommendations

Long-distance motorcycle riding is a rewarding experience that offers unique perspectives and a sense of freedom. Investing in the best long-distance motorcycle tailored to your needs ensures comfort, reliability, and enjoyment throughout your journey. Emphasize comfort features, reliable performance, and advanced technology to enhance your riding experience. Happy riding and may your adventures be both safe and exhilarating!

Posted in Motorcycles | Tagged , , | Leave a comment

When Is the Best Time to Buy a Motorcycle?

Have you ever wondered if there’s a perfect time to buy a motorcycle? Whether you’re a seasoned rider or a newcomer to the world of motorcycles, timing your purchase can significantly impact the deal you get. Savvy shoppers know that certain periods of the year, economic factors, and even specific days can influence prices and availability. Curious about how to maximize your savings and get the best deal on your new ride? Let’s explore the ideal times to buy a motorcycle and the factors that can help you make an informed decision.

Seasonal Considerations

Riding a motorcycle is often a seasonal activity, and the season can heavily influence the price and availability of bikes.

Off-Season Deals

Winter months are typically considered the off-season for motorcycle sales, especially in regions with harsh weather conditions. During this time, demand decreases significantly, and dealers are often more willing to negotiate prices to clear out inventory. As the riding conditions deteriorate, many recreational riders put off purchasing new bikes, leading to potential savings for those who buy during the off-season. It’s also common to find promotions and discounts during winter, as dealerships try to attract buyers.

Peak Season Pitfalls

Spring and summer are peak seasons for motorcycle riding, when demand surges and prices can be at their highest. Many new models are released during these months, attracting buyers eager for the latest innovations. While the excitement of warm weather may tempt you to buy a new bike, it’s essential to remember that you’ll likely pay a premium. If you’re not in a rush, waiting until the end of the riding season or during the off-season can result in significant savings.

End-of-Year Sales

Dealerships, like any business, have sales targets and inventory management strategies that can influence pricing.

Model Year Rollover

The end of the calendar year is another ideal time to purchase a motorcycle. Dealerships are looking to clear out current-year models to make space for next year’s inventory. This transition period often brings substantial discounts on the outgoing models. For buyers, this means you can get a brand-new bike from the current year at a reduced price as dealers make way for the next year’s stock.

Fiscal Year-End

Dealerships also face pressure to meet annual sales targets, which can result in aggressive pricing strategies. The fiscal year-end, which varies for different dealerships, is a critical time when sales teams are keen to hit their quotas. This eagerness can translate into better deals and more flexible negotiation opportunities for buyers.

best time to buy a motorcycle

Economic Factors

The broader economic environment can also play a significant role in motorcycle prices.

Economic Downturns

During economic downturns, discretionary spending decreases, and big-ticket items like motorcycles may see a dip in demand. Dealers may offer attractive discounts and financing options to stimulate sales. If you’re financially stable and able to buy during these periods, you might find excellent deals that wouldn’t be available during more prosperous times.

Interest Rates

Interest rates set by financial institutions can affect the cost of financing a motorcycle. Lower interest rates can make loans more affordable, reducing the overall cost of purchasing a bike. Keeping an eye on economic indicators and interest rate trends can help you time your purchase for when financing is most favorable.

Special Events and Holidays

Certain times of the year are synonymous with sales and promotions, and the motorcycle market is no exception.

Holiday Sales

Major holidays like Memorial Day, Fourth of July, Black Friday, and Labor Day are known for significant discounts and sales events. Dealerships often offer special promotions during these periods to attract buyers. These holiday sales can be an excellent opportunity to get a good deal on a new motorcycle, especially if you combine the holiday discount with already low off-season prices.

Motorcycle Shows

Motorcycle shows and expos are great places to find deals on bikes. Manufacturers and dealers showcase their latest models, and it’s common to offer special show-only pricing. These events also allow you to compare different brands and models side-by-side, giving you a comprehensive view of what’s available. Being prepared to make a purchase at these shows can result in significant savings and exclusive deals.

Dealer Strategies

Understanding dealership sales tactics can help you navigate the buying process more effectively.

End-of-Month Targets

Many dealerships have monthly sales targets, and the end of the month is often a critical time for them. Salespeople may be more willing to negotiate better prices to hit their quotas. Shopping at the end of the month can give you leverage, as dealers are motivated to close sales, potentially leading to a better deal on your motorcycle.

Inventory Clearance

Dealerships periodically need to clear out old inventory to make room for new stock. These clearance events can happen at various times throughout the year, but they often align with new model releases. Buying during an inventory clearance can yield substantial discounts, especially if you’re flexible with model years and open to choosing from remaining stock.

best time to buy a motorcycle

Online and Private Sales

Exploring online platforms and private sales can offer additional opportunities to find great deals.

Online Marketplaces

Websites like Craigslist, Cycle Trader, and eBay Motors provide a wide range of options from both dealers and private sellers. These platforms often list motorcycles at competitive prices and can offer deals not found at traditional dealerships. Taking the time to research and compare listings can reveal hidden gems and unique opportunities to save money.

Private Sellers

Buying from private sellers can sometimes result in lower prices, as individuals may be more motivated to sell quickly. However, it’s crucial to conduct thorough research and inspection when dealing with private sellers to ensure you’re getting a reliable bike. Negotiation is key in private sales, as prices are often more flexible compared to dealerships.

Timing Based on Personal Circumstances

Your personal situation and readiness to buy can greatly influence the timing of your purchase.

Financial Preparedness

Ensuring you’re financially ready is critical before making a significant purchase like a motorcycle. Assess your budget, credit score, and loan eligibility to determine the best time for you to buy. Being financially prepared can enhance your bargaining power and allow you to take advantage of the best deals when they arise.

Riding Experience

Considering your level of riding experience can also influence timing. New riders might benefit from waiting until they’ve accumulated enough riding gear and taken necessary training courses before making a purchase. More experienced riders might have a clearer idea of their needs and preferences, allowing them to act quickly when they find a good deal.

Conclusion: Making Your Decision

Ultimately, the best time to buy a motorcycle depends on a combination of seasonal trends, economic conditions, and personal readiness. Understanding the various factors that influence motorcycle prices can help you make an informed decision that suits your budget and riding goals. By being strategic about timing, you can maximize your savings and enjoy your new bike without breaking the bank.

 best time to buy a motorcycle Tips for Successful Motorcycle Buying
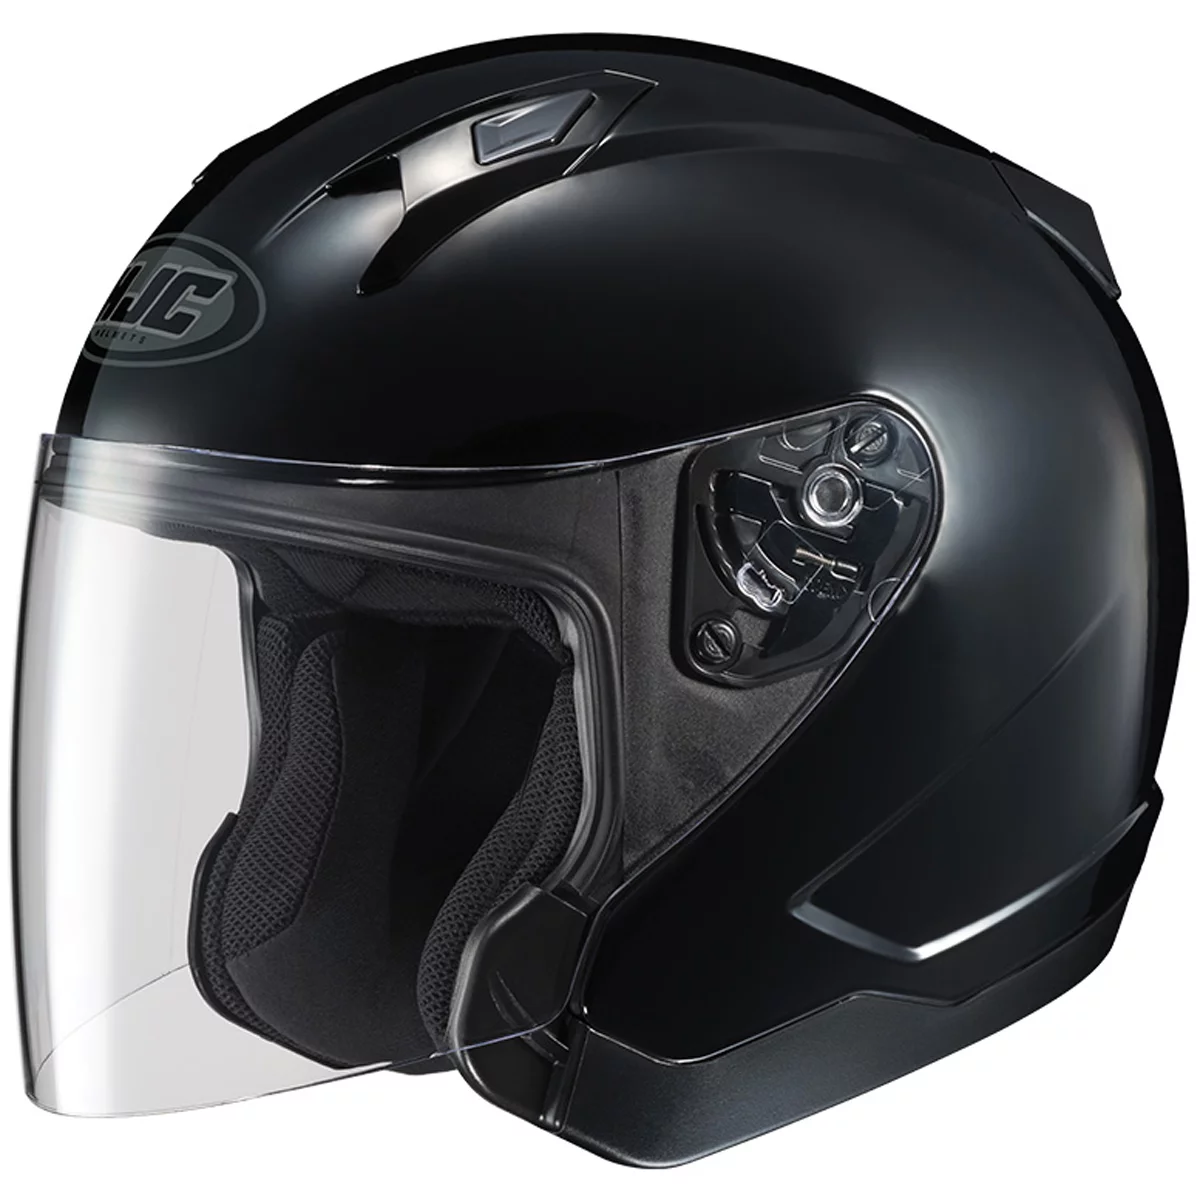
Having explored the best times to buy, let’s examine some additional tips to ensure a successful purchase.

Do Your Research

Knowledge is power, and researching motorcycles, prices, and market trends can provide a significant advantage. Understanding the features and prices of different models helps you identify a fair deal and avoid overpaying. Utilize online resources, reviews, and forums to gather valuable insights.

Negotiate Wisely

Negotiation is a crucial part of the buying process. Don’t be afraid to ask for discounts, additional accessories, or better financing terms. Being polite but firm, and knowing the market value, can help you negotiate a better deal. Remember, the worst they can say is no, but often, you’ll find there’s room for some level of negotiation.

Inspect Thoroughly

Whether buying new or used, always thoroughly inspect the motorcycle before making a purchase. For used bikes, check for signs of wear, maintenance history, and any potential issues that could lead to costly repairs. For new bikes, ensure all features and components are functioning as expected. Test rides are essential to gauge comfort and performance.

Making the Most of Your Purchase

Proper planning and preparation extend beyond just timing the purchase.

Budget for Extras

Motorcycles come with additional costs beyond the initial purchase price. Factor in expenses for gear, insurance, maintenance, and accessories. Budgeting for these extras ensures you’re financially prepared and can enjoy your new motorcycle to the fullest.

Join the Community

Becoming part of the motorcycle community can enhance your riding experience. Join local clubs, participate in rides, and attend events. Engaging with fellow riders offers opportunities to share tips, learn about deals, and enjoy the camaraderie that comes with the motorcycle lifestyle.

Stay Safe

Investing in quality riding gear and taking safety courses is crucial for every rider. Proper gear, including a helmet, gloves, jacket, and boots, provides essential protection. Safety courses, whether for beginners or advanced riders, improve your skills and confidence on the road.

Final Thoughts

Knowing the best time to buy a motorcycle can make the experience even more rewarding. Timing your purchase to coincide with the best deals can save you money and enhance your buying experience. By understanding the various factors that influence motorcycle prices and following these tips, you can make an informed choice and enjoy the thrill of riding without unnecessary financial stress. Remember, the journey to owning a motorcycle is as rewarding as the ride itself. Enjoy the process and happy riding!

Posted in Motorcycles | Tagged , , | Leave a comment

How Should a Motorcycle Helmet Fit?

Choosing the right motorcycle helmet is akin to choosing a life-saving device. A properly fitting helmet can mean the difference between minor injuries and devastating consequences in an accident. But how should a motorcycle helmet fit to provide optimal protection and comfort? Many riders struggle with this question, especially with the myriad of options available. This article aims to demystify the process and provide clear, actionable guidance for finding the perfect fit.

Measuring Your Head

The first step in selecting a well-fitting helmet involves measuring your head accurately. Use a flexible measuring tape to measure the circumference of your head, positioning the tape about an inch above your eyebrows, around the widest part. Take note of this measurement and consult the sizing chart provided by the helmet manufacturer. Sizes can vary between brands, so always refer to the specific chart for the helmet you are considering.

Keep in mind that head shape matters too. While most helmets are designed to fit a variety of head shapes, some brands specialize in more oval or round interiors. Knowing your head shape can make a significant difference in comfort and fit. If you’re unsure about your head shape, visit a local motorcycle shop where an expert can assist you in determining the best fit.

motorcycle helmet

Initial Fitment

Once you’ve determined the appropriate size, it’s time to try on the helmet. When doing so, the helmet should feel snug but not overly tight. The interior lining should make firm contact with the crown of your head and the sides of your face. If you feel any pressure points that could cause discomfort over time, the helmet might be too tight. Conversely, if the helmet moves too freely, it’s too loose and won’t provide adequate protection.

Make sure the helmet sits evenly on your head, with the front edge just above your eyebrows. It should not tilt back, exposing your forehead, nor should it ride too low, obstructing your vision. Proper alignment is crucial for both protection and comfort. Always fasten the chin strap securely to fully assess the fit; this also ensures the helmet stays in place during use.

Cheek Pads and Comfort Liners

Cheek pads play a critical role in the overall fit of a motorcycle helmet. They should press firmly without causing pain or discomfort. Over time, cheek pads can compress and conform to your face, becoming more comfortable. Initially, they might feel quite snug, but this is normal. If the pads are removable, you have the option to swap them out for different sizes and densities to achieve the perfect fit.

The comfort liner, typically made of moisture-wicking materials, should also fit snugly around your head. It should hold the helmet in place without creating pressure points. A good comfort liner will not only enhance fit but also improve overall comfort, making long rides more enjoyable. Ensuring the cheek pads and liners are in optimal condition and regularly washing them contributes to a consistent and comfortable fit.

Helmet Retention System

The chin strap, or retention system, is essential for keeping the helmet securely on your head. When fastened, you should be able to fit no more than two fingers between the strap and your chin. The strap should feel snug without restricting your ability to speak or breathe. A common mistake riders make is wearing the chin strap too loose, which can render the helmet ineffective in an accident.

Modern helmets often come with adjustable straps and quick-release buckles, enhancing convenience and safety. Ensure you understand how to properly fasten and adjust these systems to maintain a secure fit. Regularly check the condition of the strap for wear and tear; a compromised retention system can jeopardize your safety.

motorcycle helmet

Movement and Stability

A properly fitting helmet should have minimal movement when you shake your head side-to-side or up-and-down. Excessive movement indicates that the helmet is too large, potentially compromising your safety. With the chin strap fastened, perform a movement test by tilting your head in various directions. The helmet should move with your head without slipping or sliding.

Stability during high-speed rides is another crucial factor. A helmet that lifts or shifts at high speeds can distract you, increasing the risk of an accident. Aerodynamic designs in modern helmets help reduce wind resistance and improve stability, so consider these features if you frequently ride at higher speeds.

Compatibility with Glasses and Communication Systems

If you wear glasses, ensure your helmet accommodates them comfortably. The temples of your glasses should fit easily without putting pressure on the sides of your head. Many helmets come with grooves or removable pads designed to accommodate eyeglasses. It’s advisable to bring your glasses with you when trying on helmets to ensure a comfortable and secure fit.

Similarly, if you use a Bluetooth communication system, check compatibility with the helmet. Some helmets have built-in speaker pockets and channels for wiring, making it easier to integrate communication devices. Ensuring that these systems fit well without compromising the helmet’s fit or comfort enhances your overall riding experience.

Break-In Period

New helmets often require a break-in period to conform to the shape of your head fully. During the initial rides, the helmet might feel slightly tight, especially in the cheek and forehead areas. However, as the padding settles, it should become more comfortable. Pay attention to any persistent pressure points, which indicate that the helmet might not be the right fit.

Allowing the helmet time to conform to your head can significantly enhance comfort and security. However, if discomfort persists after several rides, consider having the interior padding adjusted or trying a different size or model. Monitoring the fit and comfort during this break-in period ensures long-term satisfaction with your helmet choice.

Seasonal Adjustments

Riding conditions can vary significantly between seasons, affecting helmet fit and comfort. During colder months, you might wear additional layers or a balaclava, which can alter how the helmet fits. Conversely, in warmer weather, reduced bulk might make the helmet feel looser. Having a helmet that allows slight adjustments or choosing a model with interchangeable liners can address these seasonal changes.

Prepare for these adjustments by evaluating your riding gear for different weather conditions. Ensuring that your helmet consistently fits well, regardless of seasonal changes, enhances safety and comfort throughout the year.

motorcycle helmet  Return and Exchange Policies

It’s essential to purchase your motorcycle helmet from a retailer with a flexible return and exchange policy. Despite following all guidelines, you might find that the helmet doesn’t fit as expected after a few rides. A good return policy allows you to test the helmet thoroughly and make changes if necessary. Always inquire about the policy before making a purchase to avoid potential hassles.

Choosing a retailer known for excellent customer service can also provide additional support during your selection process. Their expertise and commitment to helping you find the perfect fit ensure a smoother experience and better satisfaction with your purchase.

Consideration of Safety Standards

When selecting a motorcycle helmet, ensure it meets relevant safety standards, such as DOT (Department of Transportation), ECE (Economic Commission for Europe), or Snell certifications. While these standards primarily relate to impact protection, helmets meeting these criteria typically also offer better overall fit and comfort. Always check for certification labels on the helmet to ensure compliance with safety standards.

Opting for a helmet with higher safety ratings and certifications not only ensures better protection but often indicates superior quality in terms of materials and design. Safety standards serve as a reliable benchmark when evaluating different helmet options.

The Role of Helmet Shape

Understanding the shape of your head and how it correlates with helmet design is crucial. Common head shapes include round, intermediate oval, and long oval. Helmet manufacturers often specify which shapes their helmets are designed to fit. Choosing a helmet that aligns with your head shape ensures better comfort and a more secure fit.

If you have difficulty determining your head shape, consult with a professional fitter at a motorcycle shop. Their expertise can help pinpoint the best helmet options, ensuring you find a model that fits your unique head shape perfectly.

Final Thoughts

So, how should a motorcycle helmet fit? The answer lies in careful measurement, thoughtful selection, and attention to comfort and safety. A helmet that fits well not only enhances protection but also improves overall riding experience. By following these guidelines, you can ensure your helmet provides the necessary security, making your rides both safer and more enjoyable. Regularly checking the fit, staying informed about safety standards, and understanding the break-in process all contribute to maintaining optimal helmet performance. Riding with confidence, knowing your helmet fits perfectly, ensures maximum protection every time you hit the road.

Posted in Motorcycle equipment, Motorcycles | Tagged , , | Leave a comment

How Long Is a Motorcycle Helmet Good For?

Motorcycle helmets are essential for rider safety, providing crucial protection in the event of a crash. However, they are not designed to last indefinitely. The question every motorcyclist eventually asks is, “How long is a motorcycle helmet good for?” Understanding the lifespan of a helmet and the factors that influence its longevity can significantly impact your safety on the road. This article delves into these factors, offering specific guidance to help you maintain optimal protection.

Manufacturer Recommendations

Most helmet manufacturers recommend replacing a helmet every five years. This guideline is based on the average lifespan of the helmet materials, which degrade over time due to exposure to environmental factors such as UV rays, moisture, and temperature fluctuations. Additionally, the gradual wear and tear from regular use contribute to the helmet’s aging process.

However, this five-year rule isn’t set in stone. Depending on how frequently you ride and the conditions you expose your helmet to, you might need to replace it sooner. For example, if you ride daily in harsh weather conditions, your helmet may deteriorate faster. Conversely, if you only ride occasionally and store your helmet properly, it might last longer than five years while still providing adequate protection.

Impact of Accidents

One of the most critical factors influencing a helmet’s lifespan is impact. If your helmet has been involved in a crash or even a significant drop, its protective capabilities can be compromised, even if there are no visible signs of damage. The inner foam, designed to absorb impact, can compress or crack, reducing its effectiveness in future accidents.

Even minor impacts can cause unseen damage. Therefore, it’s essential to replace your helmet after any significant impact to ensure it can provide the protection you need. Regularly inspect your helmet for internal and external damage, paying close attention to the foam liner and outer shell. If you have any doubts about its integrity, err on the side of caution and replace it.

motorcycle helmet

Material Degradation

Helmets are made from various materials, including polycarbonate, fiberglass, and carbon fiber. Each material has different properties and degradation rates. Polycarbonate helmets, for instance, tend to degrade faster than those made from fiberglass or carbon fiber. Exposure to UV rays can cause polycarbonate shells to become brittle over time, compromising their protective capabilities.

The inner foam liner, typically made from expanded polystyrene (EPS), also degrades. This material can lose its ability to absorb impacts after several years, especially if exposed to extreme temperatures or moisture. Ensuring your helmet is stored in a cool, dry place can help prolong the lifespan of these materials, but they will inevitably degrade over time.

Signs of Wear and Tear

Knowing when to replace your motorcycle helmet isn’t just about time or impact—it’s also about recognizing signs of wear and tear. Regularly inspect your helmet for cracks, chips, or dents on the outer shell. Check the lining for signs of compression, flaking, or deterioration. Additionally, inspect the straps and buckle for fraying or damage, as these components are crucial for keeping your helmet securely in place.

Unpleasant odors and persistent moisture within the helmet are additional indicators of wear. These can result from sweat and environmental exposure, degrading the inner liner faster. If you notice any of these signs, it’s a clear indicator that your helmet may no longer provide the necessary protection and should be replaced.

Advancements in Helmet Technology

Helmet technology continues to evolve, with manufacturers constantly improving safety features and designs. Even if your motorcycle helmet appears to be in good condition, it may lack the latest safety features. Innovations such as Multi-directional Impact Protection System (MIPS), which reduces rotational forces during impacts, and advanced materials like Koroyd, offering improved impact absorption, are now available in newer helmets.

Staying updated with these advancements enhances your safety on the road. While it might seem costly to replace a helmet that appears functional, upgrading to a model with the latest technology can provide significantly better protection. It’s an investment in your safety well worth considering.

motorcycle helmet

Proper Helmet Care and Maintenance

Ensuring your motorcycle helmet lasts as long as possible involves proper care and maintenance. Clean your helmet regularly, following the manufacturer’s instructions. Use mild soap and water to clean the shell, avoiding harsh chemicals that can degrade the materials. For the inner liner, many helmets have removable, washable liners, allowing you to keep it clean and fresh.

Avoid exposing your helmet to extreme temperatures. Leaving it in a hot car or exposing it to freezing conditions can accelerate material degradation. Store your helmet in a cool, dry place, away from direct sunlight. Additionally, never hang your helmet on handlebars or mirror stalks, as this can deform the inner lining over time.

Certification and Safety Standards

Ensuring your motorcycle helmet meets or exceeds safety standards is crucial. Certifications like DOT (Department of Transportation), Snell, and ECE (Economic Commission for Europe) indicate that the helmet has undergone rigorous testing and meets specific safety criteria. However, these standards are periodically updated, and older helmets might not meet the latest requirements.

When purchasing a new helmet, verify its certification. Helmets certified under newer standards typically incorporate the latest safety features and technologies. Always look for an indication of certification, such as a sticker or label, to ensure you’re choosing a helmet that meets current safety standards.

Resale and Secondhand Helmets

While it might be tempting to purchase a secondhand helmet to save money, it’s generally not advisable. You can’t be certain of its history or whether it’s been involved in an accident. Even if it appears to be in good condition, unseen damage can compromise its effectiveness. If you must buy secondhand, ensure it comes from a trustworthy source and inspect it thoroughly for any signs of damage or wear.

Reselling your old helmet also poses risks. Once a helmet has degraded or been involved in an impact, it should be retired from use. Passing it on to someone else could potentially endanger their safety. Responsible disposal, like recycling programs offered by some manufacturers, is a better option.

Customization and Accessories

Many riders enjoy customizing their helmets with stickers, paint, or accessories. While personalization can add flair, be cautious. Certain paints or adhesives can degrade the helmet’s materials, compromising its protective qualities. Always use substances and accessories specifically designed for use with motorcycle helmets, avoiding any modifications that might weaken the structure or affect the certification standards.

Accessories like Bluetooth communicators or action camera mounts are popular additions. Ensure these are installed correctly, following the manufacturer’s guidelines. Improper installation can affect the helmet’s balance or its structural integrity, posing a risk in the event of an accident.

  motorcycle helmetEnvironmental Factors

Your riding environment can impact how long your motorcycle helmet remains effective. Those frequently riding in areas with high pollution, heavy rain, or extreme temperatures might find their helmets degrade faster. Pollutants can cause materials to break down, while constant exposure to rain and humidity can affect the inner lining and foam.

Being mindful of these factors and taking steps to mitigate their impact can prolong the life of your helmet. Using a helmet cover in harsh weather, regular cleanings, and careful storage all contribute to maintaining your helmet’s condition longer, ensuring it provides reliable protection each time you ride.

Impact of Usage Frequency

How often you ride also affects your helmet’s lifespan. Daily commuters might find their helmets wear out faster than those used only on weekends or occasional trips. Continual use exposes the helmet to more wear and tear, environmental elements, and potential impacts.

For frequent riders, it might be worth investing in multiple helmets and rotating their use. This can reduce wear on any single helmet and provide a backup if one needs replacing or servicing. Keeping an eye on the helmet’s condition and replacing it promptly when signs of wear appear ensures consistent protection.

Final Thoughts

Understanding how long a motorcycle helmet is good for involves considering various factors, including material degradation, impact history, and environmental exposure. Manufacturers’ guidelines provide a useful baseline, but personal experience and regular inspections play equally crucial roles. Helmets are a vital piece of safety equipment, and ensuring they’re in optimal condition protects your life on the road. By staying informed about advancements in helmet technology, following proper care and maintenance practices, and recognizing signs of wear and tear, you can make educated decisions about when to replace your helmet. Prioritizing your safety with a well-maintained and up-to-date helmet ensures that every ride is as safe as possible.

Posted in Motorcycle equipment, Motorcycles | Tagged , , | Leave a comment