
Motorcycle vests are more than just a piece of clothing; they’re a canvas for self-expression, a badge of honor, and a historical record of your riding experiences. Patch placement is a critical aspect that differentiates an ordinary vest from a truly personalized article. Each patch tells a story, represents affiliations, or symbolizes achievements. But how do you get it right? Understanding the nuances of motorcycle vest patch placement can bring coherence and style to your vest, enhancing both its aesthetic and its narrative value.
The Tradition of Motorcycle Patches
Historical Background
Motorcycle patches have their roots in military insignia and biker club culture. These patches served as a way to identify members and signify ranks and achievements. Over time, this tradition evolved into a form of personal expression, with riders using patches to showcase their journeys, alliances, and ideologies. This historical perspective provides context for why the placement and selection of patches are so important.
Symbolism and Meaning
Each patch carries its own meaning, from club affiliation to personal milestones. Back patches often represent the most significant aspects, such as club colors or large insignias. Smaller, front patches might display ranks, names, or specific accomplishments. Knowing the symbolism behind each patch can help in making informed choices regarding their placement on your vest.
Areas of the Vest for Patches
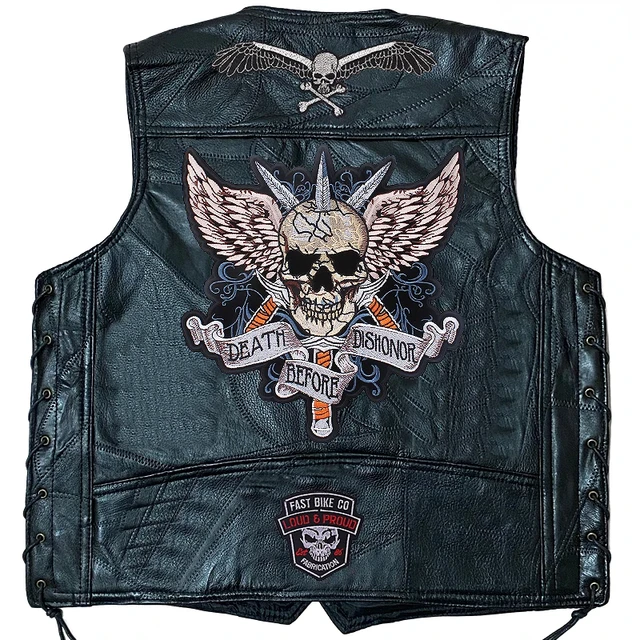
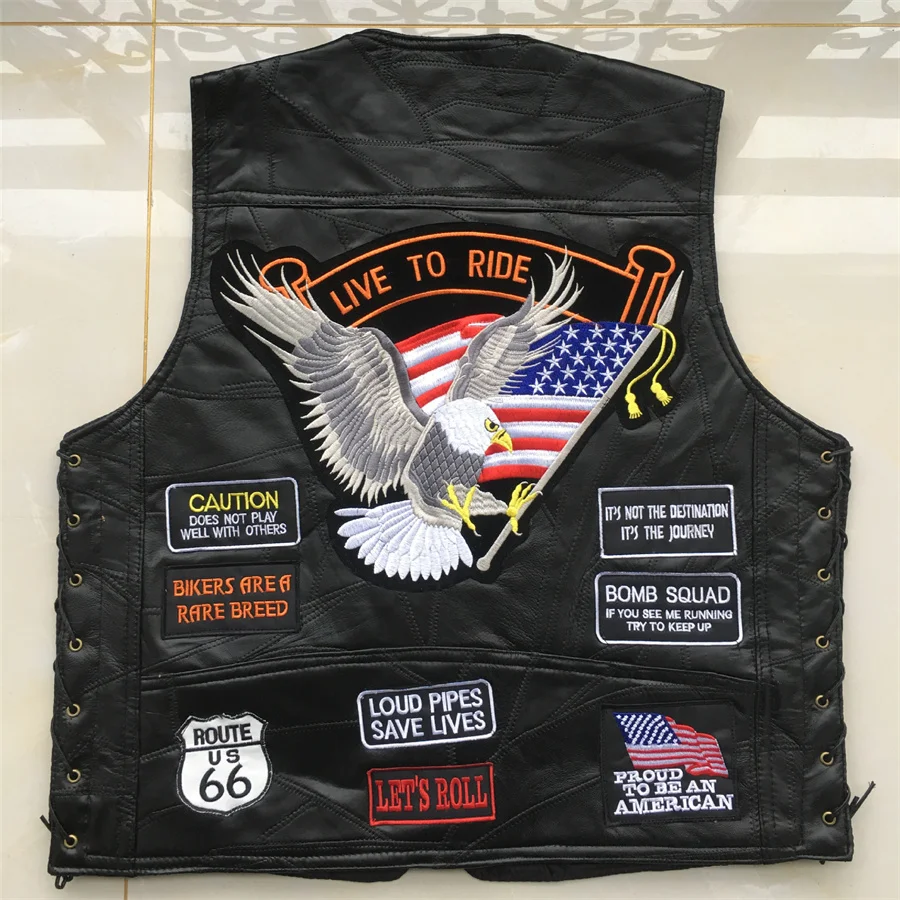
Back of the Vest
The back of the vest is typically reserved for the most prominent and meaningful patches. This includes large back patches that often denote club membership or major affiliations. Other significant patches, such as those commemorating major riding milestones, also find a place here. Proper planning ensures that the back of the vest remains uncluttered yet expressive.
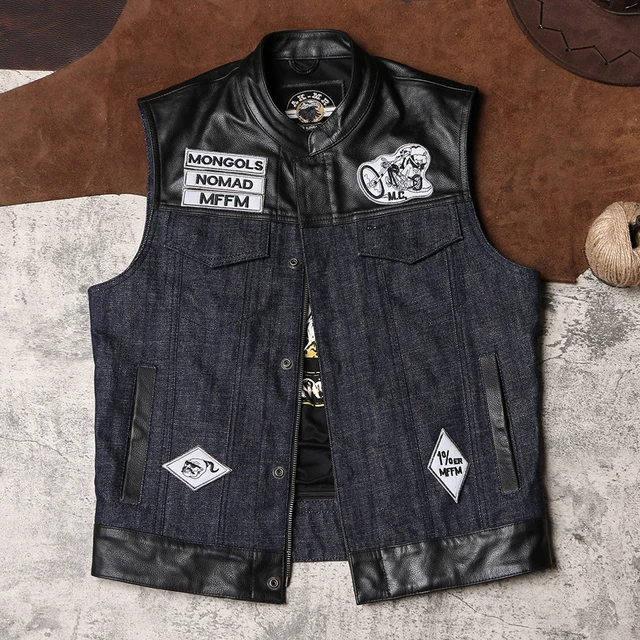
Front Chest Area
The front chest area is suitable for smaller, more personal patches. These may include name tags, rank insignias, or patches indicating smaller achievements. The chest area allows for easy access and visibility, making it ideal for patches that you want to be noticed quickly. Thoughtful arrangement of these patches can create a balanced and organized look.
Shoulders and Upper Arms
The shoulders and upper arms provide additional space for patches that are significant but perhaps not as central as those on the back. These areas can accommodate emblems, smaller insignias, or personal symbols. Utilizing this space effectively adds another layer of customization to your vest, enhancing its overall narrative.
Techniques for Attaching Patches
Sewing Patches
Sewing is the most durable method for attaching patches to your vest. It ensures that the patches stay in place even under rough conditions. Use a heavy-duty thread and needle suitable for the material of your vest. Double stitching the edges of the patch provides additional security and longevity.
Iron-On Patches
Iron-on patches offer a less permanent but straightforward method of attachment. These patches come with an adhesive backing that melts when heated, bonding the patch to the fabric. While convenient, iron-on patches may not hold up as well under frequent use or exposure to the elements, making them suitable for less critical patches.
Using Velcro
Velcro offers versatility, allowing you to change patches easily. This method involves sewing one side of the Velcro to the vest and the other side to the patch. It’s an ideal solution for patches that you might want to replace or reposition frequently. However, Velcro might not be as aesthetically pleasing as other methods, so consider blending it well with the patch design.
Design Considerations
Size and Proportion
The size of your patches should be proportionate to the area of the vest where they are placed. Large patches dominate the back, while smaller patches fit well on the front or shoulders. Keeping a sense of proportion ensures that the vest looks balanced and aesthetically pleasing, avoiding clutter or overcrowding.
Color Coordination
Color coordination plays a vital role in creating a harmonious look. The colors of your patches should complement each other and the vest. Consider the background material and the color palette of your patches to create a unified appearance. Thoughtful color coordination can enhance the visual appeal of your vest, making it look more cohesive and well-designed.
Theme Consistency
Maintaining a consistent theme across your patches tells a coherent story. Whether it’s a focus on club insignias, personal achievements, or travel experiences, sticking to a theme creates a cohesive narrative. Consistency in theme not only looks good but also helps in organizing your patches effectively, making your vest easier to read and understand.
Placement Etiquette and Rules
Club Rules
If you’re part of a motorcycle club, there may be specific rules regarding patch placement. Clubs often have strict guidelines about where and how patches should be placed to maintain uniformity and respect the club’s traditions. Familiarizing yourself with these rules ensures that your vest aligns with club standards and avoids any potential conflicts.
Respecting Traditions
Even if you’re not part of a club, understanding and respecting the traditions around patch placement can be beneficial. These traditions have developed over years and represent a shared culture among riders. Adhering to these unwritten rules shows respect for the community and adds authenticity to your vest.
Personal Preferences
While traditions and rules are important, personal preferences also play a significant role. Your vest is an extension of your personality, and the way you place your patches should reflect that. Striking a balance between tradition and personalization creates a unique yet respectful expression of your riding identity.
 Maintenance and Care
Regular Inspection
Regularly inspecting your patches ensures they remain in good condition. Check for any signs of wear, fraying, or detachment. Addressing these issues promptly can prevent further damage and extend the life of your patches and vest.
Cleaning Tips
Cleaning your vest without damaging the patches requires some care. Spot cleaning with a damp cloth is usually sufficient for minor stains. If a deeper clean is needed, hand washing in mild detergent is preferable. Avoid harsh chemicals and high heat, as these can damage both the patches and the vest material.
Patch Replacement
Over time, some patches may need to be replaced due to wear or changes in your affiliations. Carefully remove old patches to avoid damaging the vest and follow the same meticulous process for attaching new ones. Regular updates keep your vest current and reflective of your latest achievements and experiences.
Customization Ideas
Unique Patch Designs
Custom patches allow for a truly personalized vest. When designing patches, consider incorporating waterproof elements to ensure they withstand various weather conditions. Patches that represent your unique experiences, interests, or affiliations with waterproof elements add a layer of individuality and durability to your vest, making it a one-of-a-kind representation of your riding journey.
Adding Embellishments
In addition to patches, you can add other embellishments like pins, studs, or embroidery. These additions can enhance the aesthetic appeal of your vest and complement your patches. However, balance is key to avoid an overly cluttered look.
Seasonal Changes
Consider changing or adding patches to your jacket seasonally to reflect recent rides or achievements. This keeps your jacket dynamic and relevant to your current experiences. Seasonal updates provide a fresh look and a continuous narrative of your riding history.
Conclusion
Mastering motorcycle vest patch placement is an art that combines tradition, personalization, and practical considerations. Whether you are adhering to club rules or expressing individual style, understanding the nuances of patch placement can transform your vest into a meaningful and aesthetically pleasing storytelling canvas. With thoughtful design, proper attachment techniques, and regular maintenance, you can create a vest that not only looks impressive but also stands the test of time.