
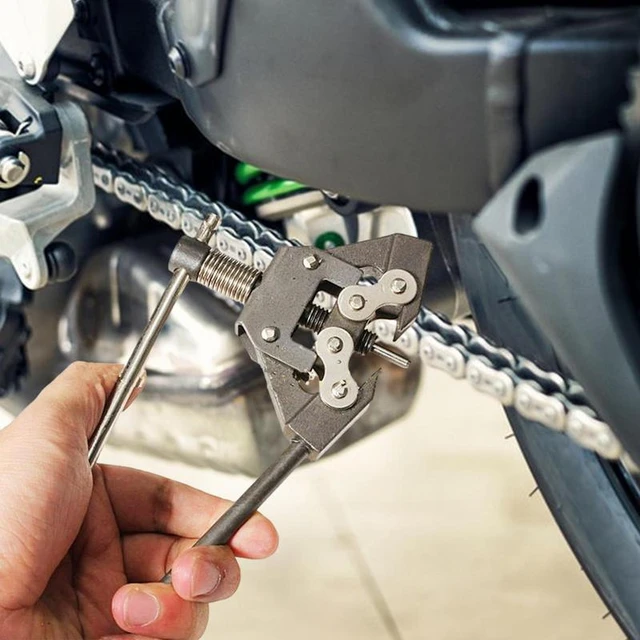
Preparing for Chain Adjustment
Before diving into how to tighten a motorcycle chain, it’s essential to prepare adequately and grasp the importance of correct chain tension. Inadequate preparation can lead to improper adjustment, potentially resulting in motorcycle damage or unsafe riding conditions.
Understanding the Importance of Chain Tension
Appropriate chain tension is vital for the smooth operation of your motorcycle. A tension that is too tight can put excessive stress on the engine’s driveshaft, sprockets, and the chain itself, leading to premature wear and potentially costly damage. Conversely, a chain that is too loose can lead to instability, an increased risk of the chain coming off the sprockets, and cause damage to the motorcycle’s swing arm. Correct chain tension ensures that power is efficiently transferred from the engine to the rear wheel, providing a smooth and safe riding experience.
Tools and Materials Needed for the Job
To properly adjust your motorcycle’s chain, you’re going to need a few tools and materials:
- A wrench set or socket set for loosening and tightening bolts
- A paddock stand or center stand to lift the rear wheel
- A tape measure for checking chain slack
- Lubricant for the chain if necessary
- A manual or guide with the specifications for your motorcycle’s chain slack
It’s best to have these items on hand before you start, as stopping halfway through to find a missing tool can throw off your progress and affect the precision of your adjustments.
Loosening the Axle and Adjuster Nuts
With the right tools ready, the first step in the adjustment process is to loosen the axle nut and adjuster nuts. Perform these actions while the motorcycle is on solid ground to maintain stability. Take care not to remove the nuts entirely, as they should remain attached to the motorcycle throughout the process. Use your wrench or socket set to loosen these components until they can be adjusted without resistance. This will allow the rear axle to move back and forth freely, which is essential in setting the correct chain tension.
Adjusting the Chain Tension
Now that we’ve discussed the necessary preparations, including the importance of chain tension and gathering the right tools, let’s move on to the actual chain tension adjustment process. Proper tensile adjustment is not just a matter of ride quality; it is also about the safety and longevity of your motorcycle’s components. Follow this step-by-step approach to ensure your bike’s performance remains optimal.
Lifting the Rear Tire
The first action in the actual adjustment phase is to lift the rear tire off the ground. This is imperative as it allows the rear wheel—and subsequently the chain—to move freely, which is necessary to accurately adjust the chain tension. Use a paddock stand or center stand if available. If your motorcycle isn’t equipped with these, a third-party lifting device can be used. Once the rear wheel is adequately lifted, ensuring it can rotate without touching the ground, you’re ready for the next step.
Adjusting and Measuring Chain Slack
The goal here is to find that sweet spot of chain slack – too tight and you risk damaging the chain and associated components, too loose and the chain might derail or slap against the swing arm. Begin by adjusting the chain by manipulating the rear axle. Moving the axle backwards will increase tension, while moving it forwards will decrease it. Use your wrench to make small adjustments to the chain via the swingarm adjusters, checking the chain slack as you do so.
Most motorcycles recommend a slack of 25 mm to 35 mm. Measure this using a tape measure on the section of the chain that hangs below the swingarm. Press up on the chain to check the distance from the resting position to the highest point of movement. Refer to your motorcycle’s manual to find the exact specifications for your model.
Ensuring Proper Wheel Alignment
Accurate alignment of the rear wheel is as crucial as the proper chain tension. Misalignment can lead to uneven tire wear, poor handling, and potentially hazardous riding conditions. As you adjust the chain slack, pay close attention to the alignment marks on the swingarm. It’s essential to adjust both sides equally to maintain wheel alignment. After the adjustments, doing a visual check and using alignment tools—if available—will ensure that your rear wheel remains straight in relation to the frame of the motorcycle.
Every step of this process not only contributes to a safer ride but also extends the life of the motorcycle chain and sprockets. In the next section, we’ll discuss the final steps to secure and recheck the adjustments you’ve made, and then how to perform a test ride to ensure everything is in perfect working order.
Finalizing the Adjustment
Once you have correctly adjusted the chain tension and ensured the rear wheel is properly aligned, it’s time to wrap up the adjustment process. This involves a series of tightening and rechecking steps to make sure everything is set correctly before taking the motorcycle back on the road.
Tightening the Adjusters and Axle Nut
Begin by lightly tightening the swingarm adjusters. You want them snug enough to hold the wheel in place but not so tight that you cannot perform any additional minor adjustments if needed. Then, move on to the axle nut. Use a torque wrench to tighten the axle nut to the manufacturer’s specified torque setting, which you can find in your motorcycle’s manual. Over-tightening can lead to excessive pressure on the bearings and other components, while under-tightening can result in the wheel coming loose during operation.
Once the axle nut is tightened to the correct specification, give the swingarm adjusters a final tighten. Ensure you use even pressure on both sides to maintain the rear wheel’s alignment. Lastly, secure the adjuster lock nuts to prevent them from loosening over time due to vibration or movement of the motorcycle.
Rechecking the Chain Tension and Alignment
After everything has been tightened, it’s crucial to recheck the chain tension and wheel alignment. Verify that the chain slack still falls within the specified range for your motorcycle model. In addition, ensure that the rear wheel remains properly aligned. If any adjustments are off, you may need to repeat the previous steps to correct them. Proper chain tension and wheel alignment are imperative for safe motorcycle operation.
Test Riding and Post-Adjustment Checks
With the chain adjusted and everything tightened up, it’s time for a test ride. Start with a controlled environment, such as an empty parking lot or a quiet street, to evaluate the motorcycle’s handling and performance. Pay attention to any unusual noises or vibrations that might suggest that further adjustment is necessary.
After the test ride, perform a final set of checks. Look over the chain and rear wheel assembly to confirm that all adjustments have held and that there’s no sign of loosening. Double-check the chain tension one more time as the test ride may cause it to settle into position somewhat differently. If all looks good, you can be confident that your motorcycle is road-ready with a properly adjusted chain. Regular maintenance, including chain adjustments, will enhance your motorcycle’s performance and extend the life of its components.
Checks and Maintenance Tips
Perform a few final checks and follow some maintenance tips to ensure your chain remains in good condition.
Double-checking Slack
After tightening the rear axle nut, double-check the chain slack to ensure it hasn’t changed during the process. Proper slack is crucial for smooth, safe riding.
Lubrication
Lubricating your chain after adjustment ensures smooth operation and prolongs its lifespan. Use a high-quality motorcycle chain lubricant and apply it evenly across the length of the chain. Wipe off any excess to prevent grime buildup.
Regular Inspection
Make it a habit to inspect your motorcycle chain regularly. Check the slack, alignment, and overall condition every few hundred miles or after long rides. Regular maintenance prevents unexpected issues and keeps your chain functioning optimally.
 Common Mistakes to Avoid
Being aware of common mistakes can help you maintain your chain correctly.
Over-tightening
Over-tightening the chain can cause severe damage to the sprockets, bearings, and the chain itself. Always follow the manufacturer’s recommended slack specifications.
Ignoring Wear and Tear
Ignoring signs of wear and tear can lead to chain failure and accidents. Regular inspection and timely replacement of worn-out components are crucial for your safety.
Neglecting Lubrication
Neglecting chain lubrication can cause excessive friction, leading to premature wear and potential chain failure. Maintain a regular lubrication schedule for optimal performance.
Conclusion: How to tighten motorcycle chain
Learning how to tighten motorcycle chain might seem daunting at first, but with the right knowledge and tools, it becomes a manageable task. Proper maintenance of your motorcycle chain leads to improved performance, enhanced safety, and a smoother riding experience. By understanding the importance of chain tension, following the outlined steps, and avoiding common mistakes, you can master how to tighten a motorcycle chain effectively.
Remember, understanding how to tighten a motorcycle chain is crucial, as it is a critical component requiring regular attention. Incorporate chain inspection and adjustment into your routine maintenance schedule, and always refer to your owner’s manual for specific guidelines. Keep your chain in optimal condition, and you’ll enjoy many miles of safe, exhilarating rides. Happy riding!